Official development blog
[ Latest Cogmind Release Notes: Feb 2026, "Unchained More" ]

ASCII Wallpapers

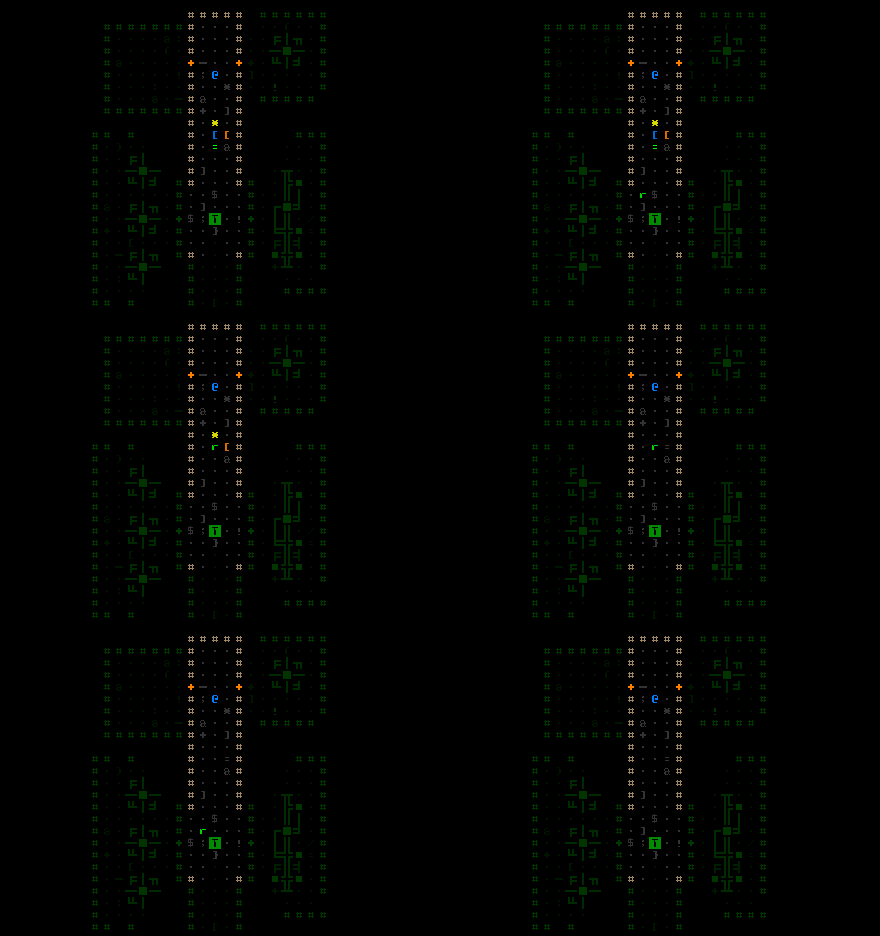
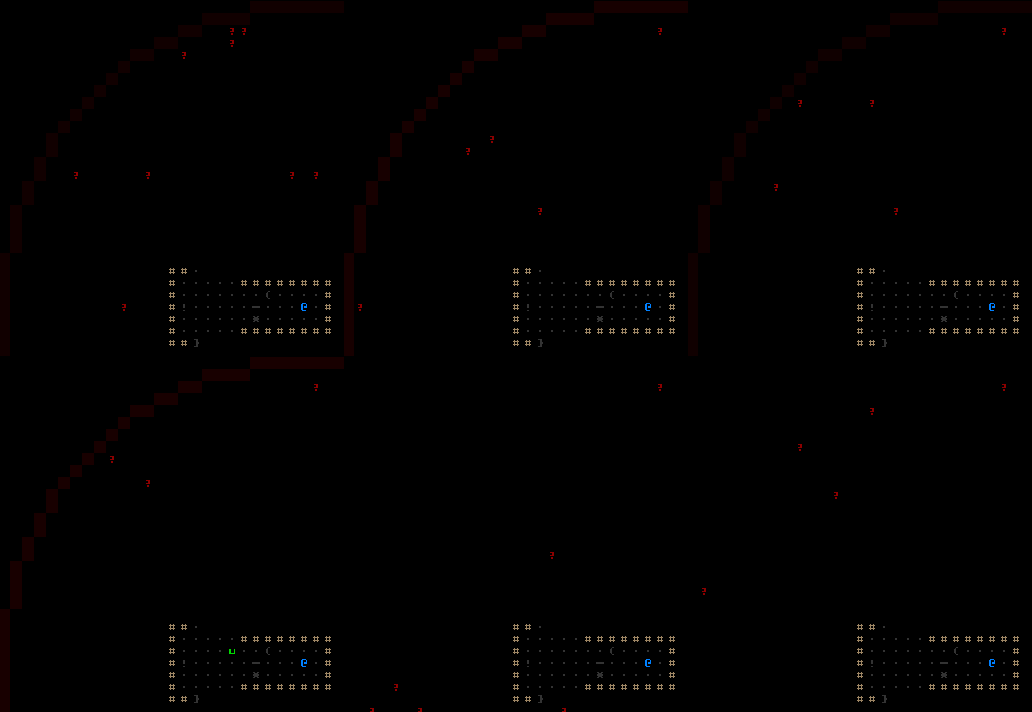
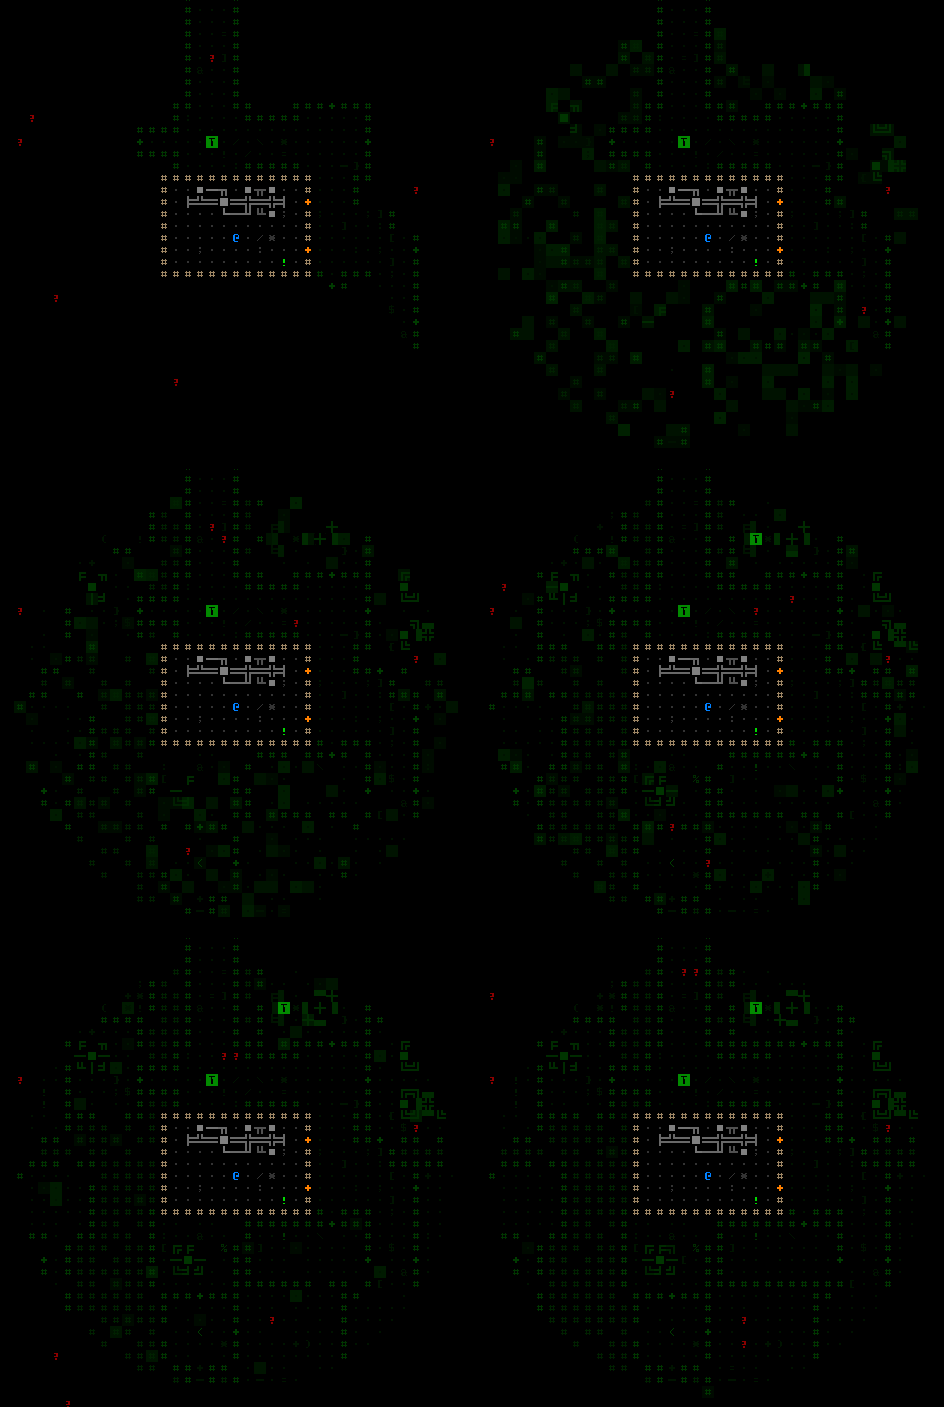
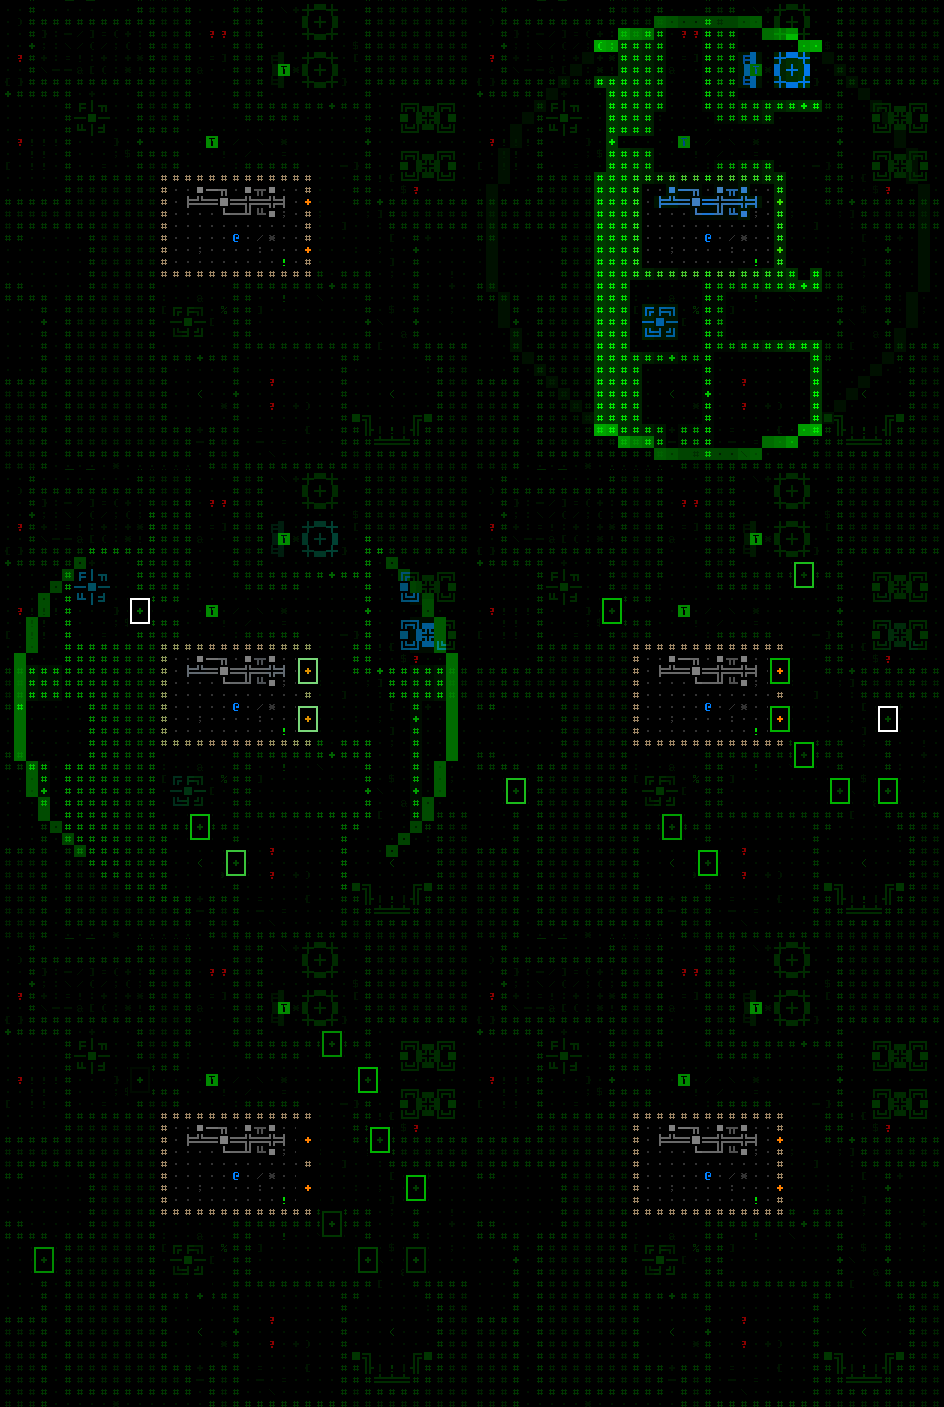
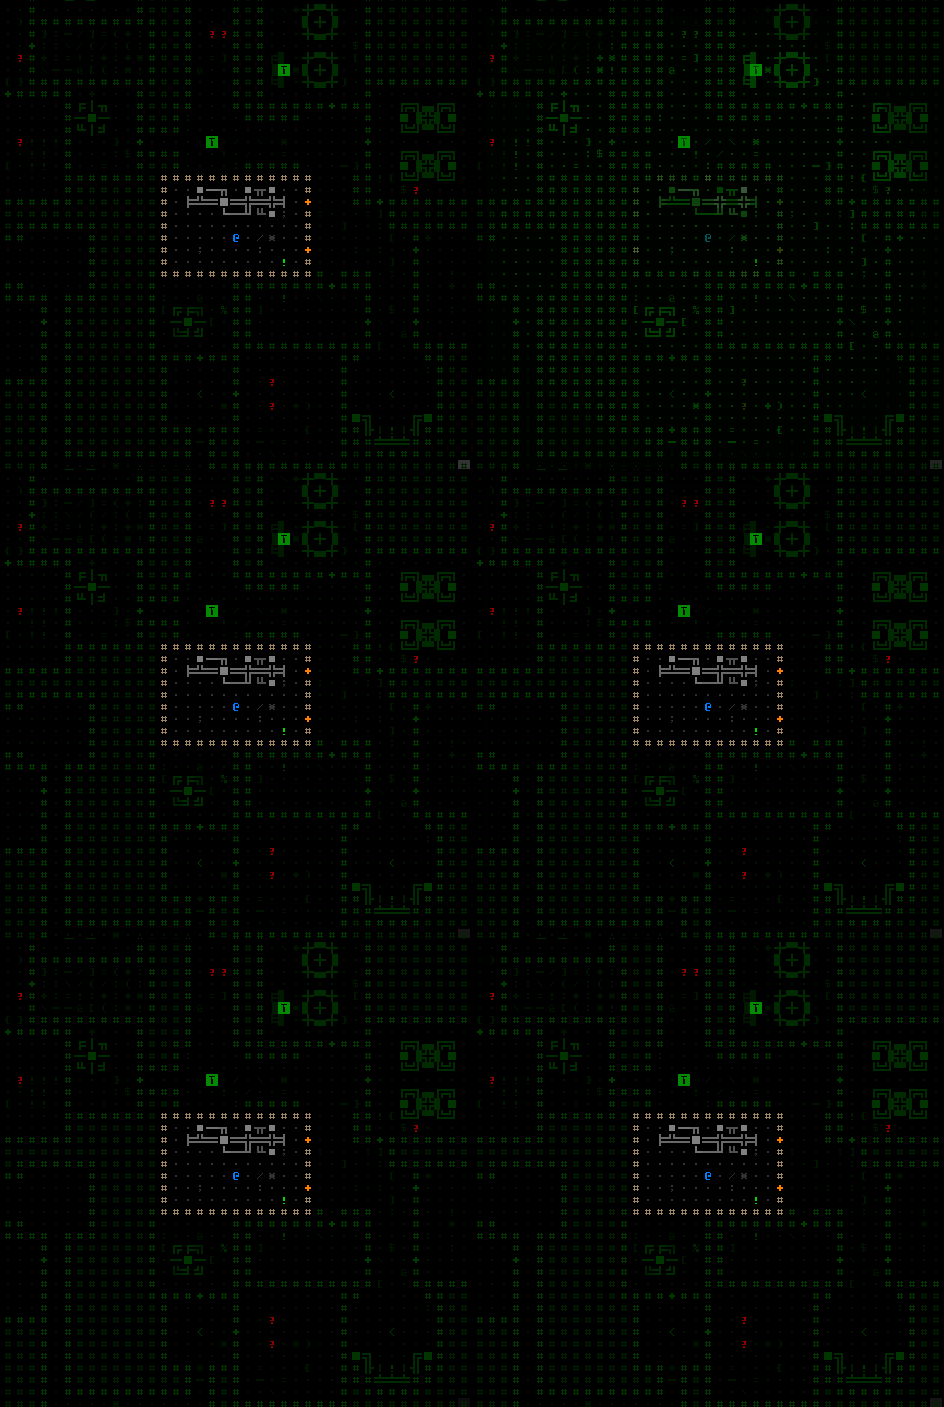
Shortly after designing and implementing the animated ASCII title screen, I figured we finally have enough material to put together a few Cogmind wallpapers. These are now available for many common resolutions over on the Cogmind website’s media page.

Here’s a test of the first one while on a recent workcation in Japan.

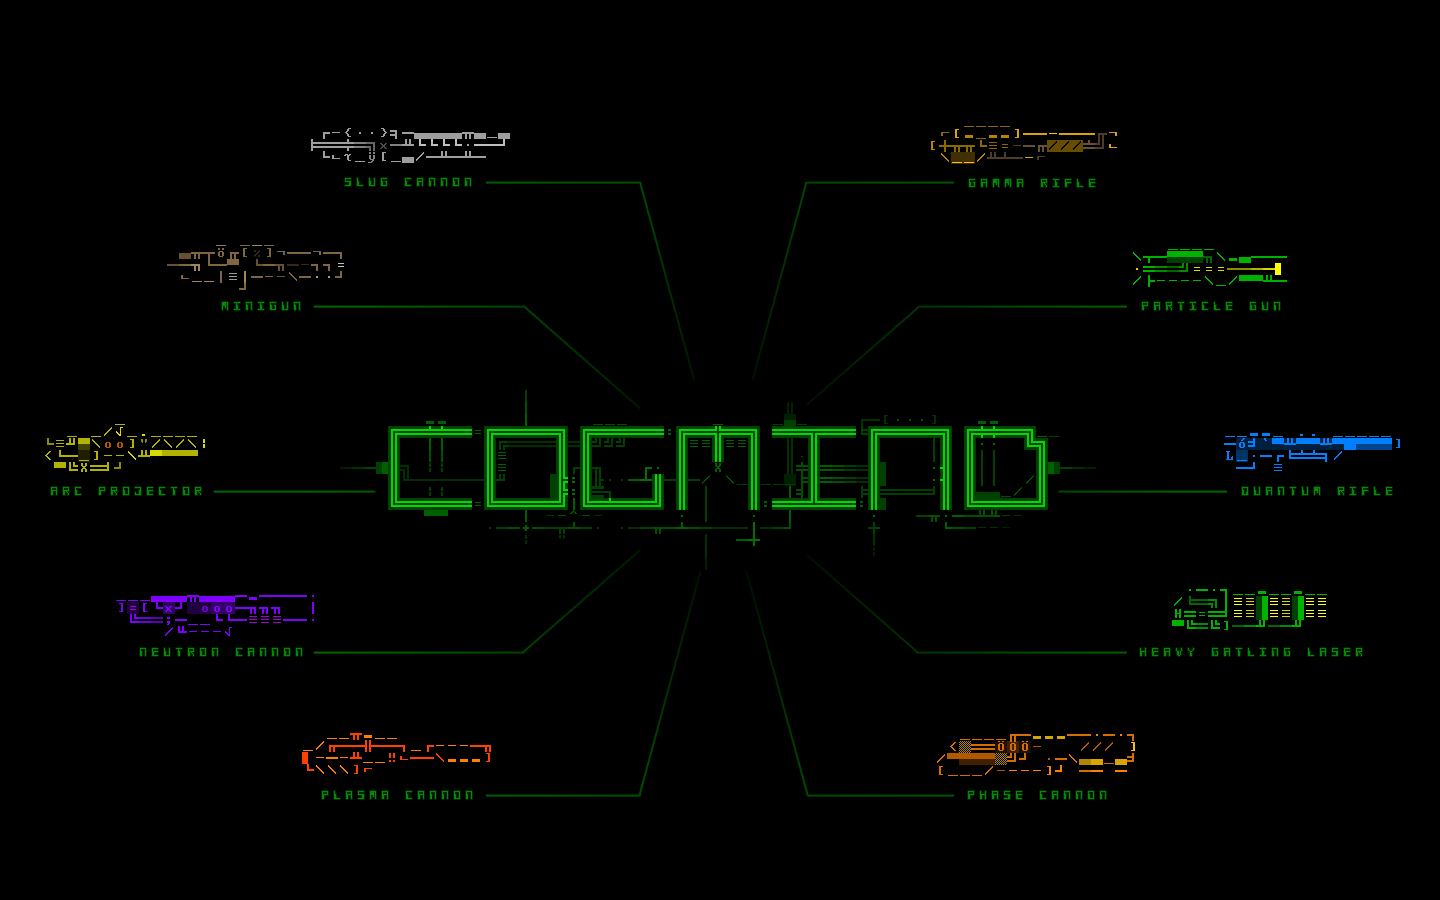
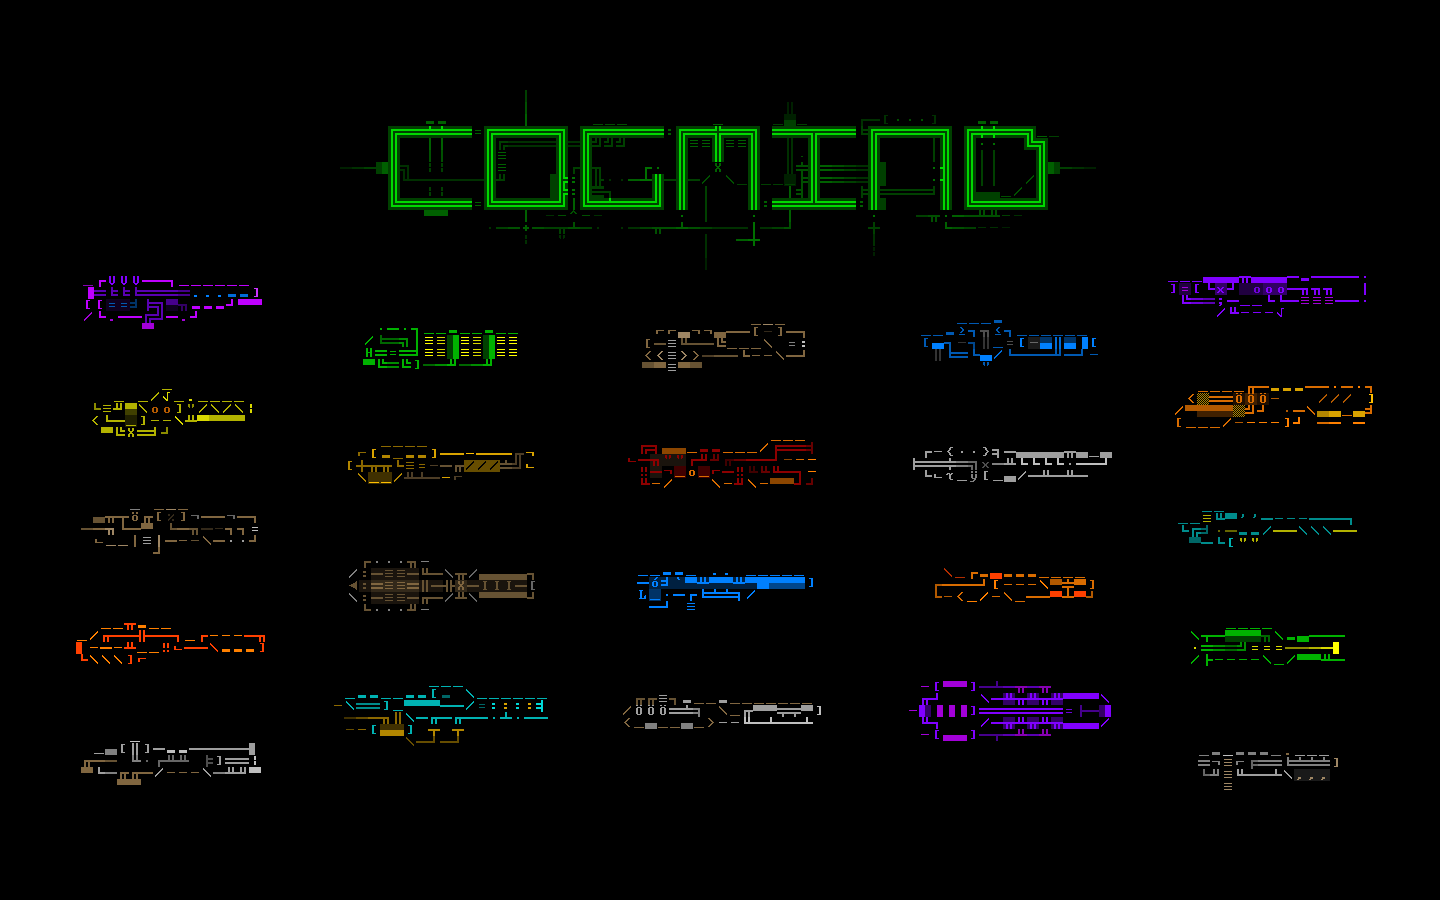
So far we have five different designs, the simplest being nothing more than the ASCII title logo itself. Probably the most interesting are those that combine the title with a set of ASCII weapon art. The weapons were chosen from among those I’ve been showing intermittently over the past six months (though I still haven’t gotten around to doing any art showcases here on the blog--so many other things to write about…).

columns_1440x900

A variety of ASCII guns and cannons. Get the size you need from the media page.

The weapons shown here are only a small portion of those you’ll find throughout the game.

radial_1440x900

Another version of ASCII weapon wallpaper. Get the size you need from the media page.

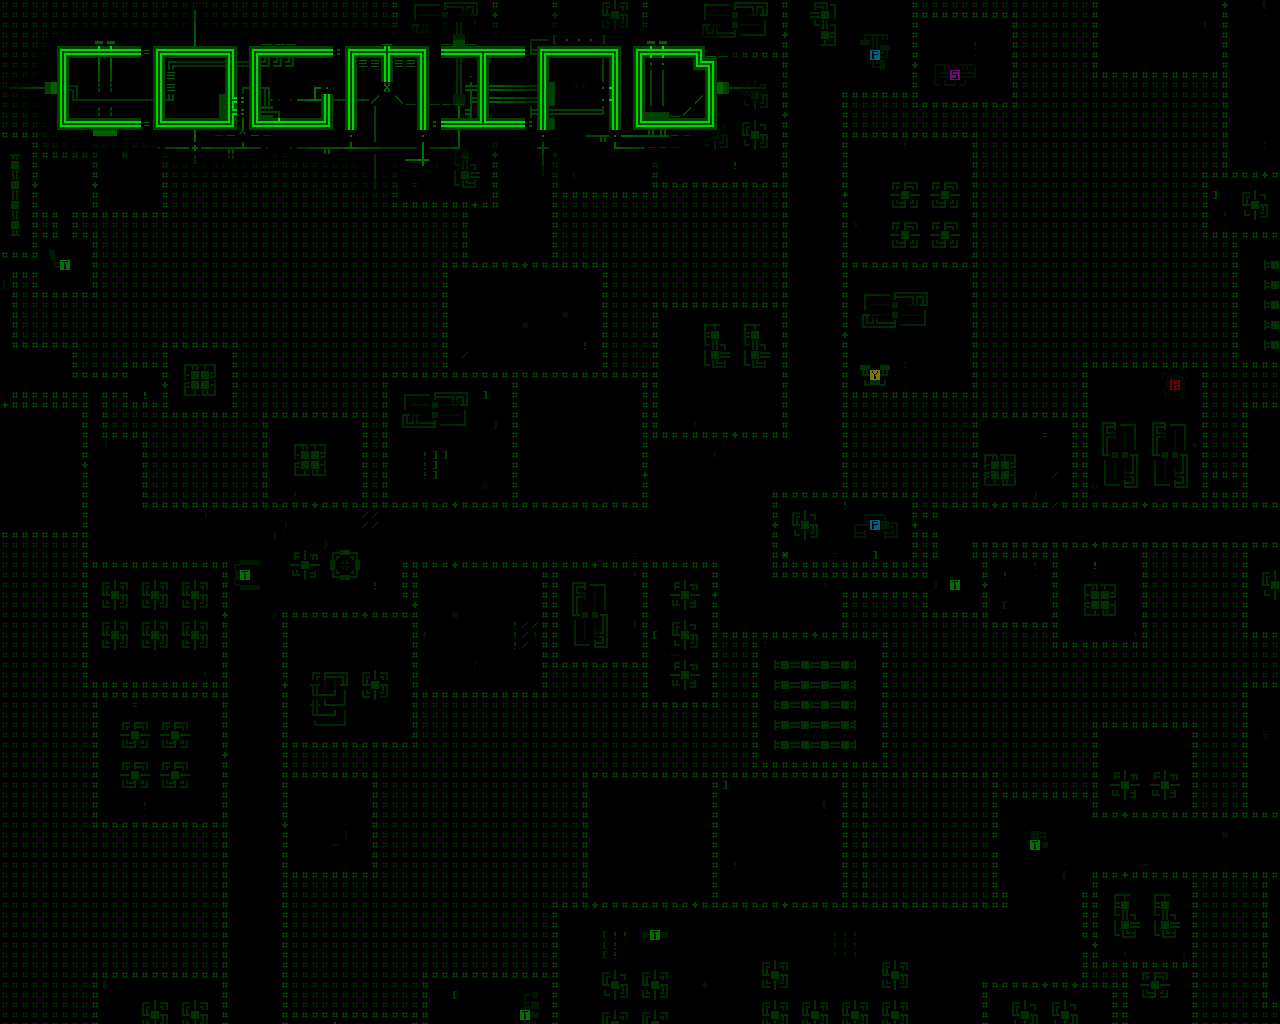
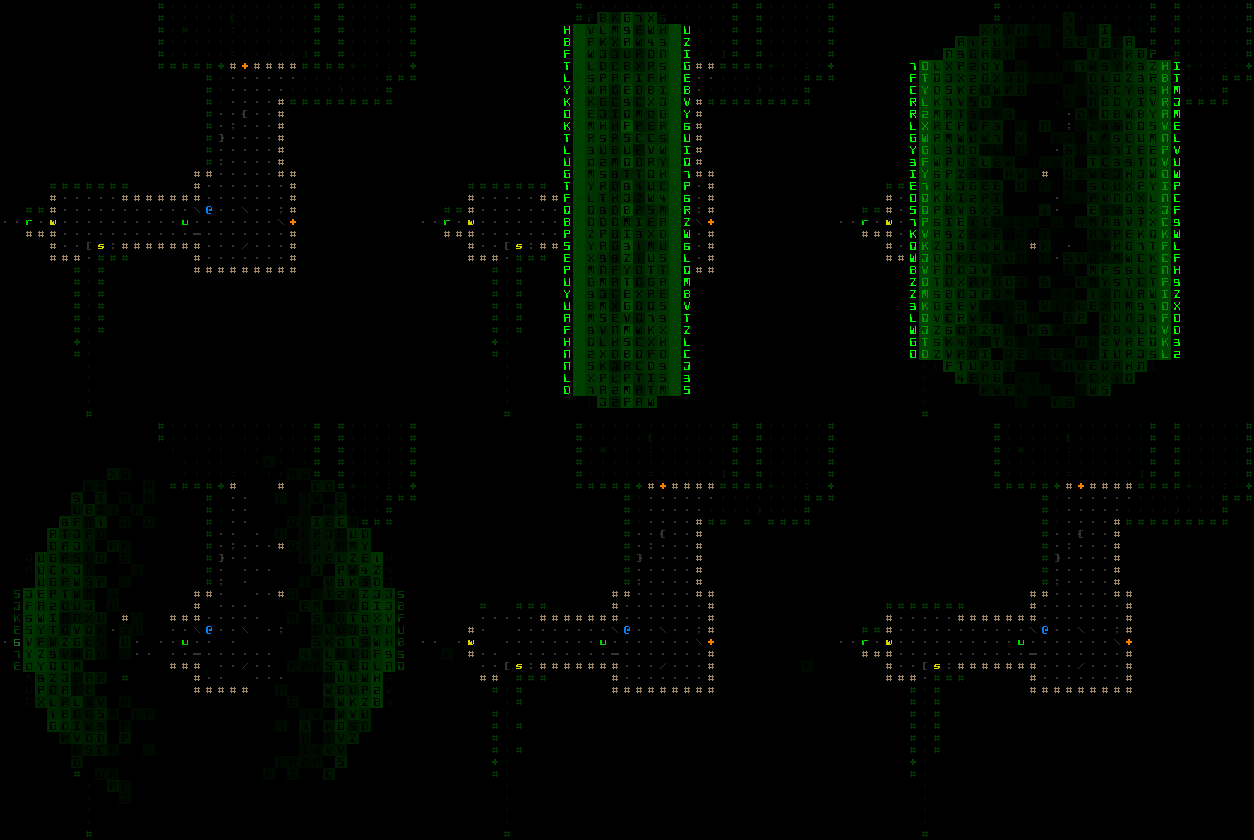
I should eventually add a few that show more in-game content, but good ones would require a lot more work, and not enough of said content exists yet. For now there are two partially-implemented factory maps for those who desire a full screen of sci-fi green ASCII.

factory10_1280x1024

One of the factory wallpapers featuring a section of procedurally generated factory. Get the size you need from the media page.

Feel free to drop any ideas for other wallpaper designs followers may be interested in.

In other news, Cogmind was just honored with a spot among Rock, Paper, Shotgun’s Best PC Games of 2015 (roguelikes category). Unexpected at this stage, but very welcome!

Posted in Art | Tagged , , | 2 Responses

The Importance of Roguelike Food Clocks

Traditionally a majority of roguelikes include some sort of food system. Hunger management does seem like a natural part of role-play adventuring, but it also serves a much more important function: Pushing the player along is an integral part of [most] good roguelike design.

All but sandbox games present the player with a specific goal to aim for, though achieving that goal should be about more than a brute force grind to become unstoppable. Of course we could simply use various means to directly cap player power, like stat ceilings or limiting the amount of items available, though I’d argue against these methods because they essentially take options away from the player. From a player’s point of view, the constraint which affords the most flexibility is how much time they have to achieve the goal--within this constraint the player can do whatever they want.

Types of Food Clock

Using an arbitrary turn count (the roguelike equivalent of a real-time timer) is one option, though a rarely used one. Why not give the player some amount of control over the mechanic?

The most common food clock is, unsurprisingly, actual food and hunger. It’s easily understood, and the timer becomes closely integrated with elements of the game mechanics themselves (searching, combat, looting, identification), making it feel more natural.

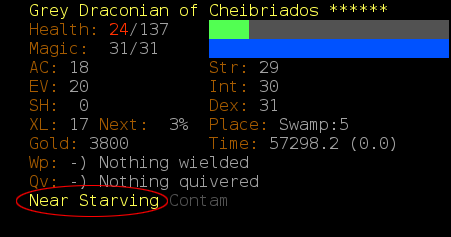
DCSS_starving

You won’t see this in Cogmind.

But food doesn’t work for all games. Some take place in an incompatible setting, or prefer to avoid the burden (on either designer or player) of integrating it with the game’s other mechanics.

One common alternative is to have some dire threat chasing you. This is more literally something behind the player “pushing” them to advance. FTL uses this mechanic.

Any food clock puts a (sometimes soft) time limit on the player’s game and therefore limits what the player is capable of. The endlessly leveling mummy trick (mummies don’t need to eat) in old versions of DCSS is one example of what happens when a food clock mechanic breaks down in a generic roguelike--the developers had to introduce a new spawning timer mechanic to deal with that and similar scumming behavior.

Regardless of the method used, they all benefit the experience by pushing the player forward. In a broader sense, being pushed along forces decisions, counteracting the player tendency to postpone decisions as long as possible, or at least until sufficient knowledge or ability is obtained to ensure a certain outcome. This tendency is at odds with the core roguelike experience--solving randomized problems. It’s an inherently less interesting way to play a game since it removes most of the challenge. (One exception would be those players who are “just along for the ride” when they play a game; definitely a minority of roguelike players, though perhaps more common with AAA games that focus on style rather than substance.)

More specifically, food clocks cut down on grinding, which is good design. (Unless you’re trying to make an addictive MMORPG or similar that milks poor gamers for their money/time.) Those who grind will likely have less fun in the process, and anyone who doesn’t grind will consider the game poorly balanced or outright unfair. In other words, a food clock is saving players from themselves. Herein lies a golden rule of game design: If the optimal way to play a game is to do something boring, players will still do it even if it makes their experience less enjoyable. Thus a well-designed game should strive to avoid rewarding this kind of behavior.

Cogmind’s goal to provide a grind-free experience goes hand in hand with pushing the player along. A food clock is essential here.

Cogmind’s Food Clock

So what about food for robots? Well, we could artificially require some resource as a substitute, but I’d rather not go that route. I don’t particularly want another resource management sub-game that ties into everything else, nor is there a need for one.

Cogmind instead wraps the food clock more directly into the existing game mechanics, specifically stealth and combat (and by extension play style).

The more you affect the environment, the greater the enemy response to your presence. Remaining stealthy is one way to postpone a stronger response, and I believe that as a more difficult challenge, successful use of stealth is a very valid way to operate outside the normal food clock. But once you mess up and the fighting begins, the cumulative effect of your presence can eventually snowball into a big mess. This increases the pressure to leave the area. Theoretically you could continue to fight, but against an unlimited army you can only lose to attrition. Did I mention you can’t repair your core? (Note: The “presence” effect is less pronounced through the first few depths to make them a little easier; in the 7DRL the first three Materials floors didn’t have any pressure to move on at all.) As Cogmind grows more powerful, though, you evolve to cover your core with more parts and attrition via integrity damage becomes less of a threat. It’s at this point in the game, about one-third through, that electromagnetic damage appears. EM damage is the game’s original (and most convincing) food clock mechanic.

Regardless of where they impact, hits taken from EM attacks can result in system corruption, which in turn causes all sorts of nasty things to happen. Current list of random effects due to system corruption:

  • Random log messages (harmless, just annoying)
  • Data loss: Forget the layout of one or more previously explored areas of the map
  • Data loss: Forget what certain parts do--they become unidentified
  • Misinterpreted scan data: Low/medium-level robot sensors display incorrect information
  • Misdirections: Unintentionally move in the wrong direction
  • (more to come)

As system corruption accumulates from subsequent attacks, the random effects progressively worsen and grow more frequent. Corruption can even kill Cogmind if it reaches 100%, though the side effects are likely to be deadly long before then.

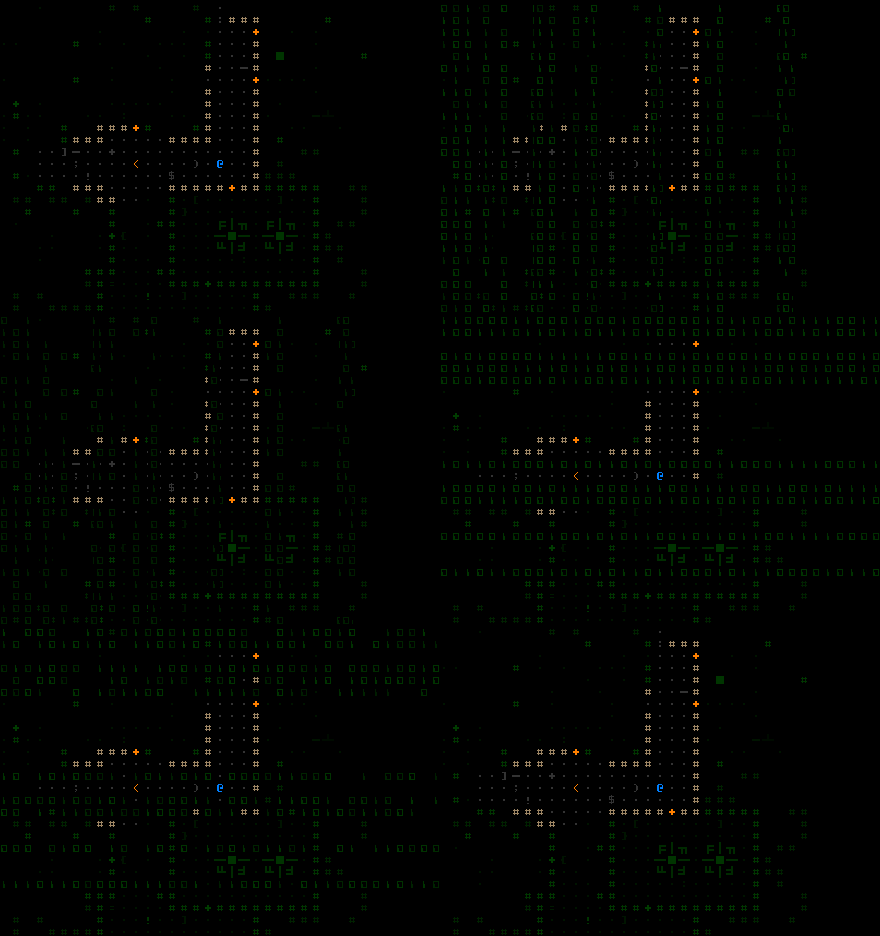
cogmind_corruption_feedback

In case you haven’t yet noticed the side effects, while corrupted your map will also occasionally glitch as a reminder.

Corruption resets to zero on reaching each new depth (because that’s when you evolve), so suffering the effects of corruption can be a very powerful motivator to forge ahead. Cleaning system corruption any other way is not easy.

Aside from corruption, in the mid- to late-game main maps (as opposed to side-routes) your location will occasionally be pinpointed and a strike team sent to deal with you. While Cogmind is more than capable of dealing with one of these teams, engaging them is tempting you to begin the whole snowball process of you interacting with more and more of the map’s inhabitants, attracting attention and increasing your “presence.” There are other strategies for handling these teams, but those are for you to discover ;)

Reinforcing this whole food clock system is the fact that you can only move forward in the world--there is no way to revisit previously explored levels. But that’s a topic for another post.

Posted in Design | Tagged , , | 6 Responses

Cogmind ASCII Art Gallery

Cogmind’s ASCII art has drawn a lot of attention where it’s been shown on Reddit and Twitter, but I haven’t  been showing much of it here on the blog. I suppose it makes sense to accumulate enough of it for a grand one-place-to-go-to-see-Cogmind-ASCII-art type post.

This is that post ;)

ASCII art style is traditionally divided into only a handful of categories: shaded art that uses groups of characters based on their pixel density, block art (similar to pixel art, but with really big pixels), and line art. Cogmind falls into the last category, relying mostly on line segments and the occasional block or other glyph to form a semi-abstract outline of an object and its details.

In terms of game objects, Cogmind contains art for both items and machines. You won’t see robot art--their appearance is left entirely to the imagination (except in tiles mode, of course).

For more general reading on the background of ASCII art in roguelikes and Cogmind, see this earlier post.

Items

The majority of the art belongs to items, of which there are currently 638. It took about two weeks (103 hours to be precise) to draw and paint each individual item, including the time spent working on concept sketches and color schemes.

Keep in mind that in choosing the following art, to avoid spoilers (and giving away all the best stuff) almost no high-end parts are shown. Many of those you’ll find in the game look cooler than what you see here.

Weapons

Weapons make up a third of the items, and therefore about a third of the art. They’re the only category that makes heavy use of color themes for easier recognition. Among them you’ll notice green, yellow, or blue for energy weapons, changing to orange, red, or purple for many of the more powerful ones. Most ballistic weapons use a brown/white scheme, though they break that mold at higher ratings.

Guns, Ballistic (Kinetic): Cause variable damage, have high recoil, and are effective at very long range. Also more likely to inflict critical damage, instantly destroying the target component.
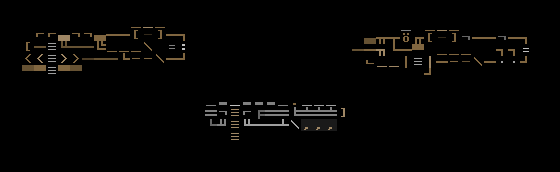
cogmind_art_gun_ki

Minigun, High-powered Shotgun, Heavy Machine Gun

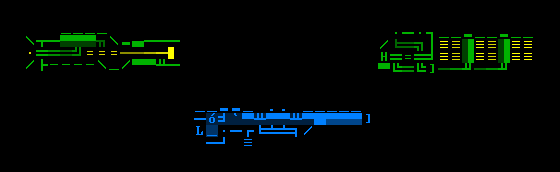
Guns, Thermal: Damage has low variability, and firing causes no recoil but is usually only effective from short to medium range. Also increase target heat on successful impact.
cogmind_art_gun_th

Particle Gun, Quantum Rifle, Heavy Gatling Gun

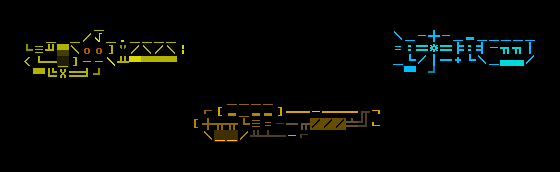
Guns, Electromagnetic: Cause less physical damage in exchange for the ability to corrupt the target’s systems, an alternative way to destroy a robot. Some EM weapons are also capable of temporarily disabling individual components or an entire robot.
cogmind_art_gun_em

Arc Projector, Gamma Rifle, EM Shotgun

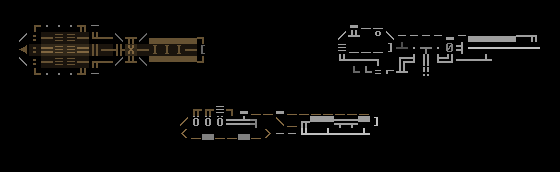
Cannons, Ballistic (Kinetic): More powerful version of ballistic guns--heavier, and drain more resources.
cogmind_art_cannon_ki

Mass Driver, Assault Cannon, Gauss Cannon

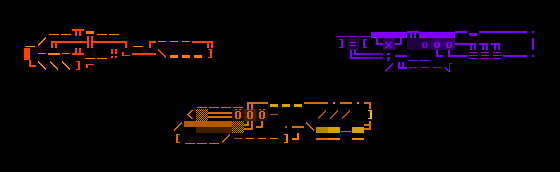
Cannons, Thermal: More powerful version of thermal guns--heavier, and drain more resources.
cogmind_art_cannon_th

Plasma Cannon, Phase Cannon, Neutron Cannon

Cannons, Electromagnetic: More powerful version of EM guns--heavier, and drain more resources.

cogmind_art_cannon_em

EM Pulse Cannon (there are few EM cannons--don’t want to reveal them all here)

Launchers, Explosive: Affect all targets in the area of effect, dividing damage into chunks that are applied randomly across each target. Targets further from ground zero usually take less damage, and there’s rarely useful salvage remaining from targets hit by explosives.
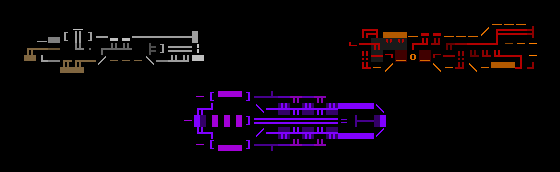
cogmind_art_launcher_ex

Heavy Rocket Launcher, Neutron Missile Launcher, Hellfire Missile Launcher

Launchers, Electromagnetic: EM weapons that affect all targets in the area of effect. Collateral damage is low, though these are the most effective way to bring down multiple armored targets at once.

cogmind_art_launcher_em

Advanced EMP Blaster (there are few EM launchers--don’t want to reveal them all here)

Special: Unique weapons that don’t fall into any other category, either tools or those with special effects.
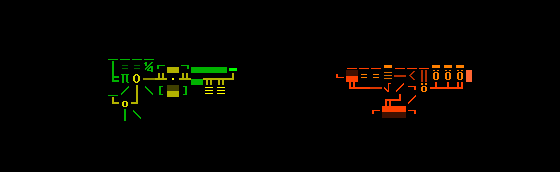
cogmind_art_swep

Mining Laser, Plasma Cutter

Melee, Impact: Cause knockback, and the impact is much more likely to damage fragile internal systems.
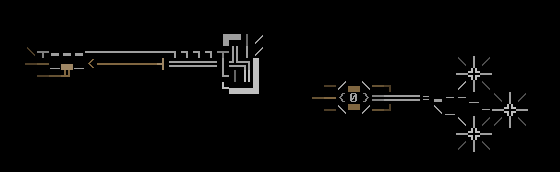
cogmind_art_melee_i

Great Maul, Heavy Flail

Melee, Slashing: High damage, and capable of severing parts clean off the target.
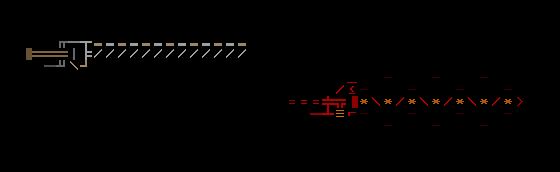
cogmind_art_melee_s

Chainsword, Plasma Sword

Melee, Piercing: Critical strikes are more likely, in addition to a bonus to directly damage a target’s core.
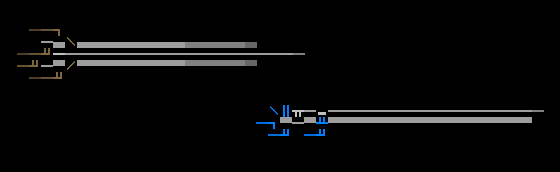
cogmind_art_melee_p

Lance, Kinetic Spear

Utilities

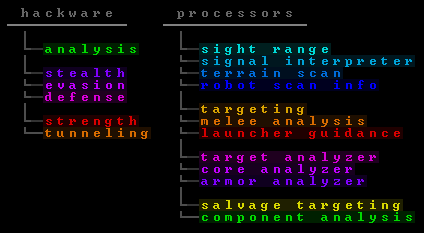
Another huge and varied category. However, colors for non-weapon item types generally don’t follow any particular scheme, instead using whatever looks good for that particular design or makes the most sense conceptually. The primary exceptions: matter-related parts are usually purple, and processors/hackware are colored based on the stat they augment:
cogmind_processor_color_schemes

Processor/hackware color schemes.

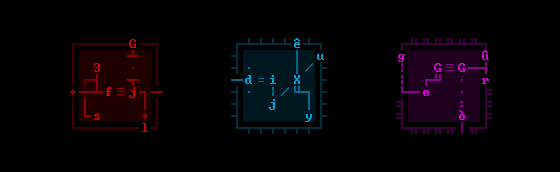
Processors: Lightweight components that benefit a single stat or ability. For these I went with a microchip-style appearance (border style indicates the relative effectiveness of each part).
cogmind_art_process

Launcher Guidance Computer, Improved Signal Interpreter, Advanced Target Analyzer

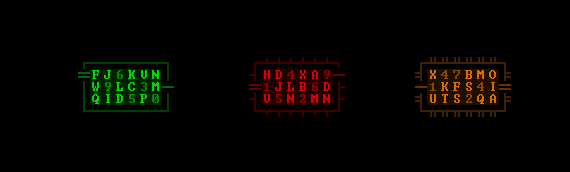
Hackware: Like processors, except their benefits apply specifically to hacking.
cogmind_art_hware

Footprint Analyzer, Improved Hacking Suite, Advanced Deep Network Scanner

Armor: Physical protection, often with special properties like defense against certain damage types or focusing coverage on certain areas.
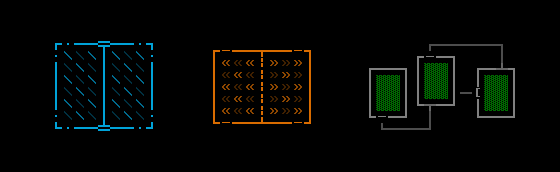
cogmind_art_armor

Reflective Medium Armor, Insulated Light Armor, Core Shielding

Cooling: Devices that dissipate heat, for those loadouts which produce excessive amounts of heat under certain conditions.

cogmind_art_cooling

Heat Sink, Cooling System

Defense: Large subcategory of shields, fields, and subsystems that block or absorb potential damage or negative effects.
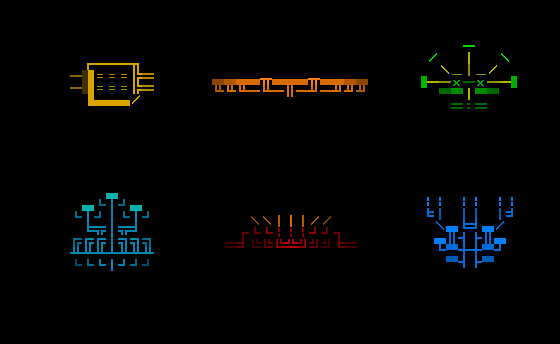
cogmind_art_defense

Heat Shielding, Advanced Thermal Shield, Force Field (top row); Improved Remote Shield Generator, Anti-missile System, Improved Energy Mantle (bottom row)

Offense: Enhance offensive capabilities of some weapons, or mitigate negative side-effects of their use.
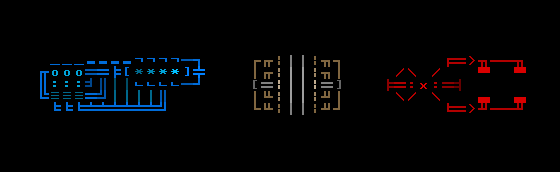
cogmind_art_offense

Improved Particle Charger, Recoil Stabilizer, Overload Amplifier

Resource: Enable Cogmind to manipulate or alter the behavior of mass, matter, energy, heat, salvage etc.
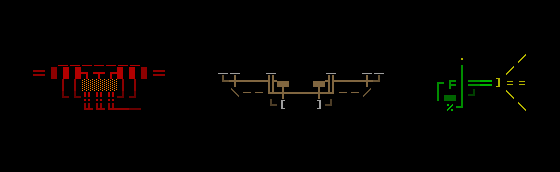
cogmind_art_resource

Advanced Power Amplifier, Weight Redistribution System, High-powered Tractor Beam

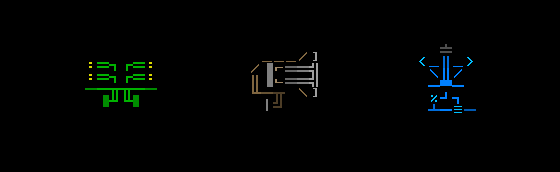
Sensors: Devices for detection and analysis of the surrounding environment.
cogmind_art_sensors

Improved Sensor Array, Long-range Terrain Scanner, Structural Scanner

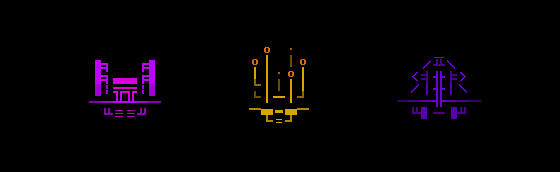
Stealth: Prevent enemies from tracking and swarming Cogmind, or evade attack more easily.
cogmind_art_stealth

Advanced ECM Suite, Improved Transmission Jammer, Cloaking Device

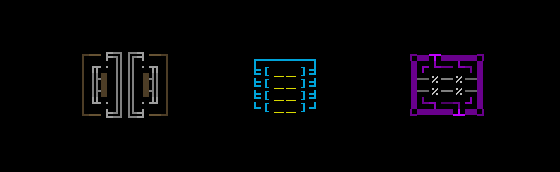
Storage: Hold parts and resources.
cogmind_art_storage

Small Storage Unit, Energy Well, Improved Matter Compressor

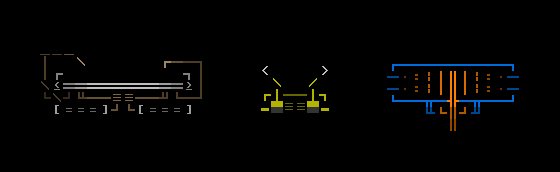
System: Help deal with system corruption, memory issues, and a range of malfunctions.
cogmind_art_system

Error Protection Suite, Recalibrator, System Purifier

(The above groups were subdivided for art categorization purpose--as classified in game utilities fall under only six designations: Devices, Storage, Processors, Hackware, Armor, and [REDACTED]. The last category you can discover later in the game.)

Propulsion

Flight: Don’t support much weight, but definitely the quickest way to get around, and even fly over enemies.
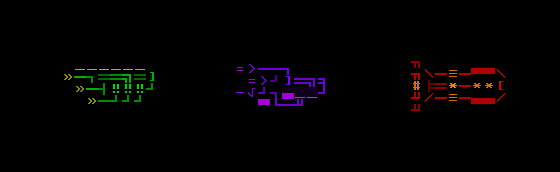
cogmind_art_flight

Electron Diverter, Diametric Drive, Nuclear Pulse Thruster

Hover: A fairly fast form of movement that can still support a good amount of weight (the viability of both hover and flight have been improved significantly over the 7DRL version).
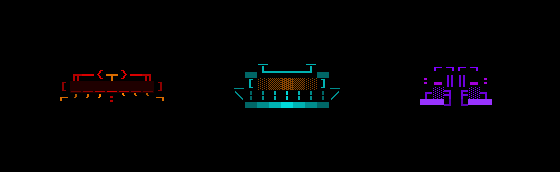
cogmind_art_hover

Aerolev Unit, Gravmag System, Anti-grav System

Wheels: Easy to find, but hard to keep--most wheels are not made for combat.

cogmind_art_wheels

Compact Wheel, Wheel, Armored Wheel

Legs: A good mix of weight support and speed. And yes, you can hop on one leg ;)
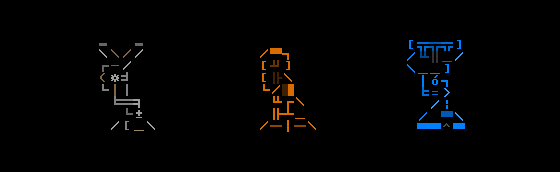
cogmind_art_legs

Flexi-carbon Leg, Myomer Leg, Centrium Leg

Treads: Slow and heavy duty, for the tank that needs to carry everything and the sun. (No really, you can carry a miniature sun if you need the power.)
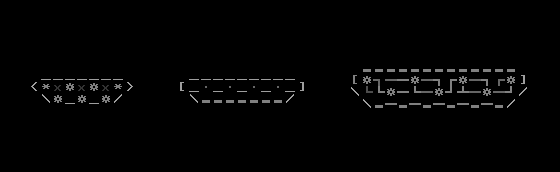
cogmind_art_treads

Light Treads, Medium Treads, Heavy Treads

Power

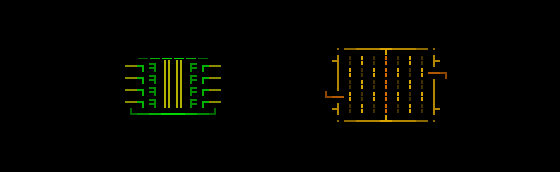
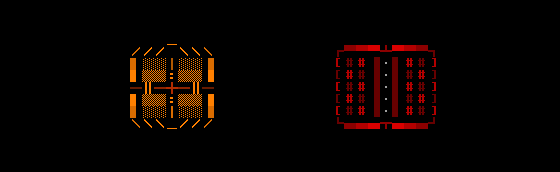
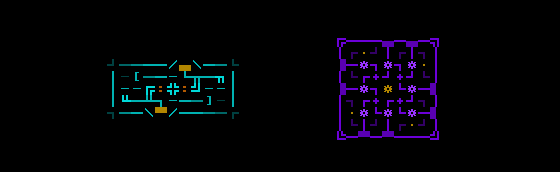
An essential but not so varied category in terms of game mechanics. By functionality, the main subdivision for power sources would be “standard” vs “light/micro” versions, where the latter weigh less but in turn come with little capacity for energy storage. But this division is not reflected in the classification system, which is instead based on power level:

Engines (1-3)
cogmind_art_power_engine

Ion Engine, Deuterium Engine

Cores (4-6)
cogmind_art_power_core

Nuclear Core, Fission Core

Reactors (7-9)
cogmind_art_power_reactor

Graviton Reactor, Vortex Chain Reactor

Machines

In this case the art is the on-map image itself, made possible because machines are multi-space props, something you don’t see too often in ASCII roguelikes.

Interactive Machines

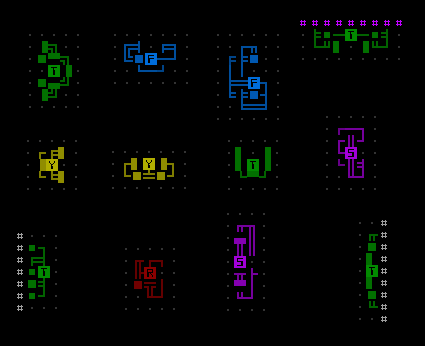
The five types of interactive machines have each been covered before--this post contains links to pages describing their functions (along with art, though some has changed since then). Below you can see some variations of Terminals (T), Fabricators (F), Scanalyzers (S), Repair Stations (R), and Recycling Units (Y).
cogmind_machines_interactive_composite

A selection of interactive machines (map excerpts).

Non-Interactive Machines

This category of machines is mostly for atmosphere, though some may explode if not treated nicely. There are over 100 non-interactive machines which appear in areas that make sense for their intended function.
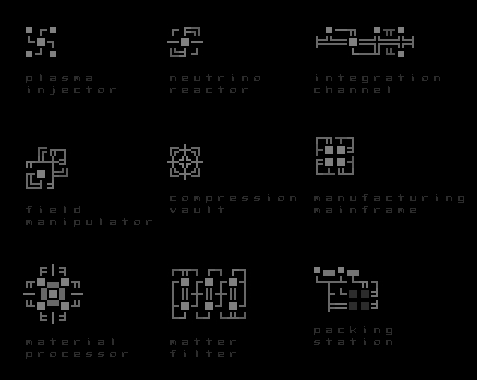
cogmind_machines_noninteractive_composite

A selection of non-interactive machines from the early game.

See more non-interactive machines in their native habitat here (guaranteed lots of destruction and explosions :D).

Animation

It’s really fun to combine static art with the scripting engine to animate it. The engine can import ASCII art files and move glyphs, manipulate colors, handle image layers separately, reference specific art coordinates…

Items

All the item art appears in the data screen for their respective item. Opening info about an item displays its image at the top of the window, animating its appearance:
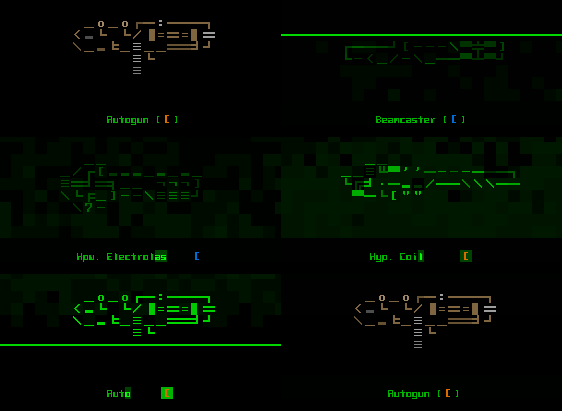
cogmind_art_item_animation

Animated appearance of item art

Title Screen

The game already features some full-sized screens of procedural ASCII, though the title screen is the first of them to combine static art with animation:
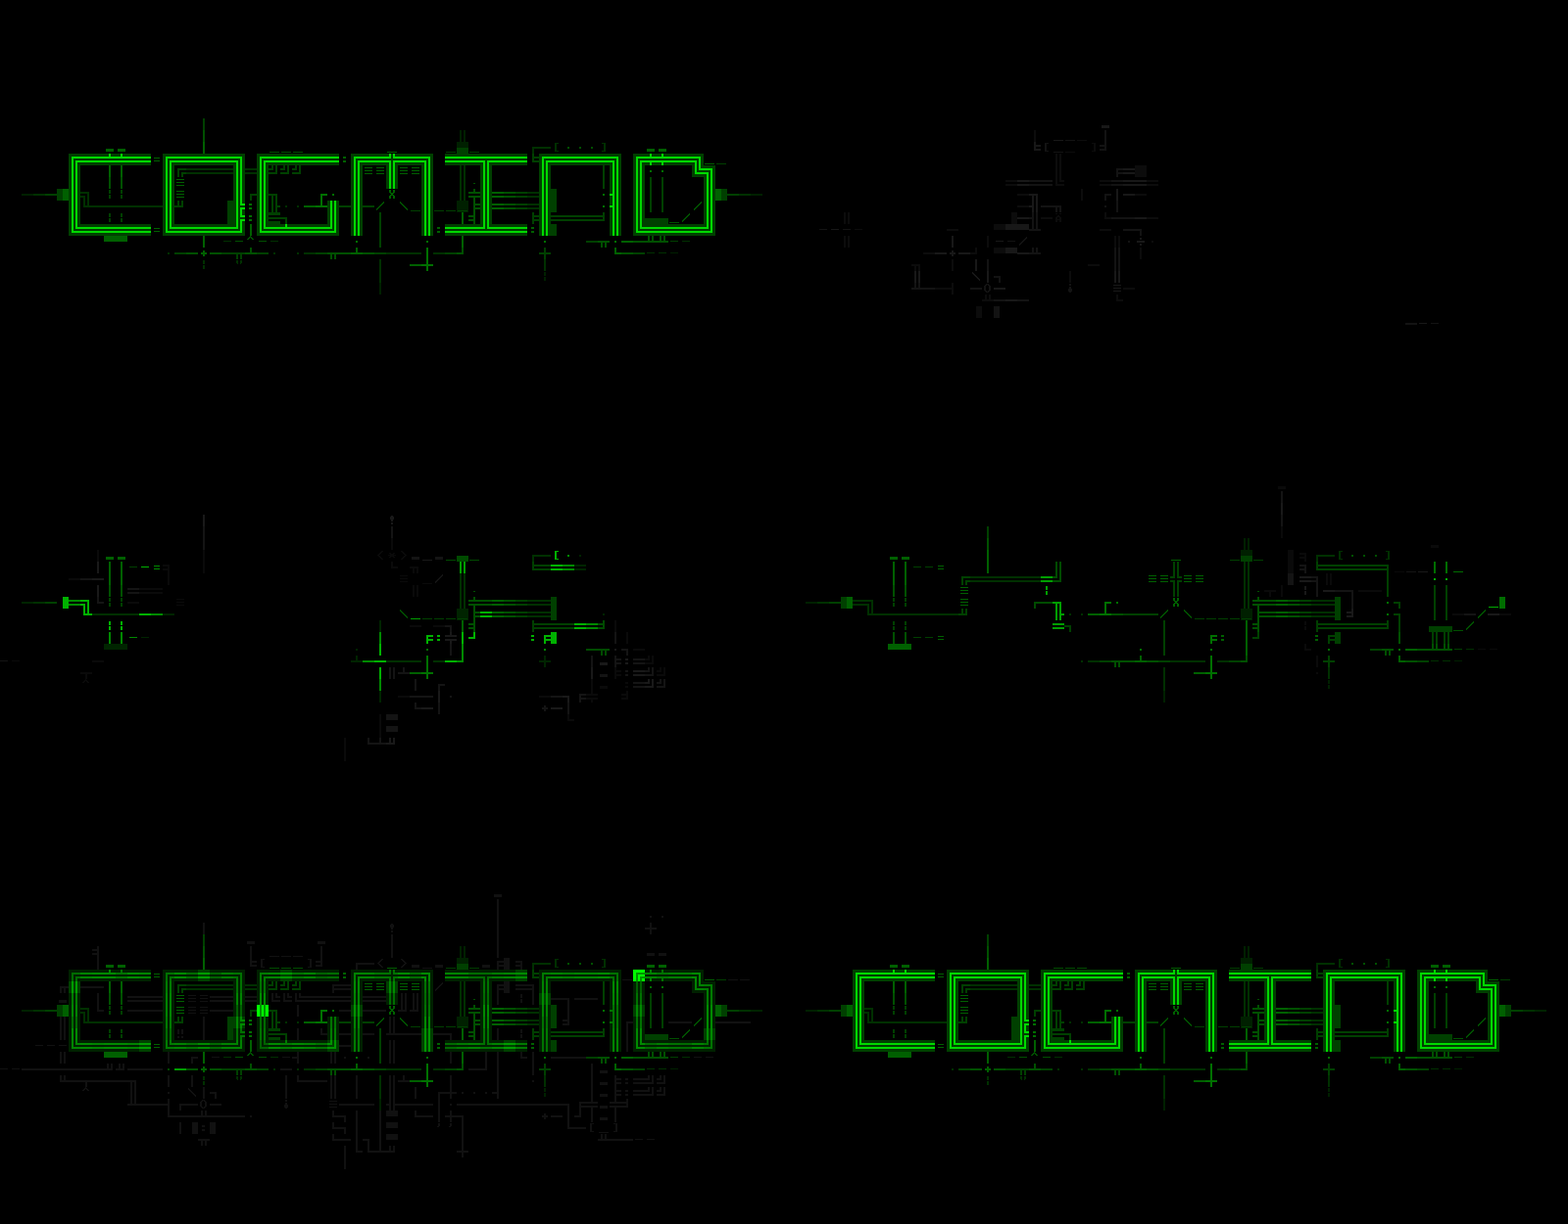
cogmind_title_animation

Cogmind title animation (click for full size).

Read here for more about how the title screen was put together.

More such animations will be added later for components like the evolution, game end, and game over screens.

UI

I also consider the UI to be art, though more so when in motion.
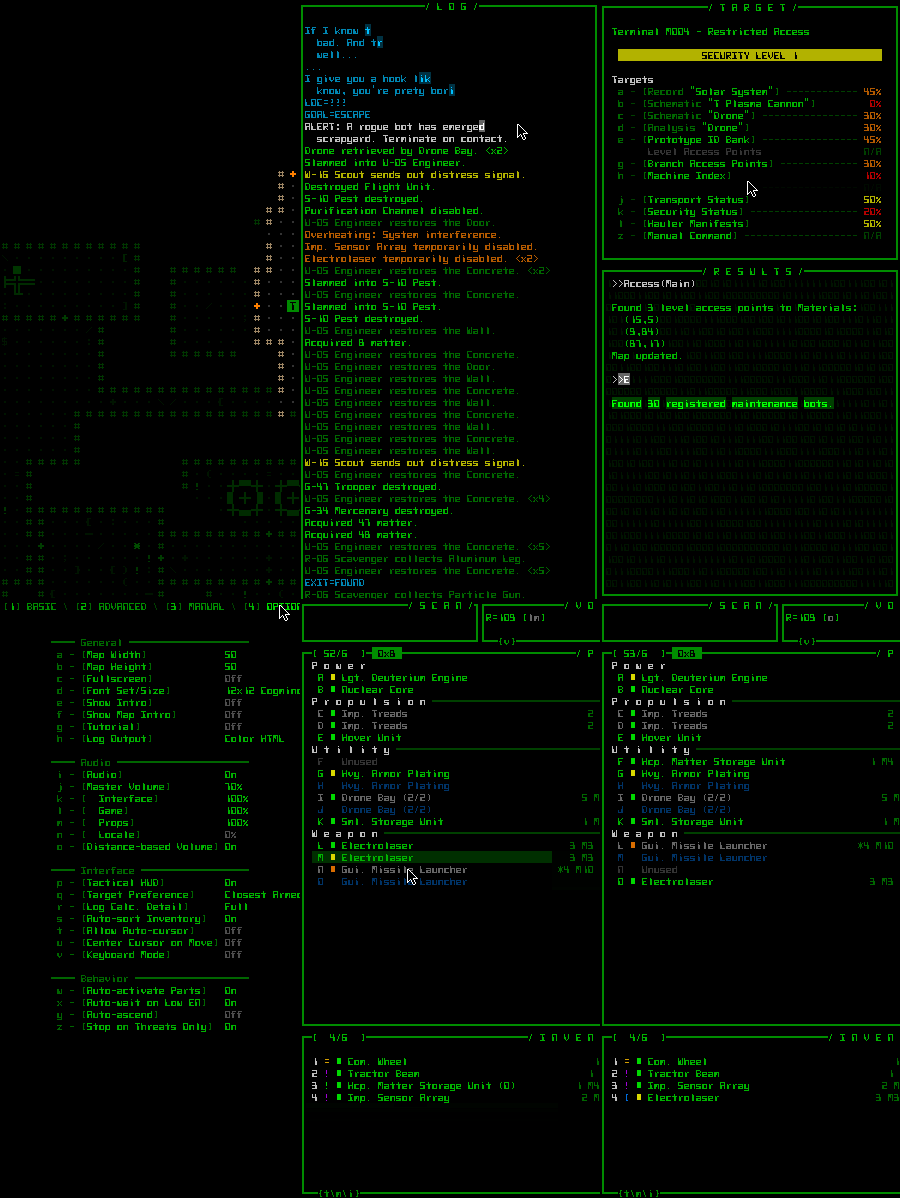
cogmind_ui_animation_compilation

Compilation of nine different interface elements as they appear in use (3.5 MB gif).

Even more animated interface elements can be seen in earlier posts about UI feedback and information warfare.

Particle Effects

ASCII particle effects are similarly a form of art, and come in various styles unique to Cogmind. The primary difference being that none of their components are manually drawn--they’re created purely by procedural scripts. Many of these have been shown before in dedicated posts here and here, and their making was discussed here.

Doesn’t hurt to show some more :D
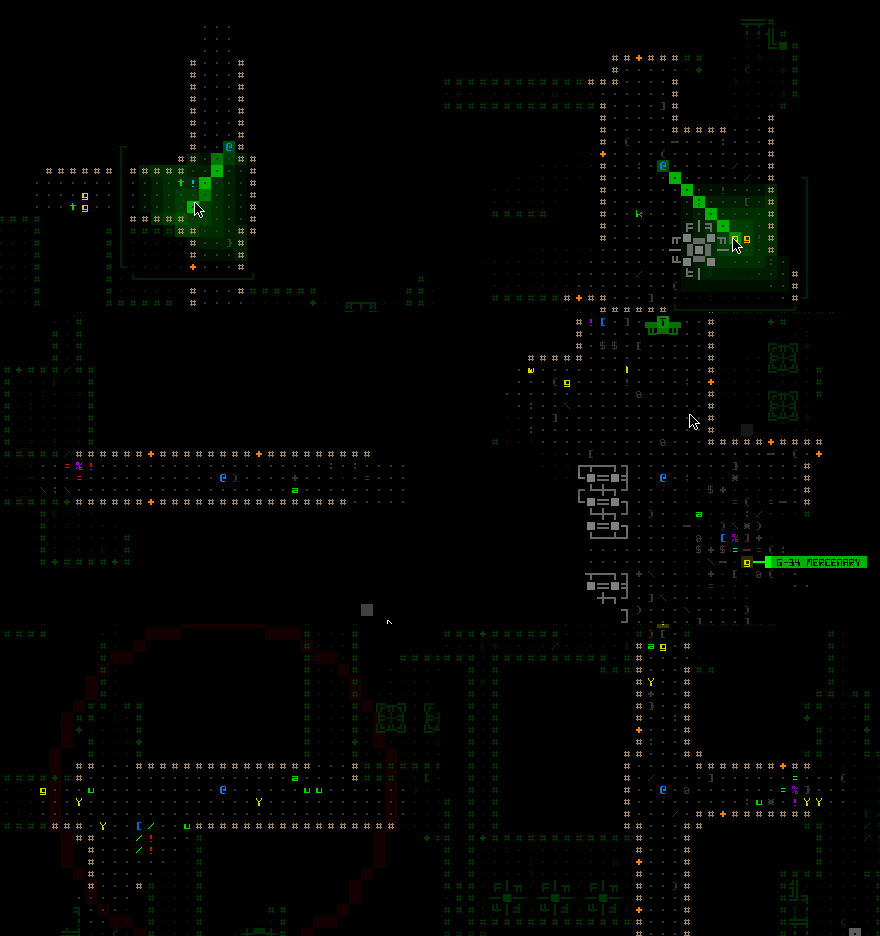
cogmind_particle_effects_compilation

Compilation of ASCII particle effects.
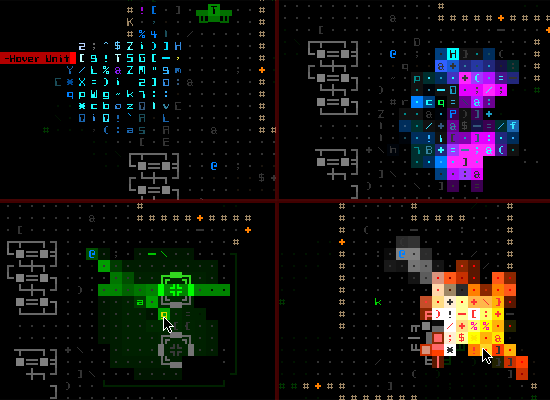
 

cogmind_particle_effects_compilation_stills

ASCII particle effects--stills from the above gif.

Creating ASCII Art

All of the art in Cogmind was created using an in-house tool: REXPaint. I’ve made it freely available for anyone to use, so check it out! In a future post I’ll be See this post for a guide covering REXPaint’s many potential uses in roguelike development (mockups, art, prefabs, etc.).

If you’re interested in the process used to create some of the game’s art, specifically the item art, I’ve written about it in detail here.

cogmind_neutron_missile_launcher_timelapse_fast

Neutron Missile Launcher ASCII art time lapse.
 

Posted in Art | Tagged , , , , , , , | 10 Responses

Inventory Management

Inventories are almost a staple component of any roguelike, and as such there is usually some amount of inventory management required to play them. Deciding what to carry for contingencies is an important part of roguelike strategy (plus it’s fun! …or cause to kick yourself later). For these decisions to be meaningful, games almost always place some kind of limit on inventory space. It might be a design-imposed static value (52, 26, or less), or derived from strength etc.

Cogmind has an inventory system, too, but at any point in the game it’s the player who decides how important a role they want the inventory to play.

How is that possible?

Dynamic Inventory Size

Cogmind has a very small base inventory size--only four slots, meaning you can only carry a maximum four extra items/parts. Relatively tiny by roguelike standards, but you can very well play through the game with this number.

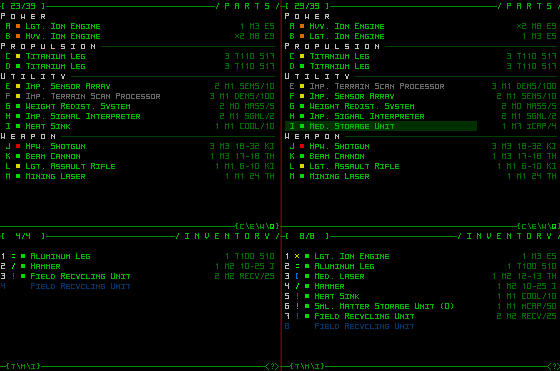
Should you want the ability to carry more parts, you can control the size of your inventory by attaching storage modules of various weights/capacities. Thus these non-permanent expansions to your inventory come at the cost of utility slots that could be used to attach usable parts. Doing this essentially trades an amount of “immediately usable part” space for even more parts that are not immediately usable.

cogmind_dynamic_inventory_size

Base inventory size (left) vs. an inventory taking advantage of a single medium storage unit.

Inventory size varies greatly, from four items to dozens of items, based on how much extra storage capacity you want (and can fit). And in addition to play style considerations, as with any loadout in Cogmind the amount of inventory space can also be quickly changed to adapt to new situations, like significantly expanding capacity to carry along an entire stockpile of armor plating before an expected dangerous confrontation.

Aside from the temporary nature of storage expansions (like any other part you can also unwillingly lose a storage module when it’s destroyed), the most unique aspect of Cogmind’s inventory system is that it’s not controlled indirectly via some other stat (e.g. strength) that has a long-term impact on a character and also affects other aspects of their abilities. The trade-offs are both non-permanent and immediately transparent. “Right now do I want to increase my inventory size by four, or attach another type of active sensor?”

To a (very) limited extent, Cogmind’s inventory also takes volume into account. In the 7DRL prototype all parts were equal in size (one slot), while now we may have very large parts that occupy two or more slots. I wouldn’t want to go to far with this system and risk overcomplicating inventory management and item comparability, so it applies only to a small number of special parts. It’s still nice to have that option for flexibility in item design. Without it some of the amazing parts in the game wouldn’t be feasible since the player could potentially attach too many of them. (See more about large parts and how they look in your inventory in this old post.)

As for storage modules themselves, I opted to keep them all the same “size” (one slot) regardless of their capacity, instead differentiating them only by weight. This is to keep the system simple. Large storage modules are themselves much heavier--the weight of contained items is not taken into account, another abstraction of unnecessary detail.

As mentioned earlier, depending on your strategy it’s technically not even necessary to increase your inventory size. You start with a fair number of usable attachment slots (7), and that number can eventually rise pretty high (26!). In fact, before long you may not even need all your slots for active parts, leaving them free for occasional use as makeshift “inventory space.” The caveat: parts can only be attached in their proper slot type whereas inventory space accepts any item.

The Purpose of Inventory

Cogmind’s lack of consumables (read more about that design feature here) means you aren’t expected to be hoarding a lot of single-use items for contingencies, which is one reason the game can get away with this highly flexible inventory design.

So what is the inventory for, then?

If you’ve played the prototype, you’ll know that in certain encounters it’s likely you’ll lose more than a few parts that will need replacing. Your inventory is a good source of those parts--you’ll often find duplicates in stockpiles that can be carried around as spares. It’s also for storing alternate types of weapons/utilities/propulsion that you don’t have enough slots to attach.

However, this doesn’t imply you absolutely must have a large inventory. Sticking with a smaller inventory is perfectly possible, and results in an even more dynamic game since you’re forced to use what you find locally rather than what you’re lugging around (there is plenty of scrap to be found after a battle). It also means you’ll be slightly more prepared to immediately deal with different situations since you’ll have more useful parts attached at once (no slots occupied by storage). You’ll also weigh less, especially important for hover/flight propulsion.

So keeping your inventory small is a strategic choice.

There is one other factor to consider along with inventory size that you won’t find in most other roguelikes: attaching parts from the inventory has several associated costs (more than simply time). Attaching a part also consumes energy, which is generated free by power sources and usually not an issue, though it can be annoying when you’re in the middle of a fight and need to attach a new power source which may require shutting down active utilities and waiting for backup power to slowly recharge (because the battle already drew down too much energy). More importantly it consumes matter, a (semi-)finite resource. This puts a hard limit on the frequency with which you can swap out parts until you acquire more matter, usually by salvaging other robots.

Thus having a huge inventory doesn’t always mean you can effectively use it all, as it’s tied in to resource management. Related strategy tip: Even though it does take time to attach/detach parts, sometimes doing so while under fire is a good idea, and not too dangerous since Cogmind is nowhere close to a one/few-hits-and-you-die kind of game--taking some extra damage is not a huge deal. Attaching a part during combat will restore or provide extra functionality while also adding extra protection.

Forcing Decisions

In most roguelikes the design includes some gray area that offers ways to circumvent inventory limits. Games with persistent maps may allow the player to create a so-called “stash” where they can store items for later retrieval, or simply return to a previous area to scavenge for items left behind.

Neither of these is possible in Cogmind--you pretty much have to carry everything you may want to use later.

You can’t revisit previous maps (a feature to be explored in a future post), and anything left lying around will be cleaned up by recycler bots.

cogmind_recycler_cleanup

Recycler arriving to clean up a little pile of parts I left on the ground.

The only exceptions to recycler cleanup are intentional stockpiles placed on a map, but these are less reliably useful than gear known to drop from specific robots. You can get specific items by salvaging robots known to use them, but if you want them you’re going to have to take them with you.

In the 7DRL you could technically create a stash and come back to it as long as you remained on the same map and destroyed all the recyclers first. That strategy no longer works on most maps because new maintenance bots are dispatched to replace any that have gone missing.

Another different aspect of the new recyclers is that they no longer simply wander around carrying whatever junk they happened to pick up (you could originally chase them down and take them out to get parts back)--once their inventory is full they’ll actually take the parts to recycling stations and convert them to matter! (You can retrieve this matter from the station, unless it’s already reached a quota, at which point it will be transferred away.)

Altogether the system is designed to force inventory decisions. As a side effect, stash-free design contributes to the “eliminate grinding” philosophy.

That’s not to say there are absolutely no external alternatives to expanding inventory size, though other methods aren’t necessarily as reliable. The first which comes to mind are potential helpers--hacked haulers can carry stuff for you, but I’m not yet sure how effective this will be yet, as I haven’t tested it in true play. You can also remember existing stockpile locations (or hack to find them), since those won’t move. Stockpiles are like “randomized game-specified stashes,” but too much backtracking can be dangerous and wasteful (more so later in the game).


Update 160629: For an even more in-depth look at the advanced UI features aimed at facilitating inventory management in Cogmind, see this more recent post.

Posted in Mechanics | Tagged , , , , | 3 Responses

Information Warfare

Knowledge is king in roguelikes. I’m not talking meta knowledge--that’s important, too, but this is about situational knowledge at a given point in any single run. Roguelikes are all about exploring and confronting the unknown (see intro to old fog of war post), and success is all that much closer if you can uncover as many unknowns as possible before they somehow result in your death. This is especially true in Cogmind, where a number of maps are quite large (thus containing many angry robots) and if you make too many wrong turns while unprepared you could end up with an unmanageable situation that can only spiral further out of control.

The most vital component of information warfare is knowing “what is where.” This knowledge influences where you move, both within a small tactical area and on a greater strategic level, creating all subsequent situations and leading to all other results. In a static or even linear game this is not much of an issue, but with roguelikes we have randomized map layouts and content, hence this factor retains its importance every time you play.

Utility parts are the primary means of obtaining that information. For that purpose we have sensor arrays, signal interpreters, seismic analyzers, terrain scan processors, structural scanners, spectral analyzers… you get the point, there’s a lot of options. You can’t realistically use them all, so you have to pick what you think is more important--or whatever you can find (and maybe carry some alternatives in your inventory).

*Note that you can also forget all this and attempt to just blow everything away. This is stuff for the cautious ninjabot.

Robot Knowledge

You always have access to the basic attributes of a robot by simply opening its data page, which will show you its class, size, rating (sort of equivalent to level/difficulty), movement type and speed, core integrity, current temperature, and any weapons.

Attaching a Scan Processor will add to that a full parts list, including internal components, and better versions report core exposure (how exposed the core is to attack), salvage potential if destroyed, and damage resistances. It’s not the greatest part to dedicate a slot to since player experience (or spoilers) eventually render it mostly useless. (I’d actually like to expand the usefulness of the Scan Processor and have an idea how to do it--maybe later.)

Sensor Arrays, which allow you to detect robots outside your field of vision, are far more useful. In fact, the ability to know what robots are where outside your FOV is so powerful that two separate parts are required to get the full effect:

  • Sensor Arrays only tell you where there is something within their detection range. No more details, just a blip.
  • Signal Interpreters can tell you more about those blips, ranging from size only (low-end interpreters) to class or even specific robot (high end).

This mechanic is made more interesting by the fact that not every robot out there is an enemy. So you can technically get by without a Signal Interpreter if you don’t mind the occasional false alarm, or you can learn to differentiate certain blips by waiting a bit and watching its movement pattern.

cogmind_sensor_array

Watching nearby robots move via Long-range Sensor Array (no interpreter).


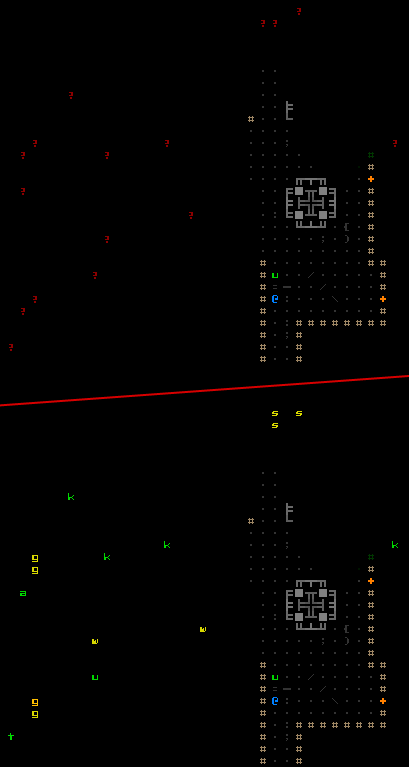
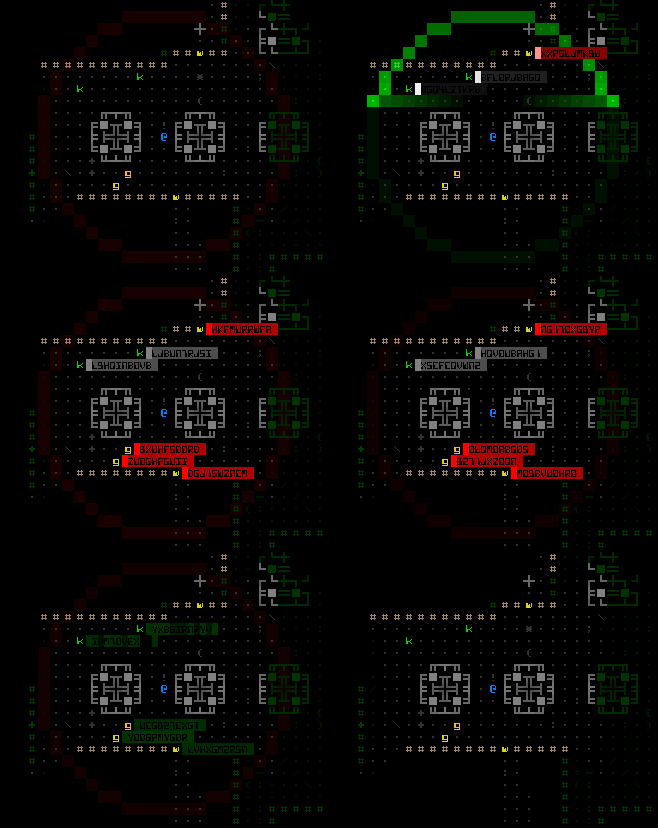
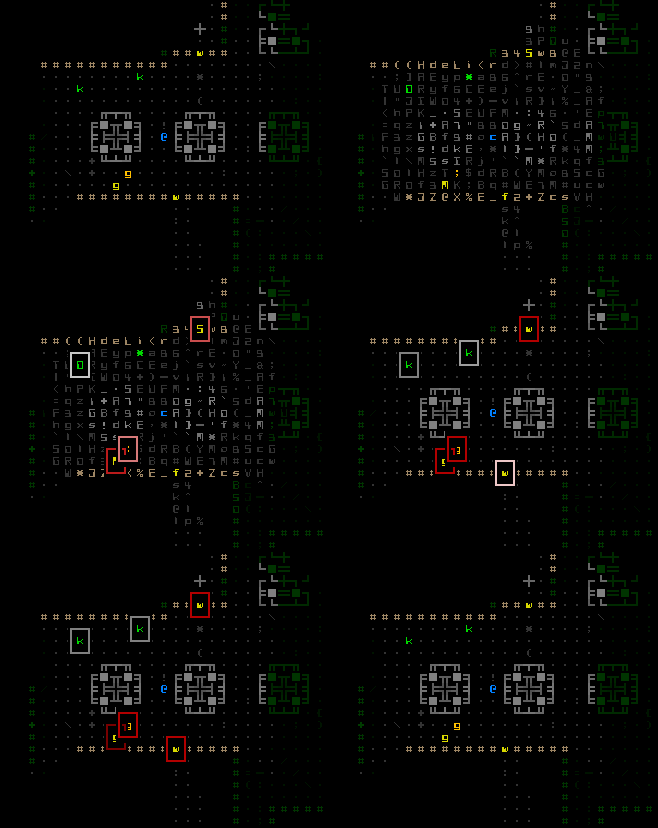
cogmind_signal_interpreter

The same view with and without the Advanced Signal Interpreter, which shows those robots with as much detail as if they were in your FOV! Going straight or left here we’re going to run into enemies, and simply turning the corner we’ll be spotted by a Watcher.

With information like that you can be a lot more confident in your movements--plot a path around hostile robots, or prefer to take on those you are better equipped to deal with, or dodge a passing patrol by ducking into a room (enjoying a suspenseful wait to see whether they plan to visit your hiding place or not ;))

Animations

Continuing on the concept of map-based informational feedback covered in the previous post, activation of all informational utilities is now accompanied by a UI animation. These animations are meant to 1) look cool, of course!, and 2) provide additional feedback where possible. If anything the animation will at least remind you of the utility’s area of effect. (Alternatively that same information is available to mouse users by simply hovering the cursor over the utility in the parts list, which shows the AOE faintly superimposed over the map.)

Activating a Sensor Array shows not only its radius, but also each known robot’s relation to you: hostile (red), neutral (gray), or friendly (green).

cogmind_animation_sensor_array

Activating an Improved Sensor Array.

Activating it can quickly pick out the threats if there are a large number of robots milling about. And remember you can repeatedly deactivate/reactivate utilities, since it’s a free action, anyway.

cogmind_animation_signal_interpreter

Activating a Signal Interpreter on top of that Imp. Sensor Array.

With a powerful enough Signal Interpreter, robot labels (discussed in the previous post) also work for those outside your FOV while the interpreter is active.

cogmind_signal_interpreter_labels

Signal Interpreter with robot labels.

Map Knowledge

Knowing where other robots are is only one piece of the picture. Sure they’re the only potentially dangerous thing out there, but at the wrong place and time that danger can multiply based on the map layout. Plotting an optimal path through unexplored territory is difficult without at least clues as to which routes won’t lead to dead ends where you may be forced to fight. You can also save yourself a lot of trouble by finding ways to circumvent enemy positions. Recall that the main goal in Cogmind is to locate and reach exits, so one way to increase chances of survival is to search the map as efficiently as possible before attracting too much attention.

In short, you want ways to reveal the map. This is a pretty powerful ability to have and thus, like robot sensors, the full effect is divided between two separate parts:

  • Terrain Scanners determine the range within which you can detect terrain.
  • Terrain Scan Processors have a “density” factor which determines how quickly that terrain is revealed. A scanner providing map data without any additional processing reveals terrain at much slower rate.

With at least a scanner, terrain within a given radius is gradually revealed, providing more and more clues to the layout as you move around.

cogmind_terrain_scanner

Imp. Terrain Scanner combined with a Seismic Analyzer (the weakest processor type). (I’ve left the radius highlight active so you can see where it scans out to.)

This means that even a low-density analysis is useful, even though it doesn’t tell you everything. Eventually with enough time or sufficiently powerful processor the entire area will be revealed.

cogmind_terrain_scanner2

Remaining stationary while an Imp. Terrain Scanner and Imp. Terrain Scan Processor reveal the nearby layout. (I’ve activated a Sensor Array so you can see other robots moving around as an indicator of the passage of time.)

Activation

Activating terrain scanners will remind you of their AOE, and also happens to point out doors (just to add a little something…).

cogmind_animation_terrain_scanner

Activating an Improved Terrain Scanner.

The processor animation is pretty simple, mostly reinforcing the radius again but with brighter versions reflecting a higher density.

cogmind_animation_terrain_scan_processor

Activating increasingly powerful processors (their effectiveness does stack).

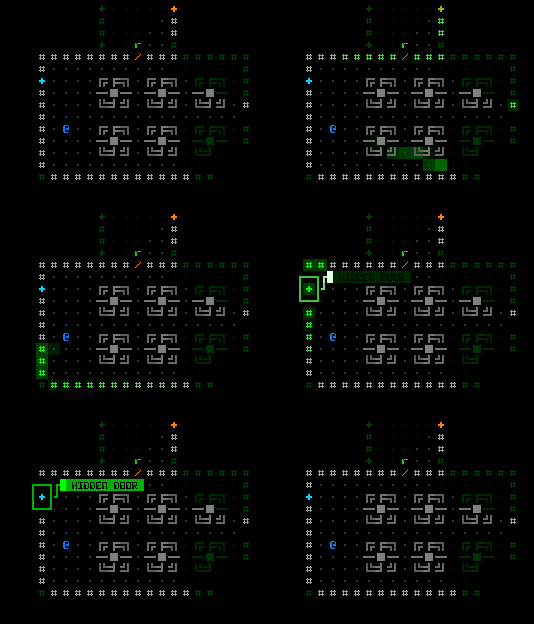
Hidden Doors

I haven’t brought this mechanic up before. It wasn’t in the original design, either--a comment on Reddit a few months ago got me thinking about them and it turns out they add so much to the game that I figured they should be added sooner rather than later. I was considering keeping them a secret (I mean hey, they’re hidden doors!), but you’ll start encountering them right away in the game, and they’re not exactly rare (quite common, actually), so what the hell let’s talk about them now.

The idea is that most maps contain a number of “emergency access” doors used only by combat robots to more quickly reach flash points. Intruders unfamiliar with the territory can be ambushed, or think they’ve reached a dead end and turn to fight off pursuers only to suddenly be attacked from two sides. The mechanics should lead to some interesting situations. When robots start emerging from a room you thought was empty, now you’ll know why.

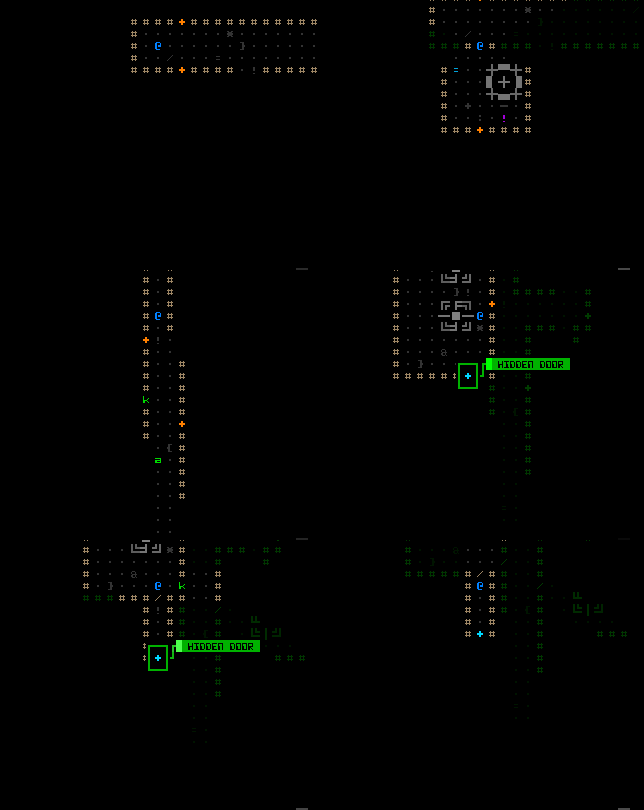
Terrain scanners don’t reveal hidden doors, which appear as normal walls until detected. You can, however, eventually figure out where these doors are hidden if you scan enough terrain to find corridors behind walls. Obviously seeing one of these doors open also counts as detecting it. Even if you don’t see it, it still opens automatically for you just like any other door, but it’s unlikely you’ll be spending lots of time running along room walls searching for them. You’ve got better things to do (and if you don’t you soon will after wasting so much time).

A better option is the dedicated Structural Scanner, now carried by engineer bots. This type of scanner is useful in that it auto-identifies hidden doors as soon as they are within view.

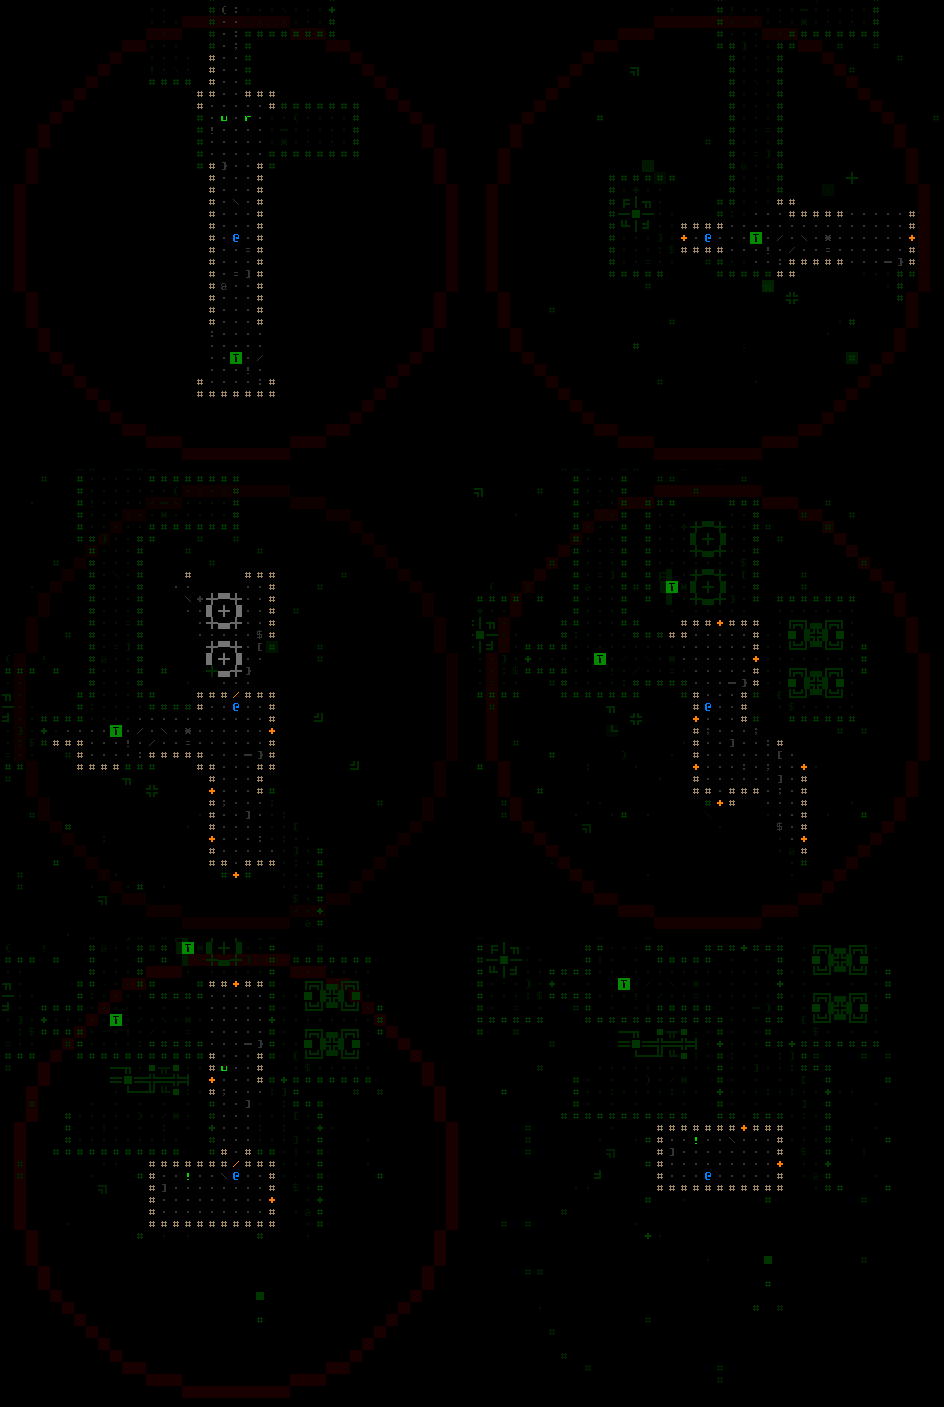
cogmind_structural_scanner

Exploring with a Structural Scanner. Without an active scanner, walking into that room would show nothing but normal walls.

Finding hidden doors saves you lots of time, making it possible to cut corners for a more direct route to an exit, sometimes circumventing entire sections of a map.

There is also a nifty animation to go along with its activation:

cogmind_animation_structural_scanner

Activating a Structural Scanner.

System Corruption

To a degree, both robot and map knowledge are susceptible to interference from system corruption. Once Cogmind has been corrupted, low-level Sensor Arrays will sometimes report false signals (the number of false signals increases with the degree of corruption), and you can lose map data for previously visited areas!

Corruption is caused by electromagnetic damage, though it doesn’t start to play a significant role in the game until about mid-way through when the more fearsome EM-armed Programmers start tracking you down. Even if you don’t immediately notice your corruption value increasing, or some of the less intrusive effects like garbled log messages, the fact that your interface starts glitching will inform you pretty quickly ;).

As in the 7DRL, system corruption has other effects, too; just wanted to drop a mention of its relation to information warfare.

Sight Range

We can’t pass up this most basic element of roguelike information warfare, the maximum range to which your field of view extends. After all, it does determine what information is always immediately available and (usually) reliable.

To keep things simple, most robots have a sight range similar to your own (around 16), the main exception being Watchers that have augmented visual sensors for obvious reasons. Upgrading your own sight range, even beyond that of Watchers, is a great way to spot hostile robots before they spot you, but this only works in long corridors or large halls. Decidedly less effective than a sensor array-processor combo, though this only requires one slot.

In the 7DRL you could only guess whether an enemy had spotted you yet; now that we have a couple different ways to know that (see previous post), enhancing your sight range is a useful option.

Hacking

While not required, hacking terminals is a fairly important way to gain information, some of which overlaps with what you can obtain from the various utilities described above.

The original game was designed without hacking, though theoretically it will be nice to have alternative sources of information, as well as greater flexibility in what can be provided. From a design perspective, parts need to provide fairly equivalent benefits due to the low-resolution slot system (e.g. you start the game with only 7 slots, 2 of which accept utilities). Any items with questionable relative value will always lose out in the fight for limited inventory space. Therefore, we can’t realistically rely on parts for some unique types of information. Terminals serve as a source of that information. I’ve mention some of the possibilities before, but the final list is not set yet.

The Other Side

Everything covered so far about information warfare is from Cogmind’s point of view, when it’s technically a two-way battle. What tools you choose to rely on (if any) heavily determines the outcome, though we can introduce a few more factors by also examining this topic from the enemy’s perspective.

First and foremost, your position is a pretty important piece of information. Once a hostile robot spots you, it will try to alert any nearby allies and tell them where you are. If there happens to be a chain of robots in the vicinity and this information gets passed around enough, you could have a lot of company on your hands.

An interesting new part, the Transmission Jammer, can prevent hostile robots from transmitting these messages to each other. I haven’t gotten far enough in world testing to see how effective it is in managing “situations,” but I’d imagine it’s going to be pretty useful. It automatically jams all transmissions in its area of effect.

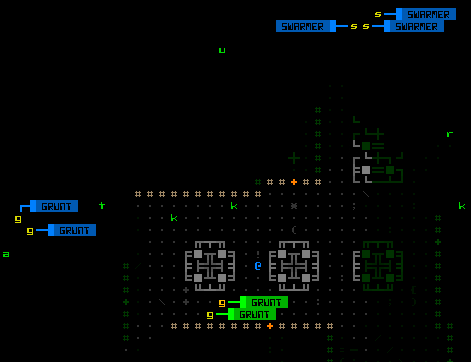
cogmind_animation_transmission_jammer

Activating an Advanced Transmission Jammer, which will keep that Watcher (and Swarmer) from reporting my position to allies.

Unless you’re really confident in your capacity to annihilate all comers, you’d do well to reveal your position only when necessary, because once certain robots are pursuing you it can be tough to shake them.

You can, however, reduce the length of time robots are capable of tracking you after you’re out of sight by employing one of the ECM Suites. They are amazingly effective at getting you out of trouble, but the better ones require significant amounts of energy to operate (a balance issue).

And that’s pretty much it for the other side! There is currently one robot that factors into the information warfare game in a special way, but I’ll let you figure that one out. I have a couple more ideas for such robots I’d like to eventually add since there’s still a lot of room to explore here.

Posted in Design | Tagged , , , , , | 4 Responses