I mention REXPaint a lot on this blog. This is not coincidence, nor because I created it. It happens to be an incredibly useful piece of software for roguelike development!
REXPaint is an in-house tool I developed in 2013 shortly before resuming work on Cogmind. It has since been made freely available for other devs, artists, players… anyone who might need a powerful and user-friendly ASCII editing program. After two years of using and updating it, I’m pretty familiar with how to take advantage of its features for roguelike development, and would like to provide a little guide to ways REXPaint can make your life easier.
Features
First, an overview of what REXPaint can do:
- Edit characters, foreground, and background colors separately
- Draw shapes and text
- Copy/cut/paste areas
- Undo/redo changes
- Preview effects simply by hovering the cursor over the canvas
- Palette manipulation
- Image-wide color tweaking and palette swaps
- True-color RGB/HSV/hex color picker
- Create multi-layered images
- Zooming: Scale an image by changing font size on the fly
- Built-in image browser
- Extreme image compression (far better than png)
- Exports to PNG, ANS, TXT, CSV, XML, XPM, BBCode
- Skinnable interface
- Load custom fonts
For gifs showing many of these features in action, see the features page on the REXPaint site.
As you can see, it’s a fully-featured paint program, albeit focused on manipulating ASCII images. It turns out that interface, maps, and art, all three separate elements in other games, are unified in roguelikes that embrace the ASCII aesthetic. Thus a single editor like this can benefit work on many different aspects of a traditional roguelike.
Mockups
In the early stages of game development you have the design and mockup phase. One of the nice things about creating a roguelike is that with the right editor you have an extremely reliable way to preview what the game will look like even before building a prototype! Any visual element from UI and maps to text and art can be accurately drawn and assessed for the right layout, colors, and overall “feel.”
Some earlier Cogmind mockups have been mistaken for screenshots, because there’s no way to tell the difference! (Sometimes I have a mockup displayed on my desktop and click on it to interact before realizing it’s not actually the game =p.) Of course, to achieve this effect you’ll have to load your game’s custom font into REXPaint. (Or use one of REXPaint’s own fonts for your game, which is fine, too--classic terminal fonts are available, as well as many from legacy systems. More fonts are coming in future versions.)
For a developer, being able to see everything as it will be / as you want it can be very motivating, especially as it gives you a clear goal to aim for and reduces the need for tedious trial-and-error design.
Even after there’s a working prototype, and really all throughout development, there’s often a need to add new features and UI elements. These can be drawn from scratch, or better yet expand upon the original mockups to save time and ensure compatibility. With Cogmind I design many related parts of the interface in a single image, using multiple layers to store each one. Any given layer can be hidden/revealed to show how different elements interact. The top layer is for annotations.
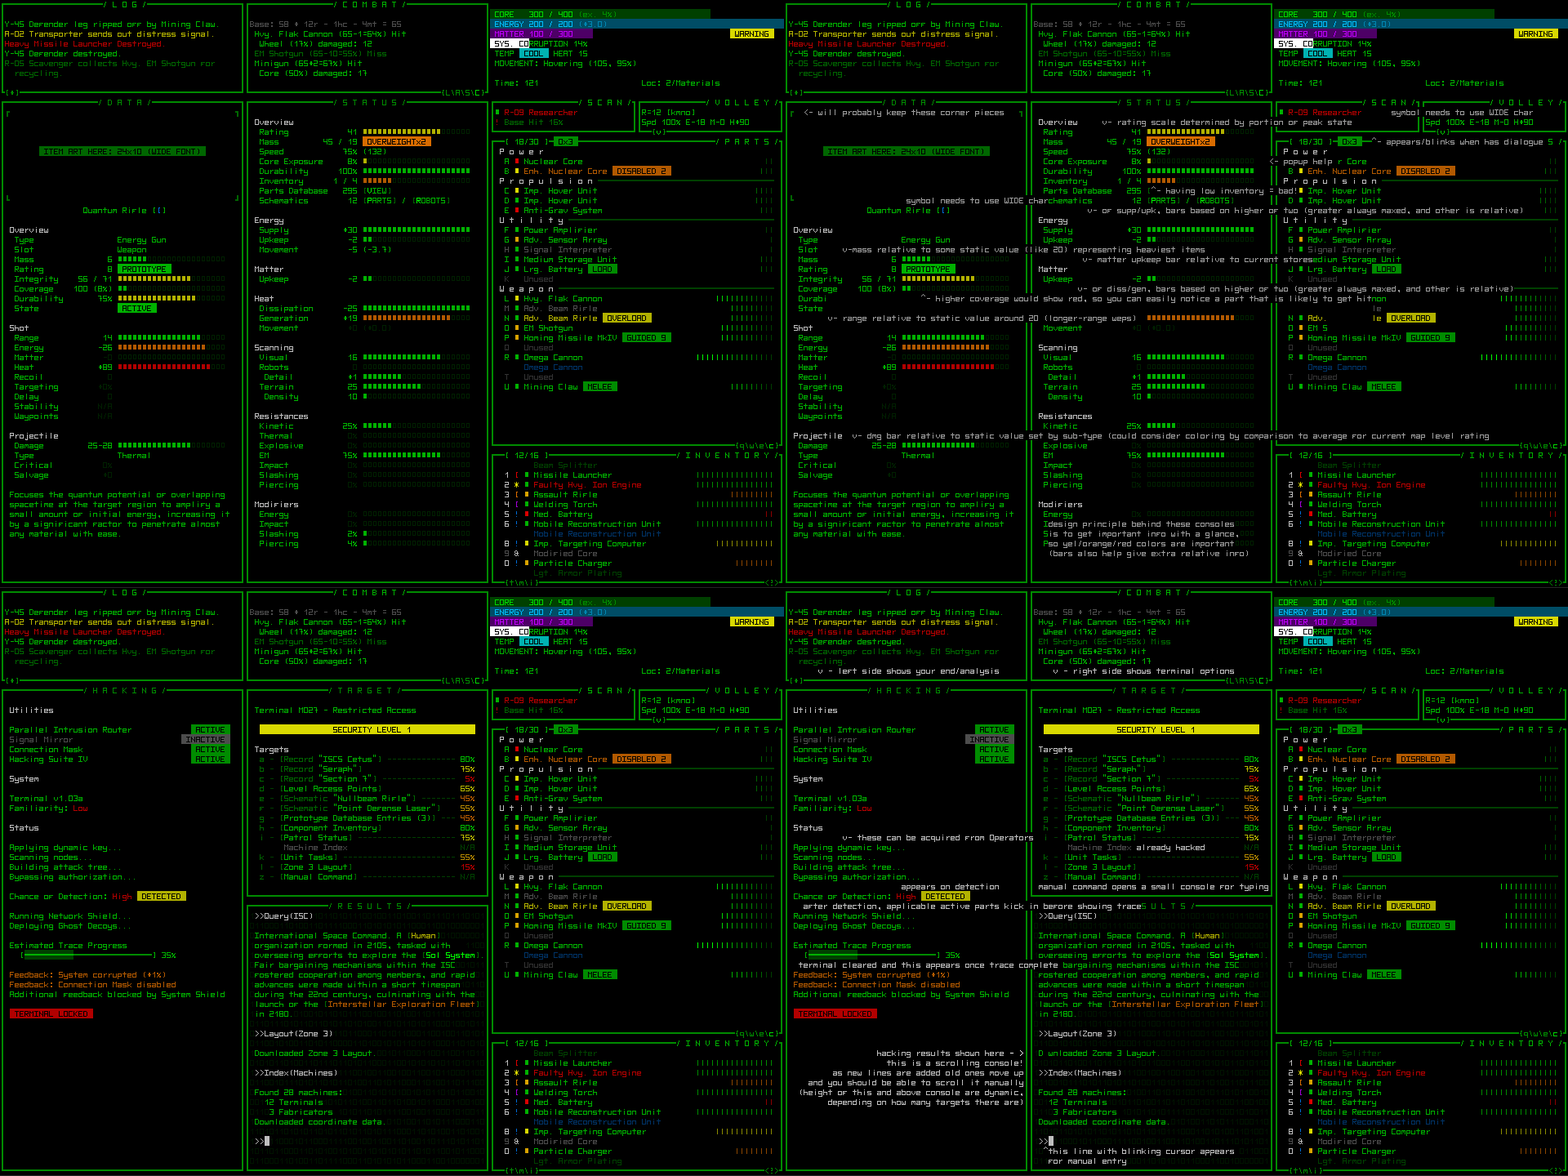
Multi-layered mockup--overlaying the original image with some data windows and the hacking interface (all handled in REXPaint). (click for full size)
Eventually you’ll build up a little library of convenient reference material. Coding the UI is so much easier with a pixel/cell-perfect representation at hand.
Art
Not every roguelike needs ASCII art, but those that use it can definitely benefit from a tool like REXPaint. Rather than hard code art into the source or rely purely on text files, it’s much more efficient to use a dedicated tool designed to streamline the creation process, then import the results into the game at runtime.
In terms of organization, there are a couple different ways this can be achieved. The most straightforward method would be to simply draw each piece of art in its own image. REXPaint is equipped to facilitate this approach, since it includes a built-in image browser which enables you to quickly swap between different images for editing, comparison, or copy-pasting. (Tip: Ctrl-tab is a new hotkey that instantly swaps back and forth between the current and most recently opened image. Great for frequent inter-image work.)
Depending on your workflow, the one-image-per-asset approach could quickly become unwieldy once you have more than a handful of small assets, so another method is to create “ASCII spritesheets.” This borrows the concept behind asset storage for most pixel/texture-based games, and it’s what I do with Cogmind.
Related assets are grouped into fewer image files, and the game knows how to find and extract specific images it needs. Cogmind currently has two different types of spritesheets (adapting to what seemed like the most convenient method for each situation): even-distribution spritesheets and irregular spritesheets.
Item art always fits into the same rectangular area at the top of the data window, and as such it’s a good candidate for an evenly distributed spritesheet:
To create a new spritesheet I just use REXPaint’s file browser to copy the blank spritesheet (shift-click), rename the new image, and drop in art (usually drawn on a separate canvas). The game knows that individual pieces of art all use the dimensions 24×10, thus it only needs the “macro coordinates” of the image for a given item in order to find that art.
Excerpt from a spritesheet (“swep”: special weapons), and above that you can see how art is referenced by file name and coordinate in data files. (Typing in the item name isn’t necessary, but it’s nice to have for reference.)
Machines can be of any size and the game must know exactly what area they occupy, so for those I went with a free-form spritesheet wherein each image is enclosed by a very faint rectangle. Pieces of art can appear anywhere in the file--just give the game a rect’s top-left coordinate and it will automatically measure the width and height of the rectangle to extract the art within:
A subset of non-interactive machines, together with the part of their data file that indicates their art offset coordinates.
Animation & Post-Processing
REXPaint does not natively support image animation. Theoretically you could manage it by using a different layer for each frame, or putting frames adjacent to one another in a spritesheet, though without a way to preview the animation in program (or export it as an animated gif) it’s probably of limited use.
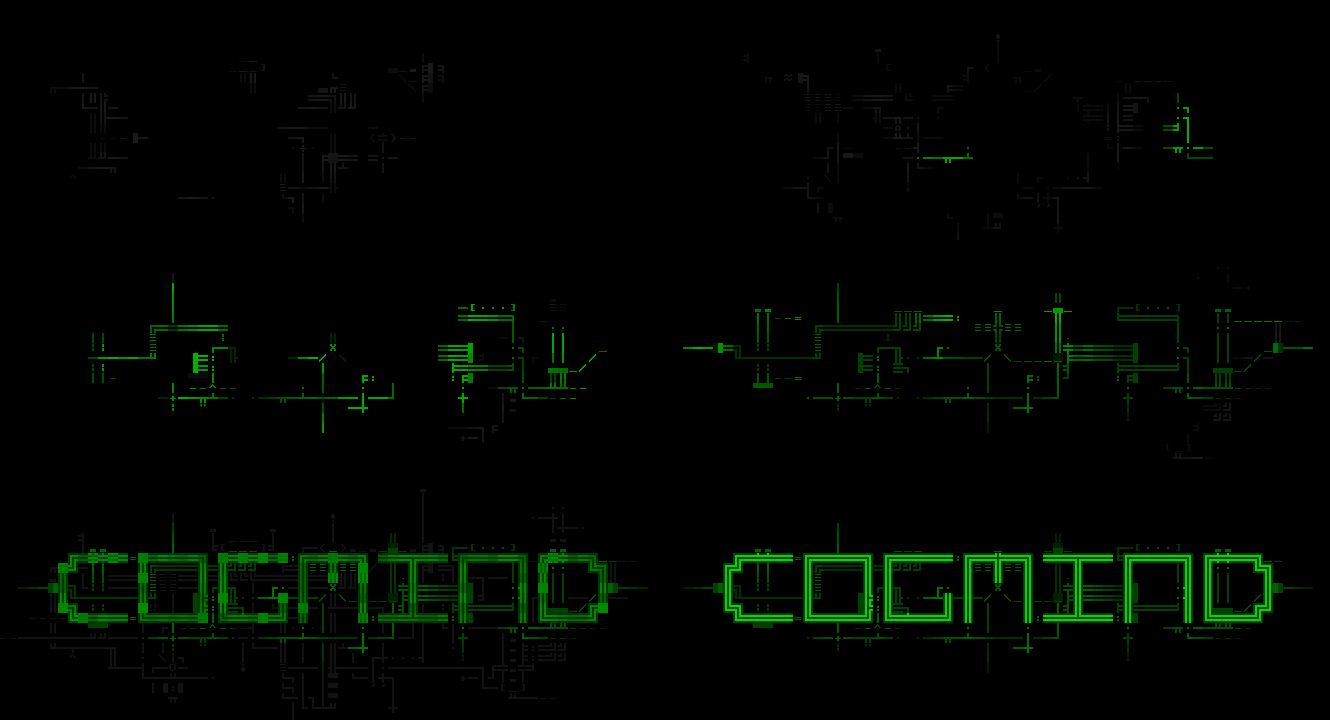
For my own projects, I prefer the greater flexibility of handling animation in code/scripts. Cogmind’s new title screen is an example of taking a multi-layered ASCII image from REXPaint and applying procedural animations to it.
Read more about the title creation process here.
For a more basic example of post-processing, see this spritesheet excerpt containing low/mid-level fabricators:
Notice that they’re all gray, though in game interactive machines always appear in color so they stand out from other machines. Just as you can recolor sprites and textures using color keying or shaders, you can also consider recoloring ASCII foregrounds/backgrounds or even altering glyphs. And this is after they’ve been imported into the game. This way I only care about the relative brightness of the glyphs--colors for specific machine types can be set elsewhere, and changed easily.
Formats
You may notice that the above images tend to have a lot of unused space as far as spritesheets go. I’m not worried about wasted space in these spritesheets, since they compress extremely well.
REXPaint’s native format, saved with an “.xp” extension, is highly compressed and squeezes even the most massive images to negligible size. The format specification is openly available (see the manual, Appendix A), so anyone willing to read and decompress binary files can take advantage of this format in their own games. There’s even some code you can reference: REXPaint user /u/BaconSoap has kindly open sourced his C# RexReader for importing .xp files; for online use, /u/chiguireitor has written a Node.js module to load and draw REXPaint sprites; there’s also the Rockpick library for Clojure users, by /u/aaron_ds. (See the resources page for other languages and libraries which are frequently added.)
If you’d prefer to work with text files, REXPaint can just as easily export .csv or .xml files (as well as unicode .txt, but that strips all color data). The drawback to text files is they lack compression and therefore take up quite a bit of space despite being easier to read in. In any case, .csv is the best text option.
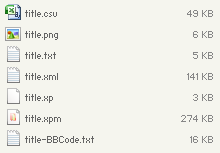
A file size comparison across all export formats currently supported by REXPaint--this one for the 69×28 title screen shown above (image dimensions are in cells, not pixels).
Useful Tricks
In my past year with REXPaint I’ve come up with a number of time-saving practices that might help you, too.
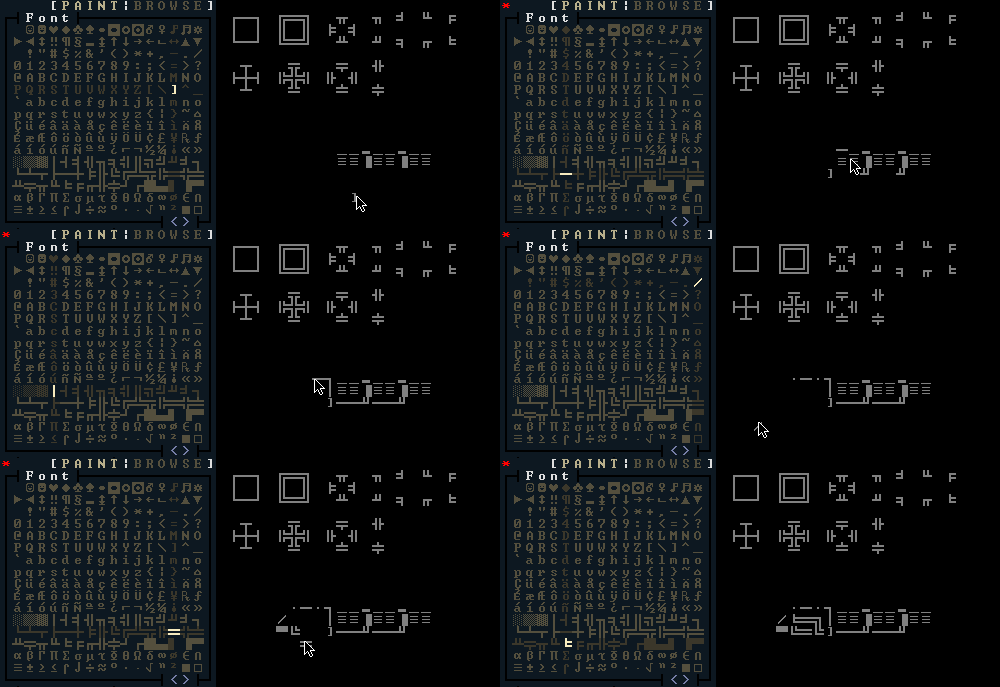
Setting up the right workspace environment can speed things up immensely. For example, early on while working on item art concept sketches I realized that it was a real pain to find some of the glyphs I frequently used from the default CP437 layout. Numbers and letters are easy enough, but most of the items use a line art style, and the many different orientations of lines are ordered pretty randomly and even blend together in the spritesheet. So I created an art “worksheet” and redrew the glyphs in a more understandable orientation at the top. RXPaint’s right-click-to-copy interface makes accessing the needed lines much faster:
I can just copy that worksheet as a base when starting a new set of images.
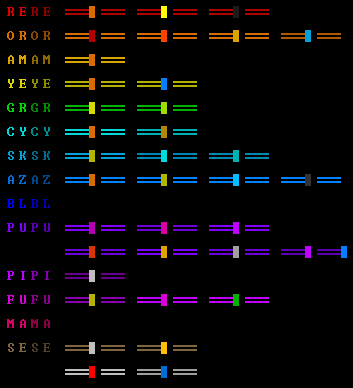
Later when I began adding color to the concept images and developing Cogmind’s color schemes, I added those schemes directly to the worksheet as well. Drawing palettes onto the canvas itself is just as easy as using the actual palette since you can always right-click to copy a color. (It’s arguably even better, since you can do a few things that aren’t easy with the normal palette, like copying entire sections of colors and moving them together.)
That’s not to say the actual palette is useless. Besides supporting unlimited numbers of palettes, it provides lots of additional functionality like image-wide swaps, color shifting, and saving colors from the RGB/HSV/hex picker.
If you do start (or are already) using REXPaint, I highly suggest skimming the manual’s complete list of commands, since the UI’s lack of any kind of submenu interface means there is no way to discover advanced features--on that list you’ll probably discover some very useful functions you didn’t know were available…
The three most common REXPaint features I use for my own work:
1. The aforementioned copy-selection-by-right-click tool. I love paint programs that have this feature, since you’re commonly reusing the same colors (and/or in the case of ASCII, glyphs) which can often be found much more close to where you’re editing than the actual selection area of the UI. In REXPaint in particular, this feature copies only what elements you have active (e.g. glyph/foreground/background), so you also have the option of selectively copying only parts of the source cell.
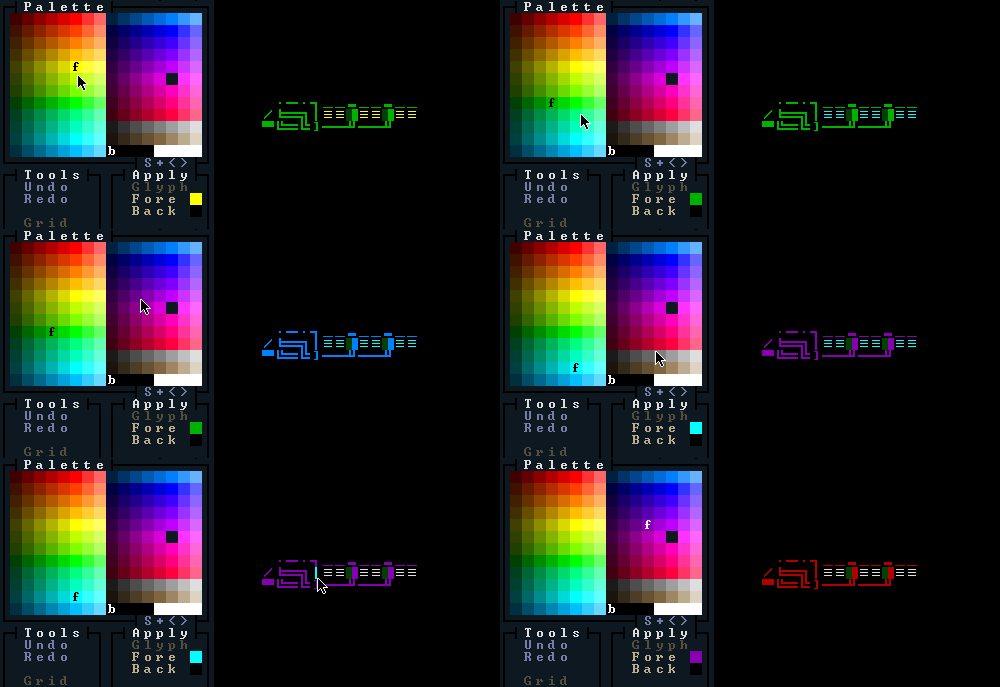
2. Foreground and background colors can be shifted left or right based on their palette position via a Shift- or Alt-click. So by setting up your palette correctly, i.e. order shades in rows, you can first draw in gray or some other single color, then tweak the shading as necessary.
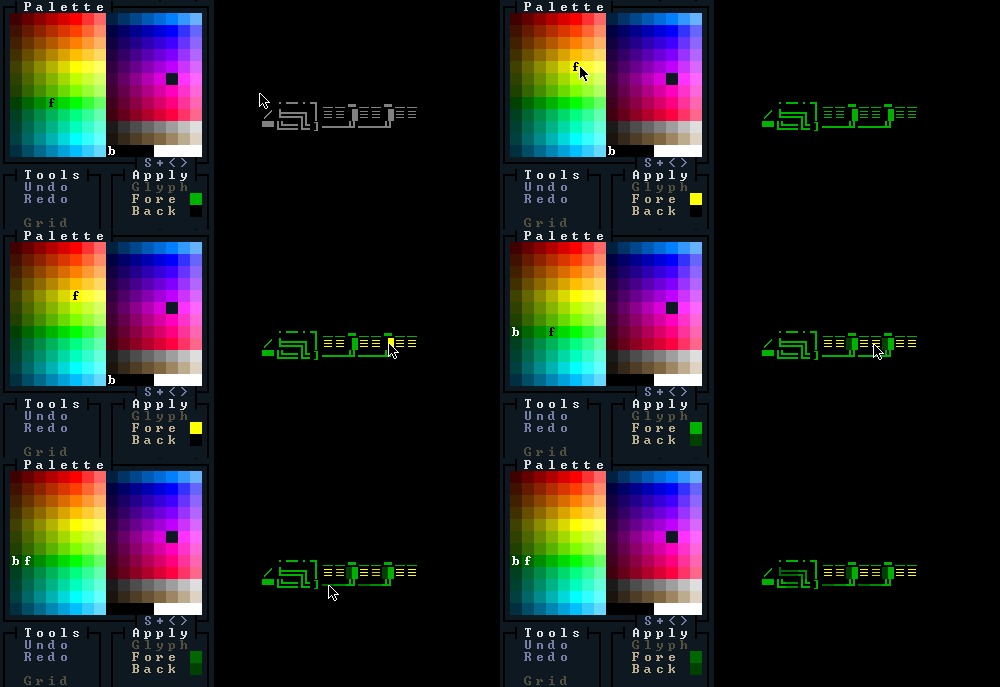
Painting the Gatling Laser drawn above, then tweaking foreground color brightness. Notice the color selector automatically shifting in the palette.
3. An easy way to test out different colors throughout an image is by using single color swaps. Shift-clicking on one palette color and then on another switches all occurrences of the first color throughout the image. (REXPaint supports full palette swaps as well, but this feature is more convenient.)
Final note: If like me you end up using REXPaint for a lot of different purposes, it can help to have multiple copies in parallel, each with their own appropriate config and loaded fonts.
Additional reading: For more information, check out the art-related posts below.
- ASCII Art: A general introduction to ASCII art.
- Cogmind ASCII Art, the Making of: A look at the process used to create the game’s item art.
- Anatomy of an ASCII Title Screen: How Cogmind’s title screen was drawn and animated.
- Cogmind ASCII Art Gallery: Cross-section of the types of ASCII art found in the game.
Maps
Roguelike maps are most often procedurally generated, at least in part. Some roguelikes use one or more static maps, which can be drawn in REXPaint and imported into the game. A far more common practice than fully static maps is merging bits of static content with procedural maps.
As I’ve explained before, I think there are lot of advantages to integrating hand-crafted components into procedural generation algorithms, and REXPaint is one tool for creating those hand-crafted areas. In fact, I already wrote an entire post on prefabs in Cogmind, so I won’t rehash all that content here.
The basic idea is that you can draw a specific area how you want it to look, even storing additional static data where it belongs, like using a combination of glyphs and foreground/background colors to represent terrain, props, mobs, objects or other map features. This information can be split up into multiple layers for convenience, and contain markers referenced by some external text file which further describes the map’s contents. (Check out the post linked above for images and details.)
On the topic of mapping, I also use REXPaint to design layout parameters that inform the procedural generation of Cogmind’s maps, but those are too spoilery to share here ;)
Future Feature?
For Cogmind the prefab editing method described above is sufficient, but I’ve considered one possible extension to REXPaint that would make roguelike map work even easier. The idea is to integrate named objects (and maybe even some related data?) directly into the map itself. At best this could essentially take the place of the external text file used for Cogmind’s prefabs.
This would be a major extension of REXPaint’s functionality (taking it beyond pure image editing), so I would want to get it right, requiring that I have my own test case to guide implementation. Cogmind isn’t quite complex enough to warrant developing this feature, but one of my future games just might be. Of course, this feature must also be conceived as a generic solution that isn’t tied down to some specific game.
Anyway, if you might want to use this feature, let me know in the comments so I can add you to the small but growing list of interested devs. Another new way to discuss features and interact with other users is via the dedicated board on the recently opened Grid Sage Forums. Feel free to leave comments here or there if there are any other features you’d like to see in REXPaint. I may do another release within the next few months.
Sample Projects
So obviously I’m using REXPaint for my own projects (currently Cogmind and X@COM), but what are others doing with it?
A good number of roguelike devs know about and use the program, though many roguelikes never see the public eye (or take a very long time to reach it) so most of the downloads have yet to lead to any concrete games.
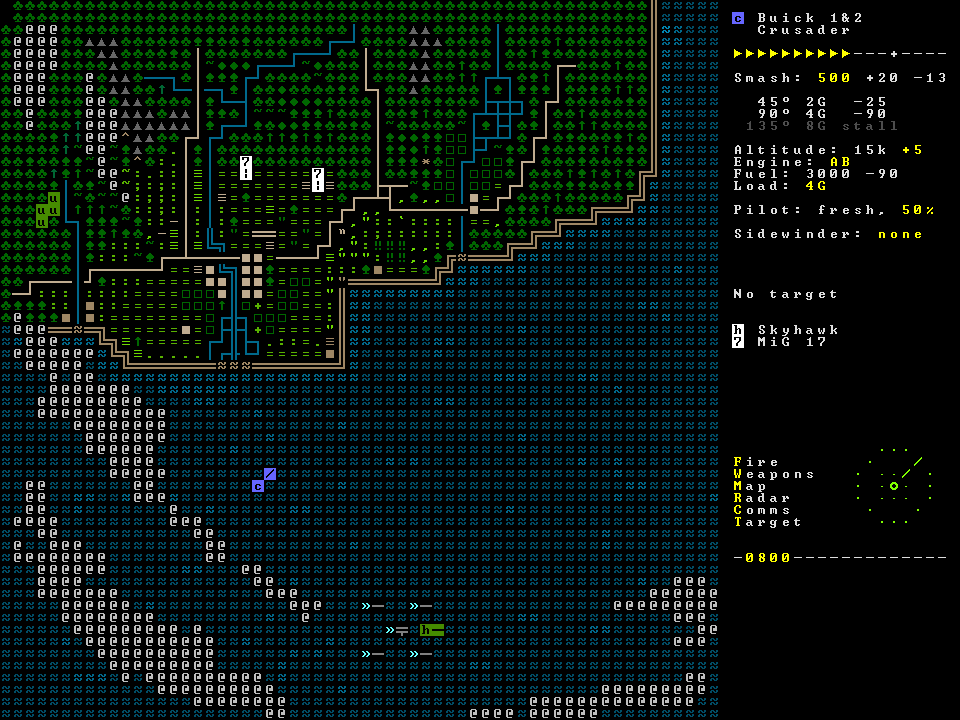
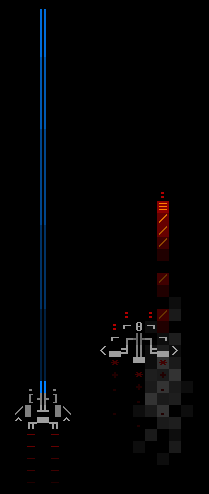
One notable exception is Kerosene Thunder, an air combat roguelike by Pishtaco over on TIGSource. His first mockup was drawn in REXPaint earlier this year:
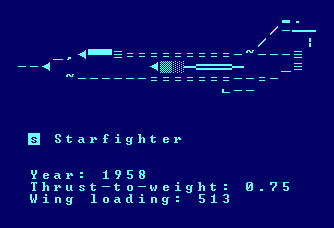
And he’s drawing the planes in ASCII, too:
It’s still in the early stages, but I tried the first tech demo and it has the makings of what could become a very cool game. You can see more recent screenshots in the forum thread.
I know many other roguelike devs actively using REXPaint for their projects, but haven’t seen much of their work yet. If you are a developer using REXPaint for your game, let me know in the comments or elsewhere! (The only requirement is that it must be linkable and display screenshots I can easily find and pick from.) At some point I will make a dedicated page showcasing all such games.
REXPaint has also been picked up by some forum game GMs and players to visually map what’s going on, mostly in boards frequented by roguelike players (ex: DF/C:DDA forums). I hadn’t thought of that when making REXPaint, but it’s a pretty creative and useful idea :).
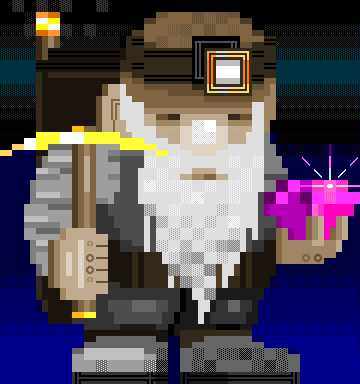
Some artists have also picked up REXPaint just for fun. Among them DragonDePlatino, maker of the DawnLike RL tileset, used it almost like a pixel art program to make this dwarf:
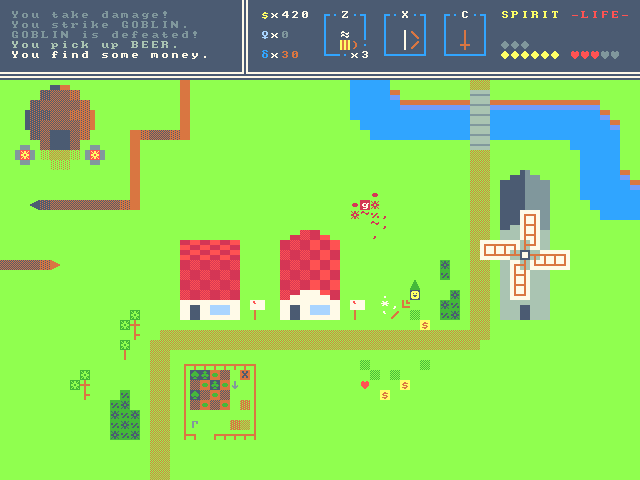
And here’s Zelda the Roguelike (a mockup):
Bonus: Some ship mockups for a modular ASCII shmup I was prototyping last year:
See more art in the REXPaint gallery.
Since I began releasing ANSI versions of REXPaint, about a fifth of downloaders target that, which would be for those interested in drawing traditional escape-code ANSI art (.ans files). No one from that particular scene has shown me anything yet, though.
If you have used or are using REXPaint for your own art, maps, mockups, or other project, drop a note in the comments to tell us about it! (Better yet, show us!)
Alternatives
I won’t claim that REXPaint is the best option for everyone needing a tool like this. Some of the other options might work better for you, so check them out, too!
- ascii-paint (2009): The first modern ASCII editor, by Shafqat Bhuiyan and libTCOD roguelike library creator Jice.
- ASCIIPaint (2010): An ASCII editor written in flash--somewhat slow and not easy to use, but it’s the first and only one I tried out when looking to make some ASCII art, thus it’s the editor that convinced me I needed to make my own ;).
- ascii animator (2011): Ben Porter’s fork of ascii-paint that expands the interface to add support for animations and gif exports. Definitely check this out if you want to make animated ASCII art.
- advASCIIdraw (2013): This one is a little more like raster art programs than your normal ASCII editor. It supports multi-cell brushes, making it a better choice for large pieces of art with varied content. Unfortunately it comes with a serious drawback: there is no undo/redo feature, which is extremely important for any kind of editor--not because people make mistakes, but because it encourages experimentation. Lack of an undo function is a pretty big barrier to “efficient creativity.”
- Playscii (2015): A very new open source option with a rapidly expanding feature set. I haven’t tried this one before so I can’t offer any opinions; check out the website for details.



14 Comments
Ahhhhh!!! That first useful tip is really useful.
(Copy-pasting glyphs to draw a Gatling Laser. Much easier than finding them in the grid to the left)
Finding out wich character to use from the pallete was my major gripe while trying it out. Will try again for my secret project
:)
I suppose in theory we could just allow the glyphs in the character selector to be arranged in a more parsable configuration rather than adhering to the standard. Maybe I’ll add a separate mode which rearranges the characters. I don’t think that would be too much trouble to implement.
And don’t let your secret project stay secret too long--indie games/roguelikes thrive in open development =p
btw, I tried the Playscii link and played a bit with it and saw on the first screenshot that some of the characters in the palette are are arranged in such a manner.
Based on that screenshot, it looks like you’re able to set your own character configuration via a file (see “c64_petscii” in the image). (That’s also a nonstandard fewer-than-256-character layout.) That’s an interesting idea, though, to allow users to potentially reassign characters into any layout.
I should really give this thing a go again after actually reading the instructions this time round. ;)
Is there the ability to ‘zoom’ via font-size fiddling mid workflow?
There is, an example of which you can see on the features page. I believe the current release only includes a few sizes, though several more will become available once I finally release the version I’m using here =p
Thanks so much for this post.. I was looking for a way to re-arrange the border ascii to a more logical order (even if they are already in alt-numerical order), and I made my own worksheet as suggested and that is TONS better. I have named it my graysheet, after the design that the borders look like.. :-)
Glad you got something out of it! I’m always looking for ways to improve efficiency in my workflow :D
Others are using the worksheet/reference glyph method as well now, and by request as of 1.0 it’s possible to put your reference glyphs on a different layer and copy from that layer (Ctrl-RMB) if you’d like. I still just keep it on the same layer since I normally don’t fill entire images anyway (or I’ll expand images beyond their intended width to provide lots of extra workspace), but it’s there if you need it :)
Thanks for all of the ideas!
For ascii design there is also https://monodraw.helftone.com.
Monodraw looks pretty cool! Although… Mac-only, which is a very tiny subset of roguelike developers :P. In the years since this post I’ve seen some other online editors that are free and sorta like Monodraw as well. Seems like these tend to focus mostly on flowcharting-type productivity needs.
REXPaint will continue to further differentiate itself from other offerings into 2.0 where we’ll get things like unlimited sizes on custom character bitmaps, more color tweaking functionality, and probably more roguelike-specific features like FOV visualizations (?) if I can figure out a way that’ll work for everyone. Trying to finish up Cogmind 1.0 before spending much time on the next big thing, though. For now I’ve just been doing minor updates mainly based on user requests.
I am using Rexpaint more often now and getting the hand of it. It is a great tool.
However I am trying to figure out how to add a layer and move between them?
Also a Save As would be a nice addition feature, so we can have two versions of an image and alter one of them. Currently we have to manually copy an image in the folder to do this.
Hi Daza, glad you’re getting use out of it :)
As you use it more I highly recommend reading the manual (included in the download, and also available online), because there are a ton of additional features but a majority of them are only described there. At least read down the full command list, which includes many commands not listed in the program itself. You’ll find answers to your questions in there, plus many more!
There is a whole section on Layers and how to work with them, and you’ll also see that “save as” already exists in the Browse interface (Shift-LMB on an image creates a duplicate, prompting you for a name but it’ll also choose a default automatically--it’s very quick and useful and yeah I use this all the time :D). You don’t really need to do any manually copying of things in the folder--it’s much faster to manage your images via the Browse functionality.
In the mockup, it looks like you are using multiple different sized glyphs. I’d like to include some 8×16 glyphs for easy to read text. How can I do this with Rexpaint? I know how to use the scale/zoom button but it changes all my current glyphs.
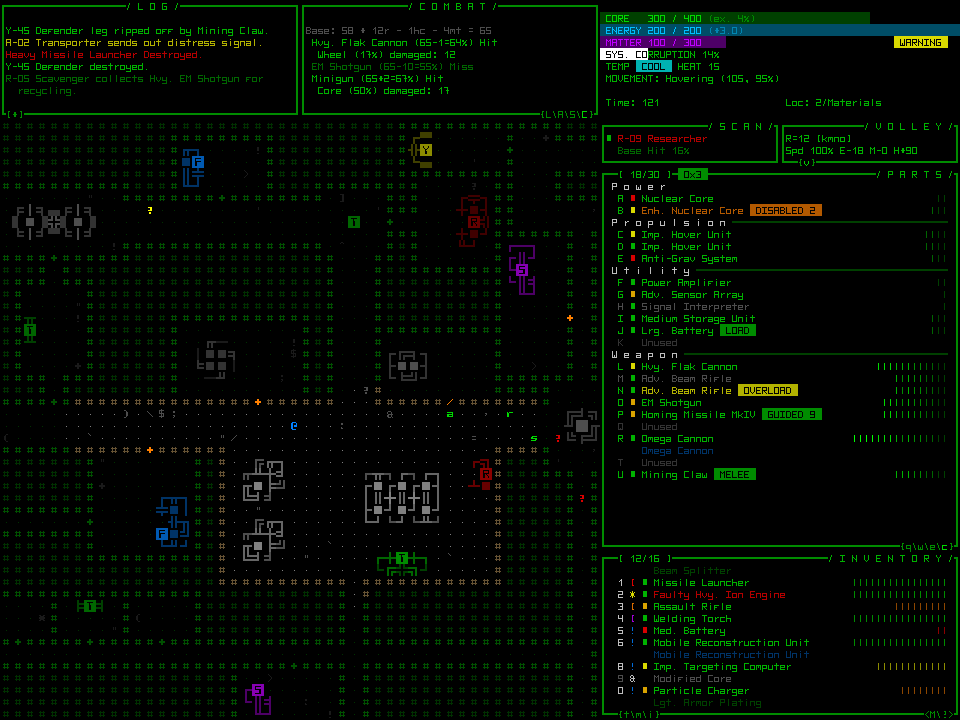
Hi Landon, it’s not actually possible to do this within just REXPaint itself, since it’s designed such that all cells must have the same dimensions. What I did for that mockup in particular was draw the map area using a different font and file, then combined the two exports into a single image using Photoshop. (Designwise this works for me because the target game, Cogmind, allows for a second font that is twice as wide as the first.)
If you have a smaller/manageable number of text areas/segments that you’d like to be larger, you’d have to take a similar approach and merge them using another program.