Official development blog
[ Latest Cogmind Release Notes: Feb 2026, "Unchained More" ]

2018 7DRL Postmortem, Part 3: Spending Too Long on Map Generation and Content

Picking up where we left off at the end of Part 2, about the early days working on the core interface and mechanics

Map Generation

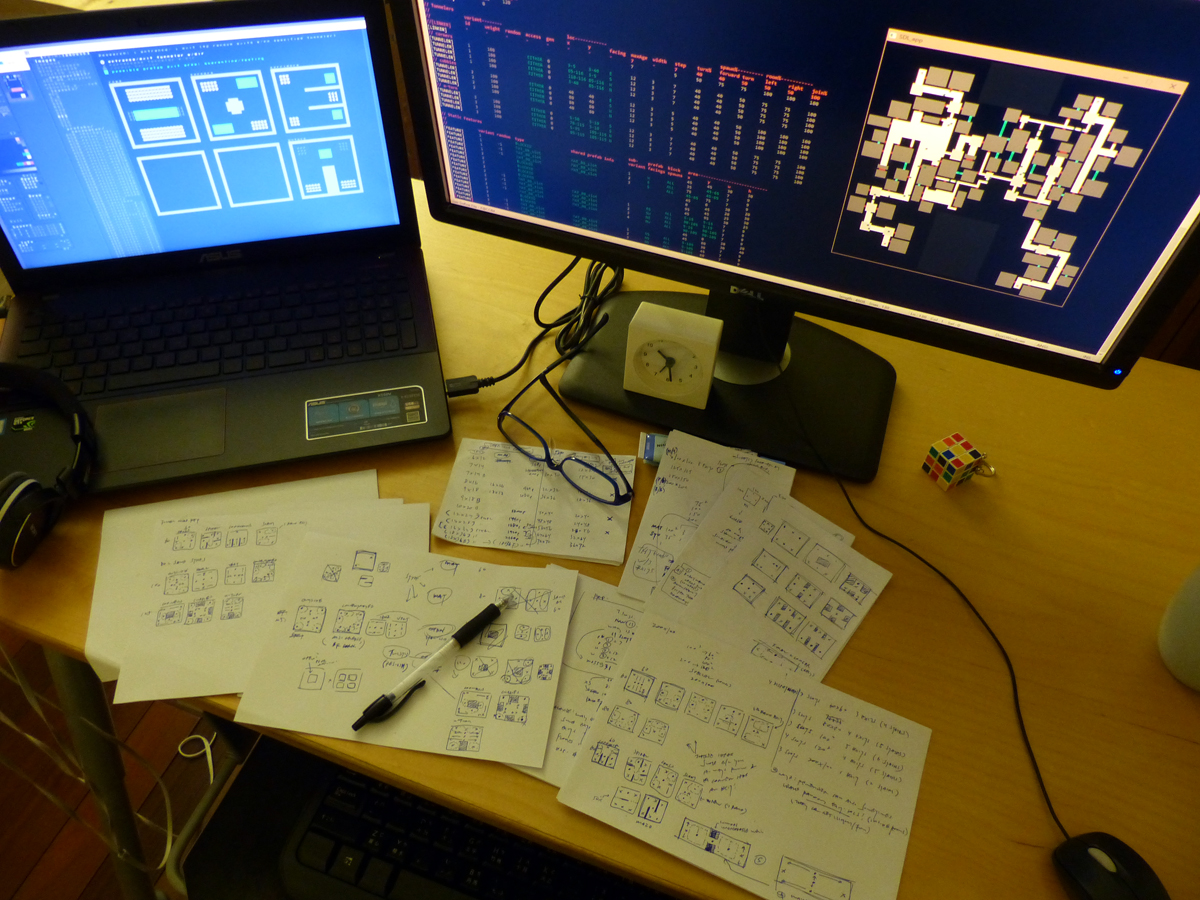
I spent an entire day just working on map generation. At the end of that day my desk looked like this:
polybot7_desktop_mapgen_work_7DRL2018

My desk after reasoning through various POLYBOT-7 map layout needs.

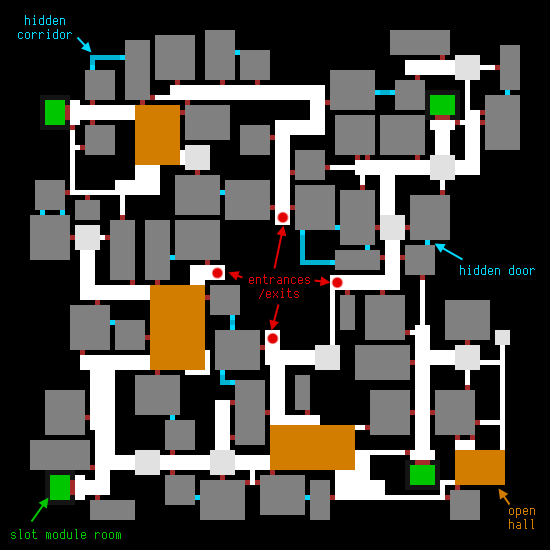
All the maps use my tunneling algorithm from Cogmind, albeit with different parameters. Slot Modules (the way to get new parts slots) are actually among those parameters, existing as prefabs that are deliberately placed in certain locations relative to map entrances/exits.
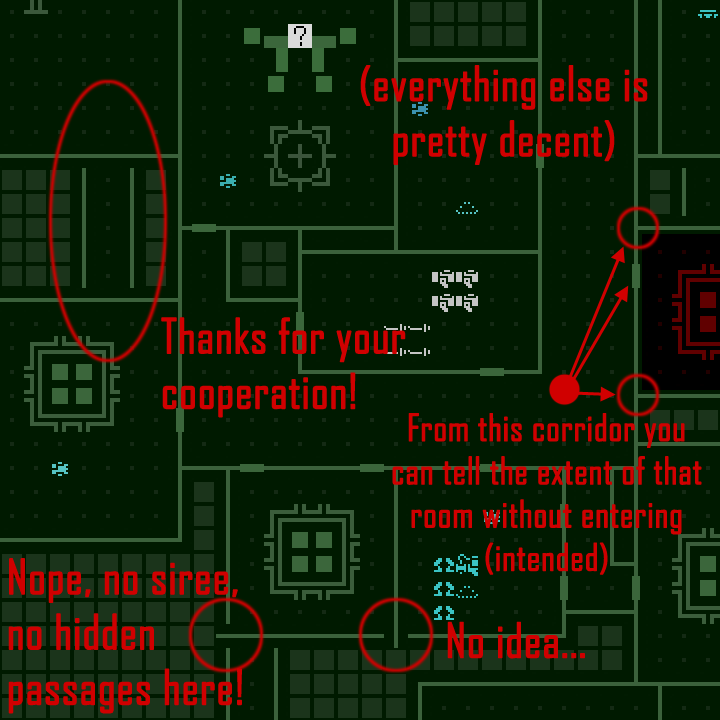
polybot7_procedural_map_structure_annotated

Sample 100×100 map layout, annotated. The player enters from one of the red dots and has to exit from another. This particular layout has four distributed slot module rooms rather than the usual three, and POLYBOT-7 has a lot more hidden doors and corridors than Cogmind. There are also very few large rooms.

I was particularly worried about screwing this phase up because a good set of maps takes a long time to create and there’d be no time to redo this later. While designing the layouts I based a lot of my assumptions on what I knew from exploring Cogmind maps, combined with plans for how POLYBOT-7’s content was going to change everything (the next step in the process, which I’ll cover later). Honestly I didn’t have to spend so much time on map generation and everything would’ve been fine, but I wanted more variety to maximize replayability while also keeping it challenging. Map size and layout are understandably crucial to balance, and I’d decided it would be appropriate to increase map size at each depth, meaning multiple different layouts were needed for every floor. So this took a while.
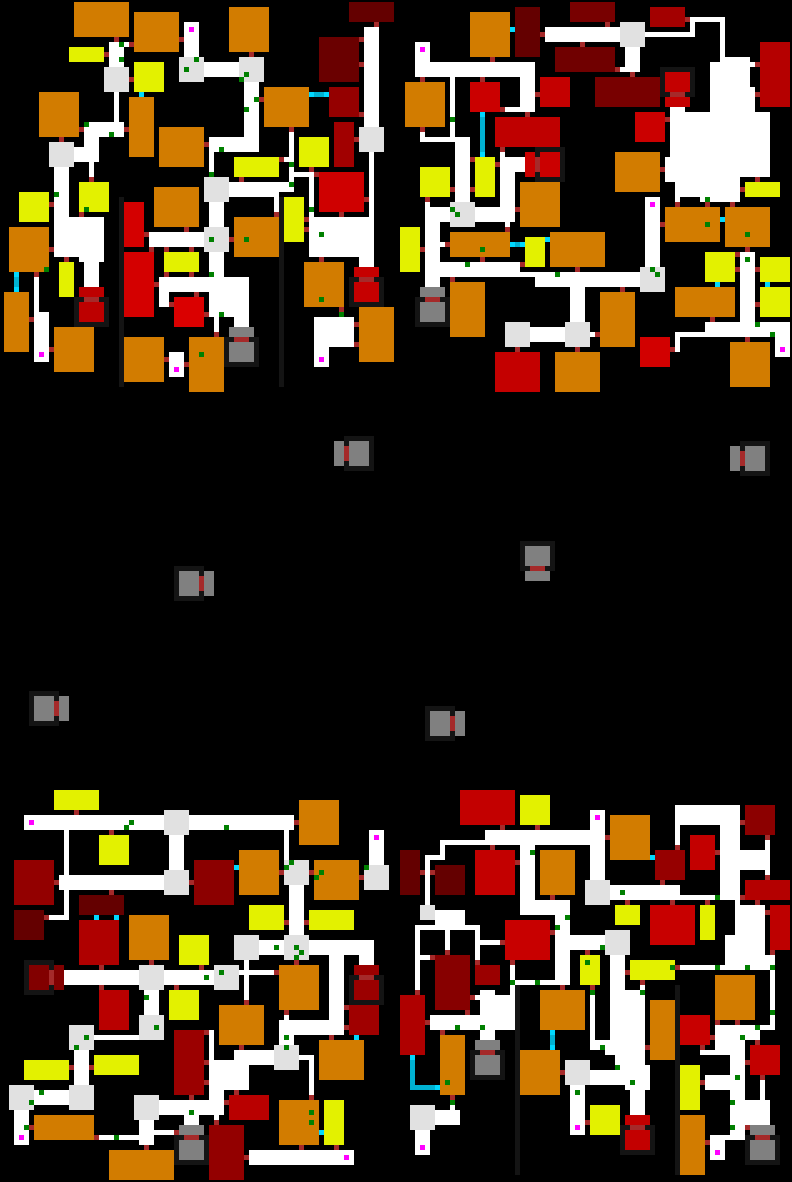
polybot7_mapgen_tests_80

Testing layout generation for the 80×80 map (second floor).
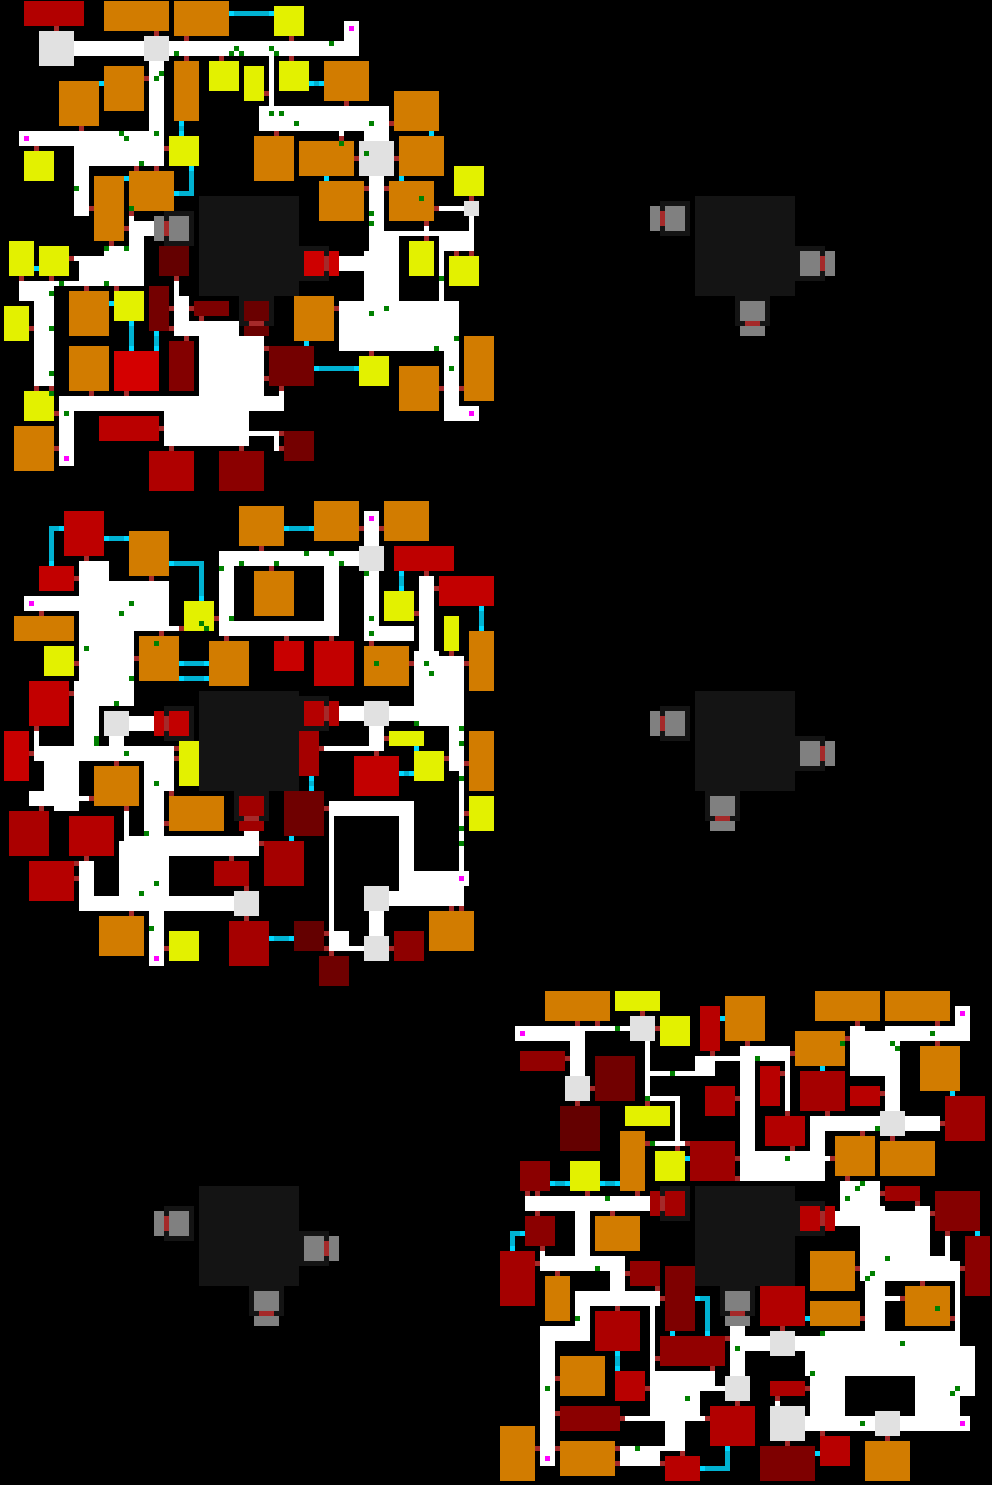
polybot7_mapgen_tests_100

Testing layout generation for the 100×100 map (third floor).
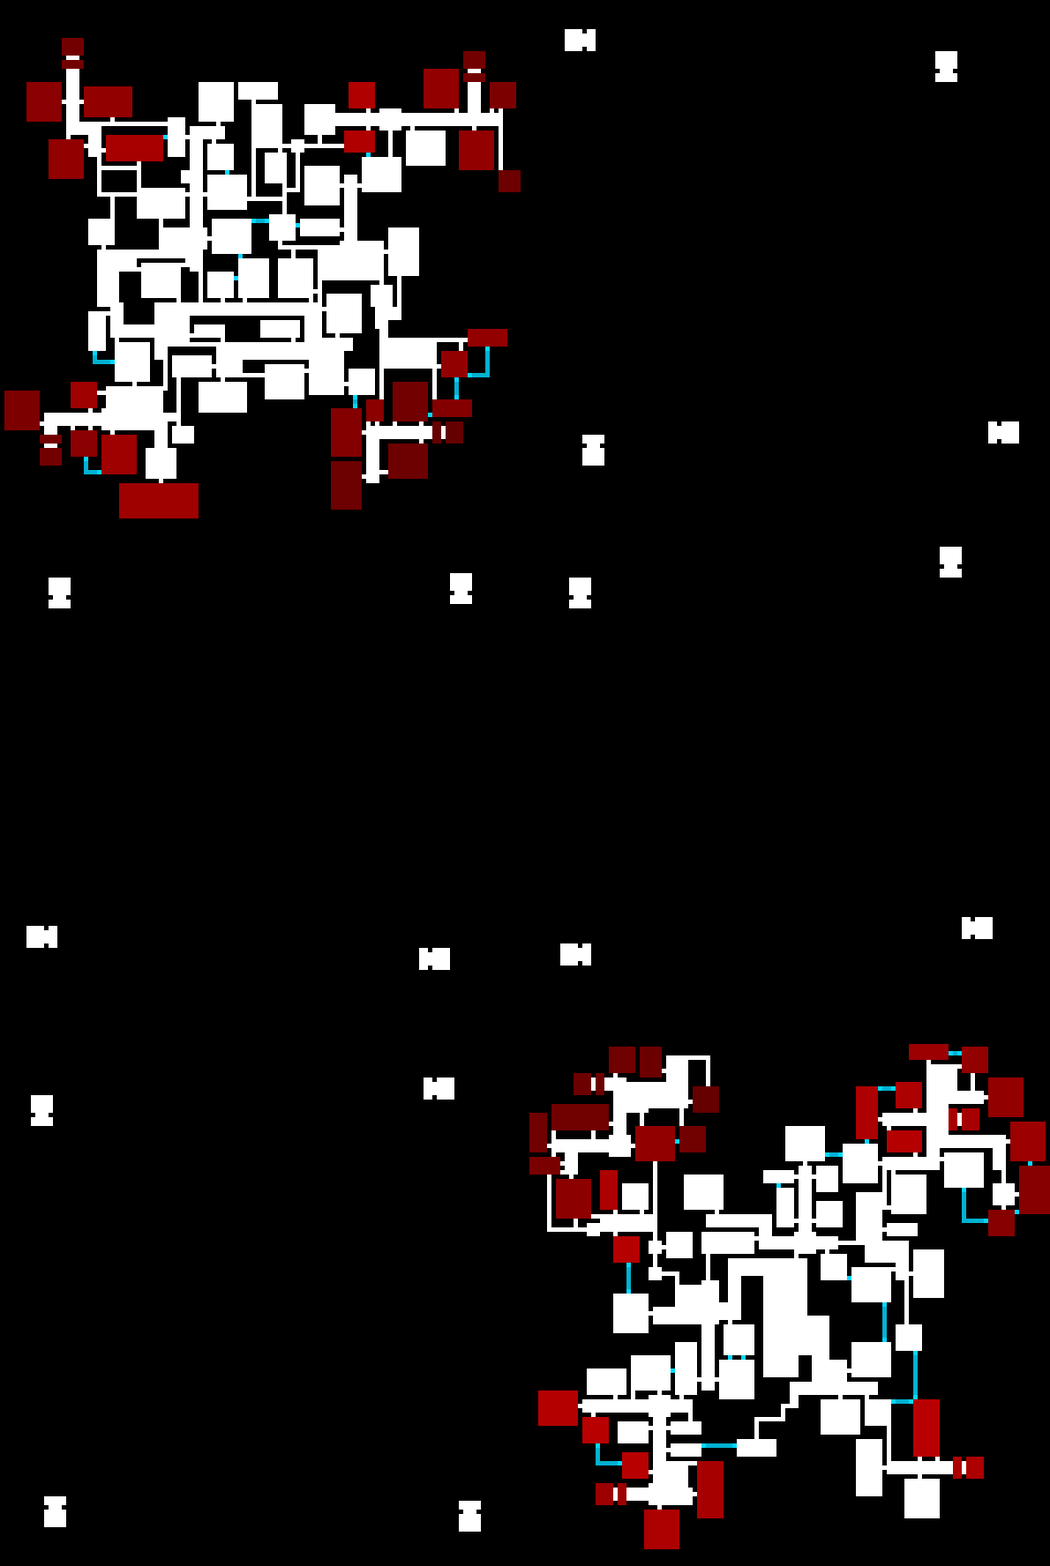
polybot7_mapgen_tests_125_cubbies

Testing generation for one layout style (each floor has multiple styles) of the 125×125 map (fourth floor).

It was during mapgen work that I made a huge change to the game’s direction: permanent upgrades. Rather than Cogmind’s evolution-based system where you simply have to reach an exit to regain core integrity and get stat boosts, the player collects random upgrade modules that provide permanent benefits like damage resistance, extra energy/matter capacity, greater accuracy or sight range, etc. This is a mechanic I really wanted to explore in P7, but it had originally been relegated to the “probably no time for that” list in the design doc. Little did I know, come the middle of the week I’d be forced to draw on this idea to balance the design.

When it came down to it, under the new mechanics map entrances and exits were very difficult to place in the same way I did for Cogmind, since P7 maps needed to be smaller, but all stat upgrades being local to a floor would mean that I no longer have to spread out the exits! Players can locate exits quickly and that’s fine, because they’ll still want to explore for more upgrades as long as they reasonably can without losing too much in the process, which is where the real challenge lies.

What’s more, obtaining these upgrades would require attacking Dispatchers (the primary source of enemies scattered across the floor), helping focus on the combat-oriented nature of the game--risk fighting for upgrades, or leave early. Collecting permanent upgrades is also simply a fun thing to do in games, despite being almost totally absent from Cogmind, so it’d be nice to experiment with that in a Cogmind-like setting.

In Cogmind, stealth/speed-based strategies emerge naturally from the mechanics because you can simply attempt to avoid (or outrun) enemies while locating exits, but that’s not possible here and now the POLYBOT-7 mechanics do so much more to reinforce combat as the main approach. Focus! Unfortunately it also meant that there would now be even more work to do when it came to content: making all the upgrades :P

Content

While I had a pretty good schedule worked out for 7DRL, fortunately that schedule also had a couple extra days built in for “balance and fun stuff,” because as it turned out I needed to reallocate all that to more pressing matters with regard to content in the middle of the week xD. My original plan was to focus mostly on giving POLYBOT-7 lots of unique mechanics while retaining many of the same items as Cogmind. But for a number of reasons that felt inappropriate, both thematically and mechanically. A better approach would be to add a whole bunch of new content as well… so I ended up crazily working through that unplanned bit mid-week. Towards the last couple days it was looking bleak and I thought I might not even finish! Apparently I ended up finding enough shortcuts to take, while just working really really fast :P

New content or not, everything had to be reworked for the new map view size. Cogmind shows up to a 50×50 area of the current map at once, and all its mechanics and content are designed assuming those dimensions. Frequently spotting, or being able to shoot (or be shot by), enemies who are off the edge of the map view and require scrolling in order to see/shoot is poor design, so it should be avoided at all costs. At the same time, having items and systems that can take maximum advantage of the available viewing area is also desirable, so you can see how central that view area is to a design.

To try to retain as much balance as possible without excessive work and testing, the simplest way to approach existing data is to take any range-related numbers and drop them by 40%, to mirror the 50-to-30 change. This was the first adjustment, to literally copy weapon range data into a spreadsheet, multiply it all by 0.6, then copy the results back :P

But the 40% reduction would also have a significant indirect effect on firing time. Earlier for the propulsion system rewrite I set the desired base movement speed to be slightly faster than once per turn, and calculated that in practice (based on total loadout mass) players would generally require anywhere from 0.75 to 2.5 turns to move one space--this was intended to keep players from moving too fast relative to the smaller map sizes. And in relation to that, again to retain a familiar balance based on experience with Cogmind, the next goal here would be to choose a firing time cost that gave enemies approximately the same number of opportunities to shoot at a fast or slow moving player as seen in Cogmind. The numbers came out as 3 turns to fire one weapon, 4.5 turns to fire a volley of two. Later testing showed that these seemed to work fine, so they weren’t tweaked at all.
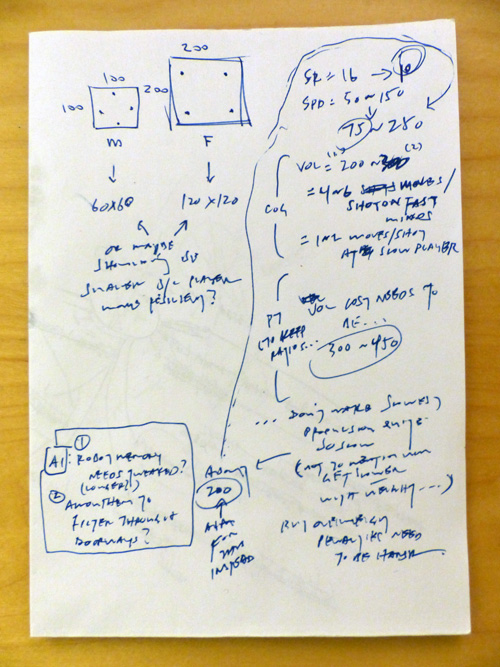
polybot7_7DRL_speed_time_notes

The few notes used to calculate movement speeds and relative volley times, sketched out during the mapgen process to ensure the map sizes would be reasonable for the target movement rates.

The item work of course involved a lot more than just ranges:

  • All (110) Cogmind propulsion items were removed and replaced with 46 new ones (although some of the names were reused, all the stats were reworked).
  • The range of power sources was simplified, removing 23 of them as well as adding a new set of 9 which most of the enemies use (instead of the regular power sources).
  • 14 upgrade modules were created (at least the behavior code for half of these was available from Cogmind, and the other half was pretty quick to add using a similar model).
  • Utilities were reworked to remove most of those with purely non-combat effects, and simplify the remaining ones to use a more basic naming scheme. In all, P7 has 182 fewer utilities than Cogmind.
  • Weapon names and progression were similarly simplified, in addition to adding 21 new weapons, most intended for use by enemies. Lots of Cogmind weapons (nearly 200) were removed, and as mentioned before, this process avoided keeping most weapons that used slower animations. One exception was the micro-nuke, the awesomeness of which many think is underemphasized in Cogmind, so I used POLYBOT-7 as a chance to give it the spotlight and make it the best launcher :D. A number of Cogmind weapons were also significantly altered to convert them into better versions of earlier weapons, and had their animations changed to match their new group, albeit recolored.
  • Overall, POLYBOT-7 has only 412 items compared to Cogmind’s 900.

Once items were done it was then time to put together robots, which are mostly defined by their items. All robots were built from scratch, but in most cases used Cogmind robots as reference templates to guide their design. The general idea is that enemy robots use inferior parts, so while the player can attach and use anything, it’s often best to avoid salvaged parts when possible (but the challenge comes when there’s a lot of salvage lying around and it fills any empty slots for you automatically! This somewhat discourages the “safe” tactic of fighting in doorways). Their power sources also come with no energy storage capacity, so the idea here is that if you rely solely on other bots for power you’ll have less reserves for supporting flexible builds.

I also gave some robots items they don’t really take advantage of but that the player might want, as a reliable way to acquire them. This is a design strategy used a lot more often in Cogmind than with P7, but there were a few cases it’s helpful. For example Aimbots carry Structural Scanners so that players have frequent access to a way to detect hidden doors--remember there are a lot more of these in POLYBOT-7! (Also thematically it does kinda make sense that Aimbots, which can attack targets through walls, might have these :P).

polybot7_7DRL_entitiy_data

Complete robot data!

Once robots were completed (see how all this progresses in a nicely orderly fashion? :D), it was finally time for Dispatchers, the focal point of much of the combat and therefore gameplay experience, including the difficulty! Dispatchers are basically Cogmind Garrisons but with different behavior (activating based on player proximity, timed dispatch of squads until destruction, and dropping modules once disabled), but being a focus of the challenge they ended up requiring a lot of balance work, especially in terms of how far away they might trigger, and how many bots they release. This is something I revisited a few times over the final couple days. Their bots do not, however always directly attack the player! That would be pretty boring, so some of them may stay to defend the Dispatcher, and others will head to the area where the Dispatcher was triggered from, but technically never seek out the player directly like some squads in Cogmind might.

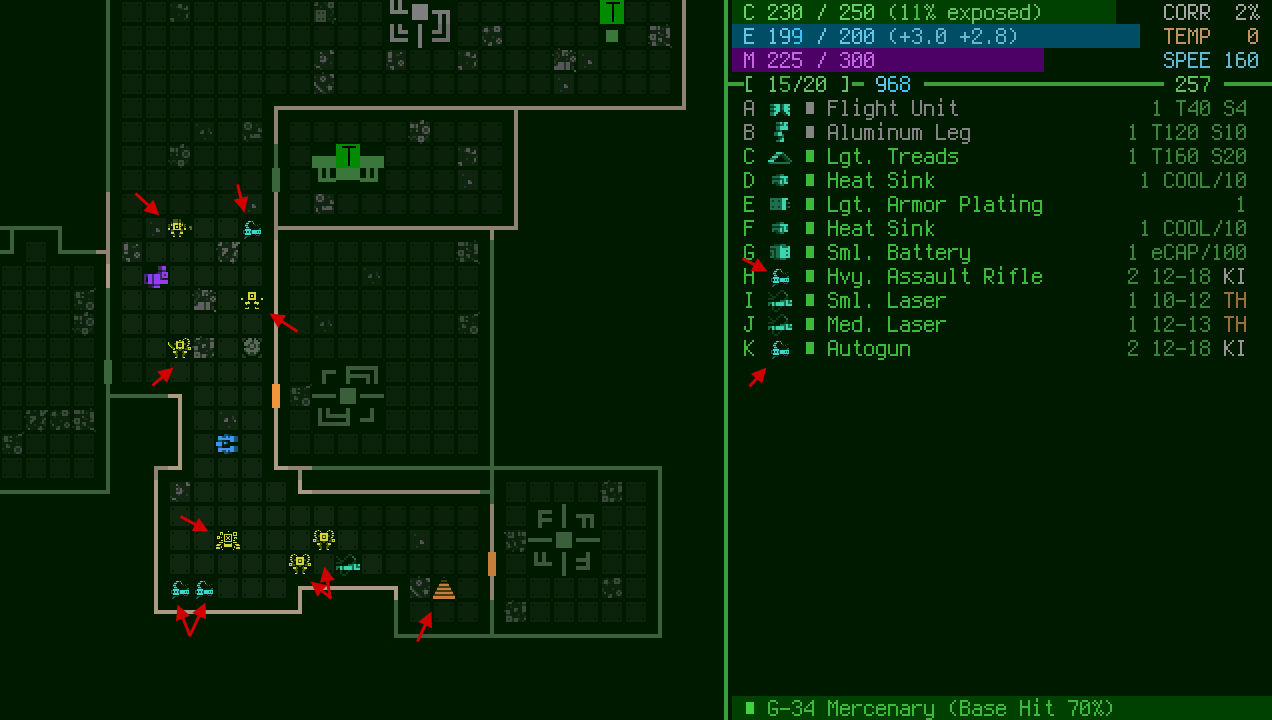
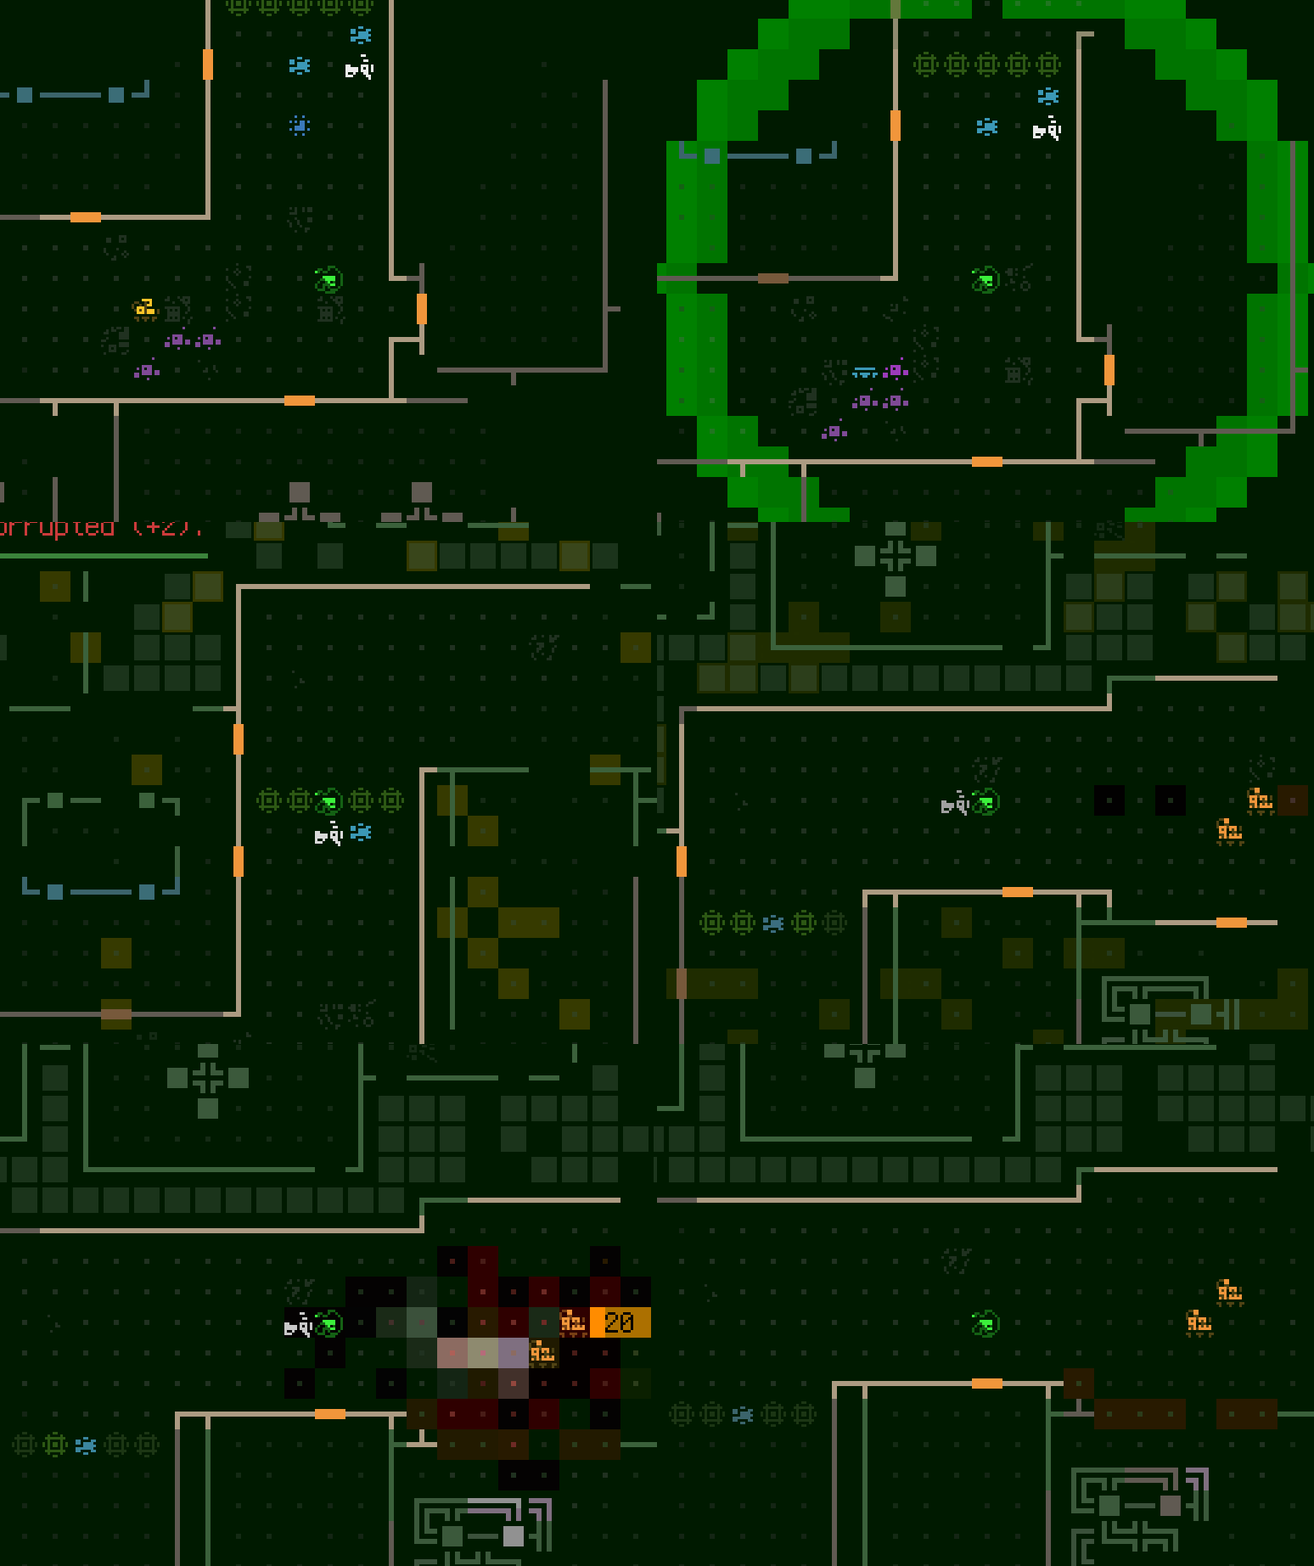
With content more or less finished, I moved on to overall map balance. This is where I’d spend time repeatedly loading random maps and looking at them in a zoomed out view to examine distribution of items, patrols, sentries, Dispatchers, etc. and tweak a lot of spawning numbers/ratios as necessary to create something close to what looked like a balanced experience.
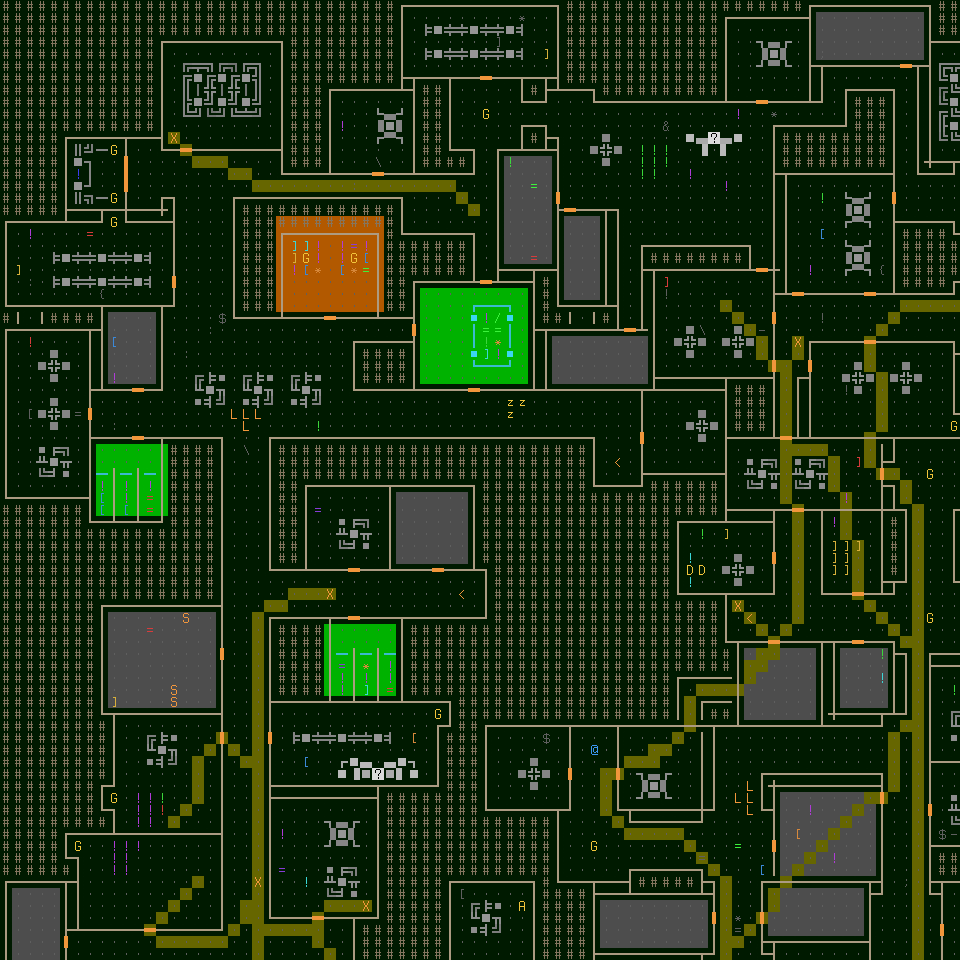
polybot7_WIP_7DRL_day6_balancing_map_content_2_paths

Examining content across a section of map, including patrol paths (the colored lines).

POLYBOT-7 was meant to be a pretty short experience, only five floors, but aside from unique map layouts I figured another relatively inexpensive way to increase replayability for those who are really into it (and play well) would be to offer a “New Game+” after winning. A number of difficulty-related variables could simply be tweaked by the number of times the player had won, and why stop at a single NG+? I decided to add up to five consecutive New Game modes, each harder than the last. Tweakable factors:

  • Number of patrols initially on a map
  • Patrol size
  • Range at which Dispatchers are triggered
  • Number of robots dispatched per group
  • Weighting for types of robots dispatched
  • Chance that a dispatch will be accompanied by a supporting Blastbot (uses missiles) or Forcebot (protects allies with force field)
  • Interval between dispatches (this was implemented but I didn’t see a need to tweak it so it remains static: 100 turns)
  • Salvage rate from destroyed robots

Other non-gameplay-related changes for NG+ runs:

  • Each has a unique name: “Alpha,” “Beta,” and so on
  • Each have their own wall color
  • The score multiplier increases with each mode, giving massive bonus points for all actions that earn points to begin with, even if a win isn’t achieved

To simplify the overall execution, I made it so that losing any NG+ run causes the player to perma-lose the streak and have to start over from the beginning with a “regular run.” Basically roguelike permadeath but for New Game win streaks. This isn’t the best design, but I was in a hurry! In hindsight it would be better to have a loss push the player back to the previous NG+ mode (assuming they’ve won more than one consecutive run already) so that not quite so much progress is lost.

Note: Sure enough one of Cogmind’s top players has already won P7’s final final final NG+++++ mode to achieve ultimate victory :D

Coming next is Part 4: Finishing Touches!
Posted in Dev Series: 7DRL Postmortem | Tagged , , , , , , , , | Leave a comment

2018 7DRL Postmortem, Part 2: First Days with UI, Aesthetics, and Mechanics

Picking up where we left off at the end of Part 1, which covered pre-7DRL preparation

UI, It Begins

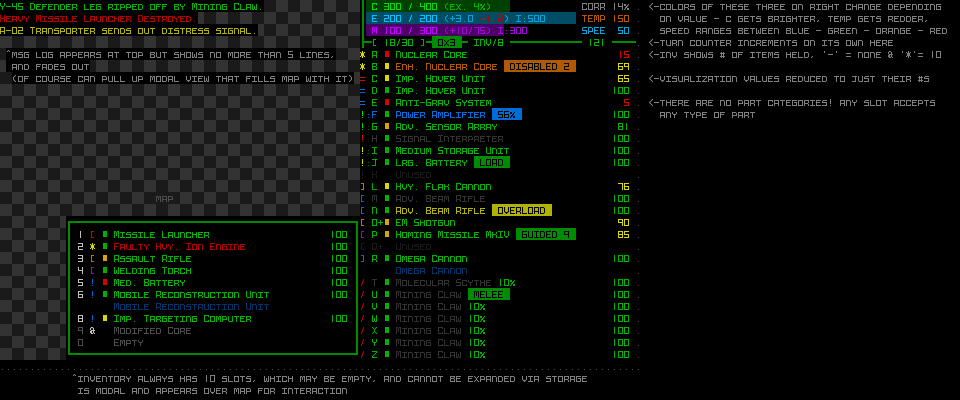
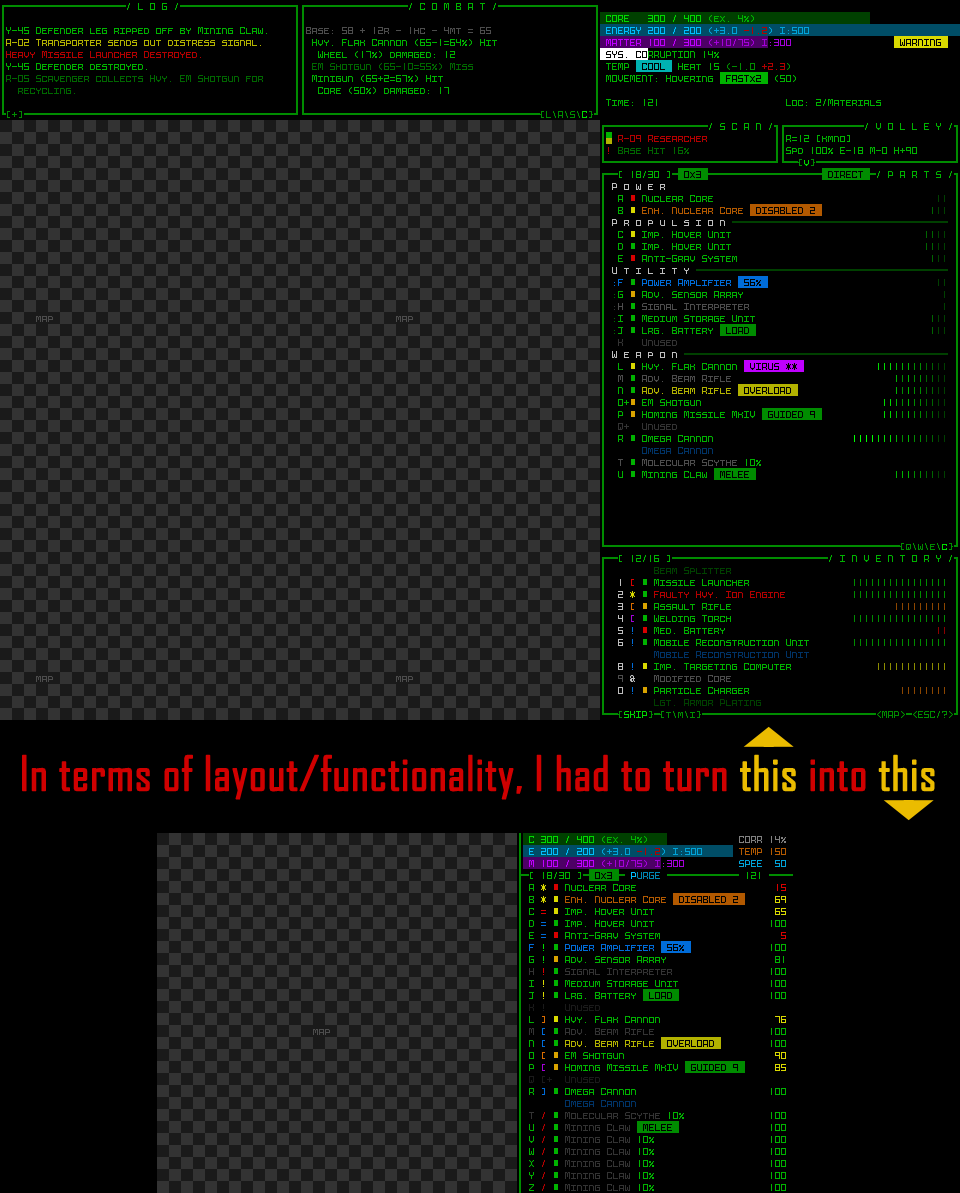
The first stretch of 7DRL week was an exercise in chopping up and reconstructing an existing UI in the most efficient way possible.

polybot7_cogmind_ui_conversion

UI-first would be the best approach, since that would enable me to work on the display with the game content (initially equivalent to Cogmind Beta 5) remaining a known variable throughout that process, speeding it up.

Now a lot of those windows in the source material are no longer needed, but as one might expect, a sprawling code base is going to have all kinds of references to them and their contents, so outright removing them and hoping for a stable game is out of the question. What did I do instead? I moved them :)

polybot7_cogmind_ui_conversion_positioning_hacks

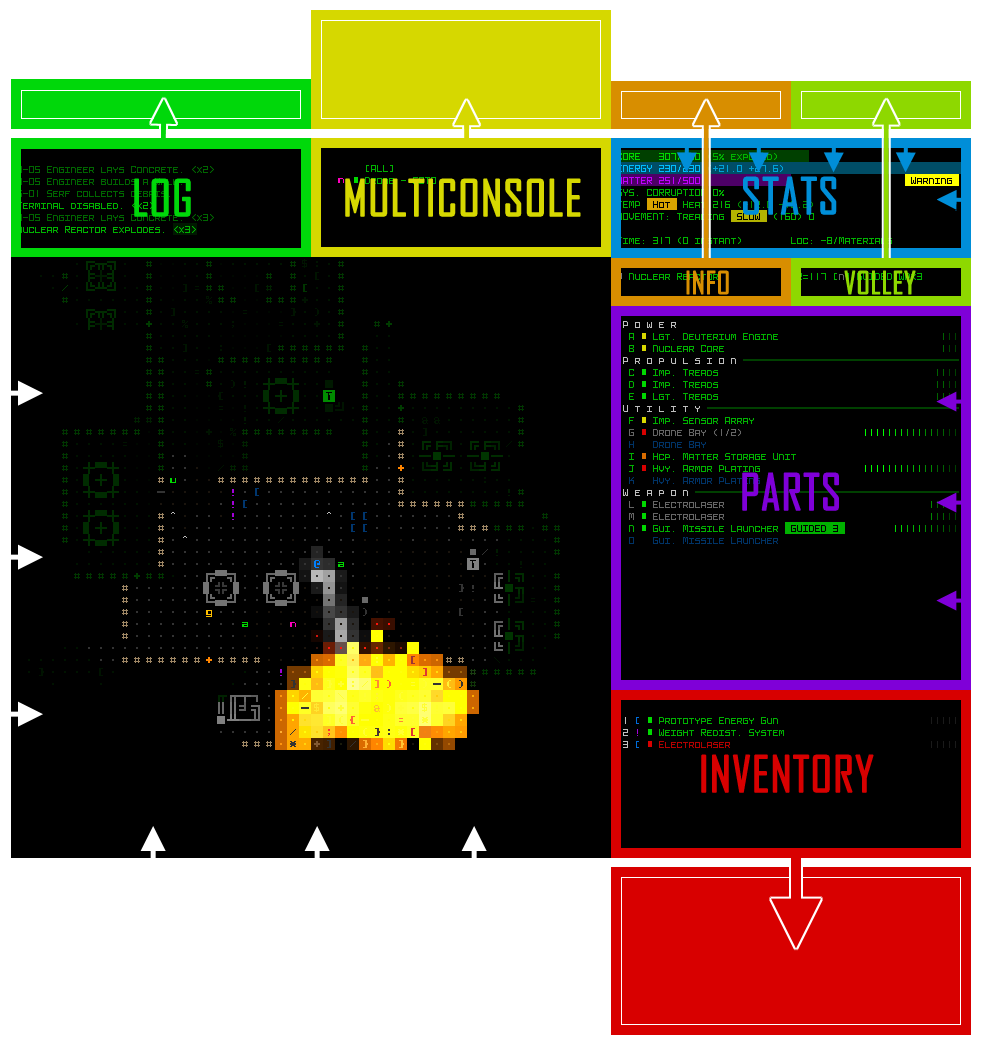
The default Cogmind UI layout, with arrows showing how consoles were either moved out of view or shrunk down for POLYBOT-7.

Hackish? Very. Easier than the alternatives? Hell yeah. I also blocked the commands that would otherwise interact with contents of those windows.

So technically while playing POYLBOT-7 there are a fair number of consoles that actually exist and are updating all the same, but aren’t drawn to the viewing area because they’re positioned off the screen.

One of the more specific interesting hacks is the message log. P7 still needs a message log but there’s no room for it to always be visible like it is in Cogmind, so two solutions were used in tandem here…

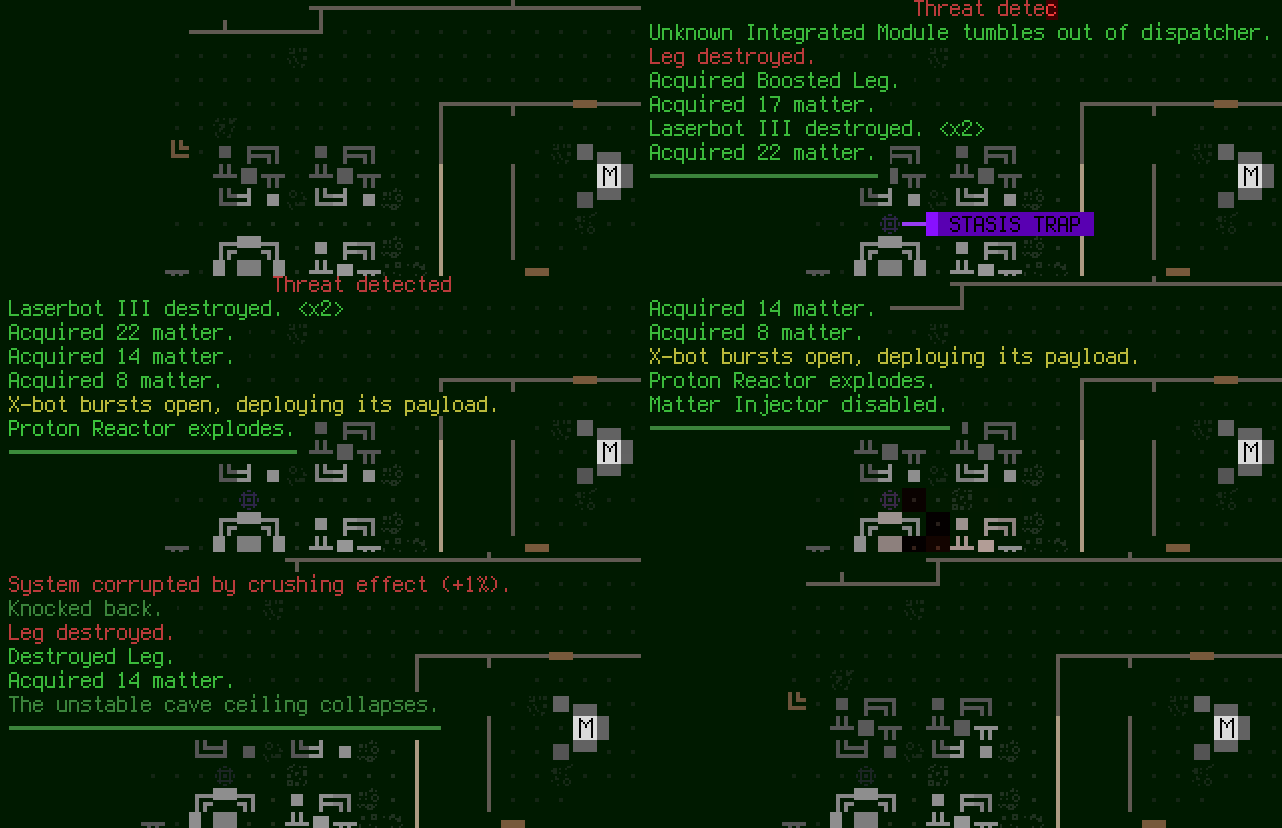
Cogmind already has a system for printing the combat log (separate from the message log) directly to the map, so I instead hooked that system up to the message log itself--bam, messages now temporarily appear over the map :). Though I did have to alter its behavior to always scroll downward, and shift older messages up, rather than the cyclical approach used in Cogmind (which I might go back and replace with this new one, not sure).

polybot7_message_log_using_updated_map_message_system

Sample log messages scrolling over top of the map.

But we can’t have messages staying there forever, covering part of the map, plus we need a way to review older messages anyway, so we still need an interface to provide that functionality.

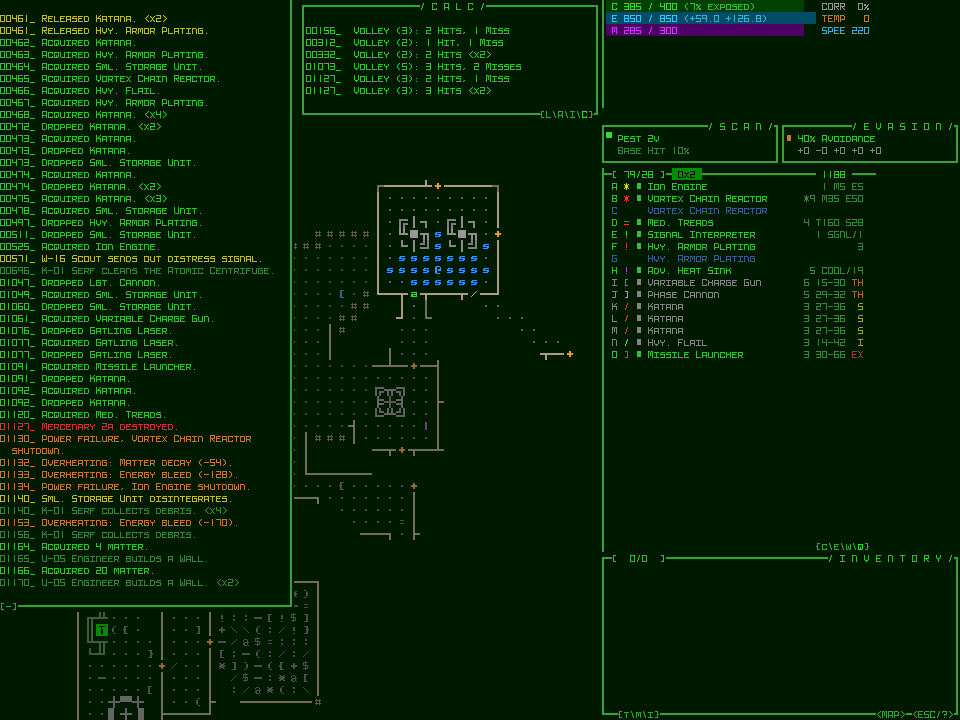
For that I came up with the idea of simply reusing Cogmind’s “full message log.” In the original, pressing F4 expands the message log to have it stretch all the way to the bottom of the screen, showing many more messages for faster parsing.

In POLYBOT-7, pressing ‘m’ both repositions the log window so that its top left corner is at (-1,-1) relative to the screen (to hide its title/borders) and expands its height so that the interior covers the map. Closing it with ‘m’ or Escape (or a click) then shrinks it again and moves it back up out of view.

Rather convenient that we allowed that dedicated message log window to continue existing off-screen, eh? :D

Here’s what progress looked like when I had only adjusted a few of the windows so far; notice how the expanded log is opening just off the screen (later I turned off the embedded turn numbers by default, since they’d waste precious log space in P7):

polybot7_cogmind_ui_conversion_message_log_hack

The message log originally spanned only half the width of the map, as in Cogmind, but I later widened it to match the map width and cover it entirely when open--may as well since there’s room and it makes messages easier to read by requiring fewer newlines!
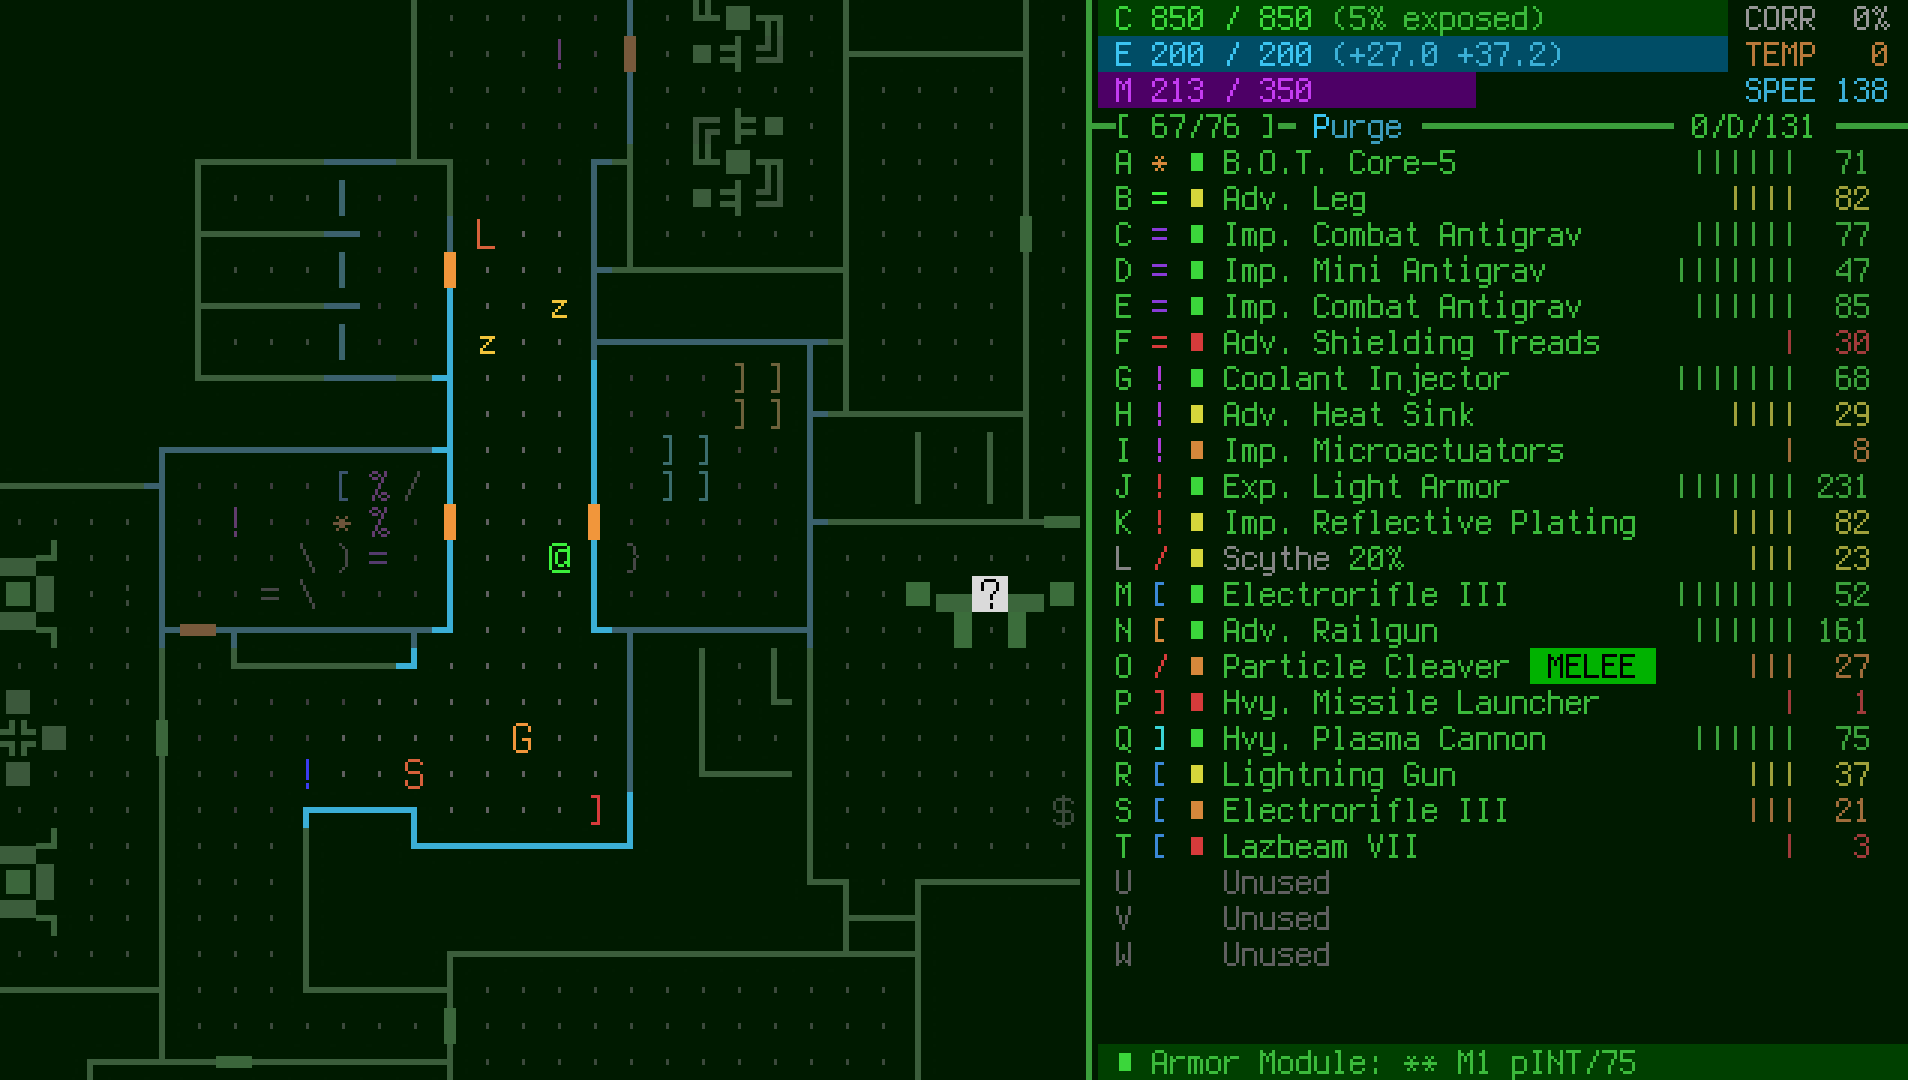
polybot7_expanded_message_log

Opening the expanded message log over the map. Note that later I decided to keep its borders visible since it looked better given the way the fonts work (otherwise letters appear right up against the edge of the screen).

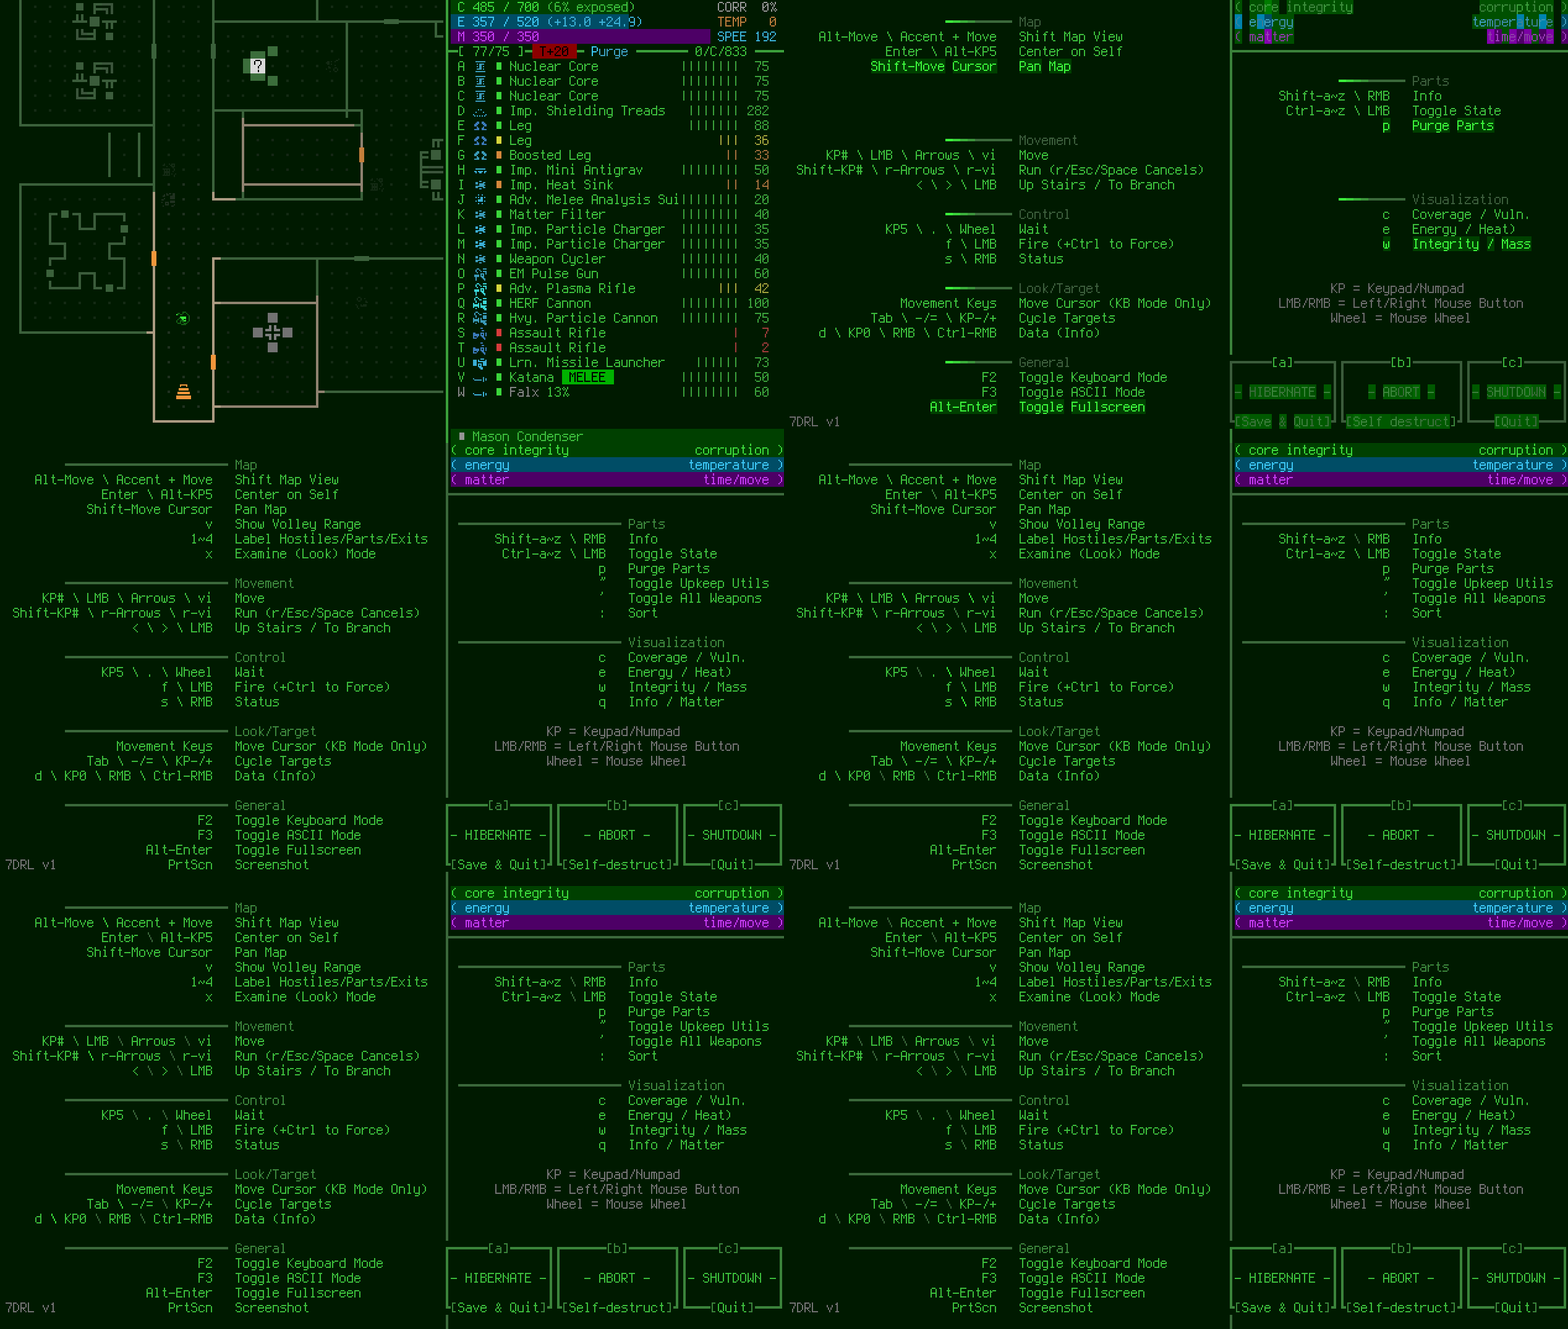
One of the last things I did before actually changing the main terminal dimensions was reorganize the help screen contents to approximately fit in what would be the target area. Here’s a shot from when I wasn’t quite done yet, but a lot of the contents are already gone:

polybot7_early_WIP_help_screen

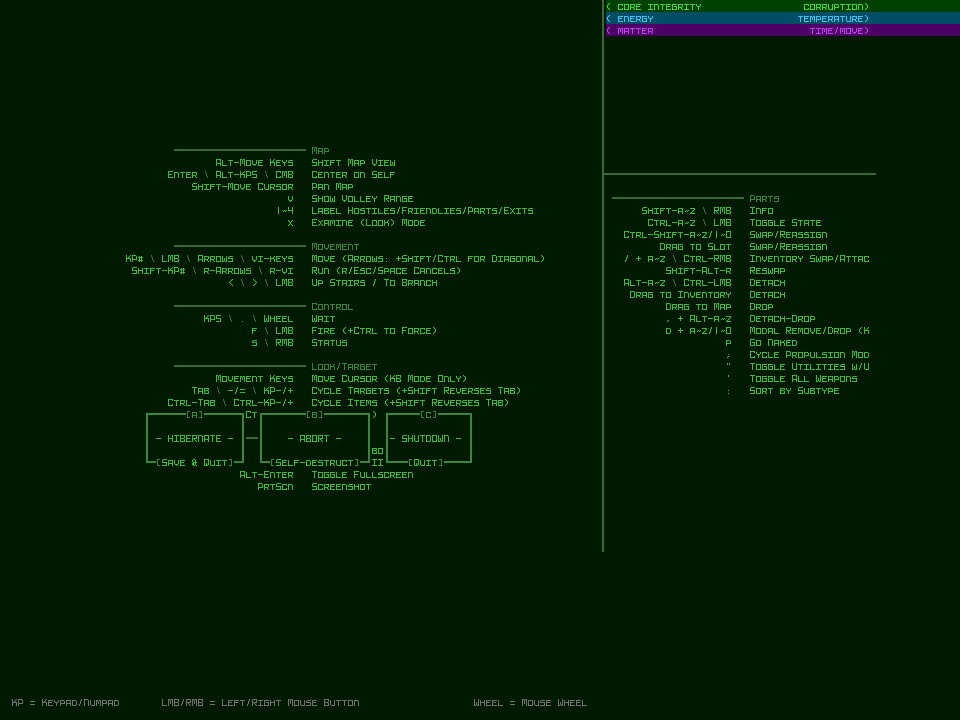
There wasn’t enough time to build an accessible options menu, but a help screen is pretty much mandatory (and not too hard) for a roguelike, plus it doubles as a game menu with the buttons there. The final version once converted to the new font and terminal dimensions:

polybot7_help_screen

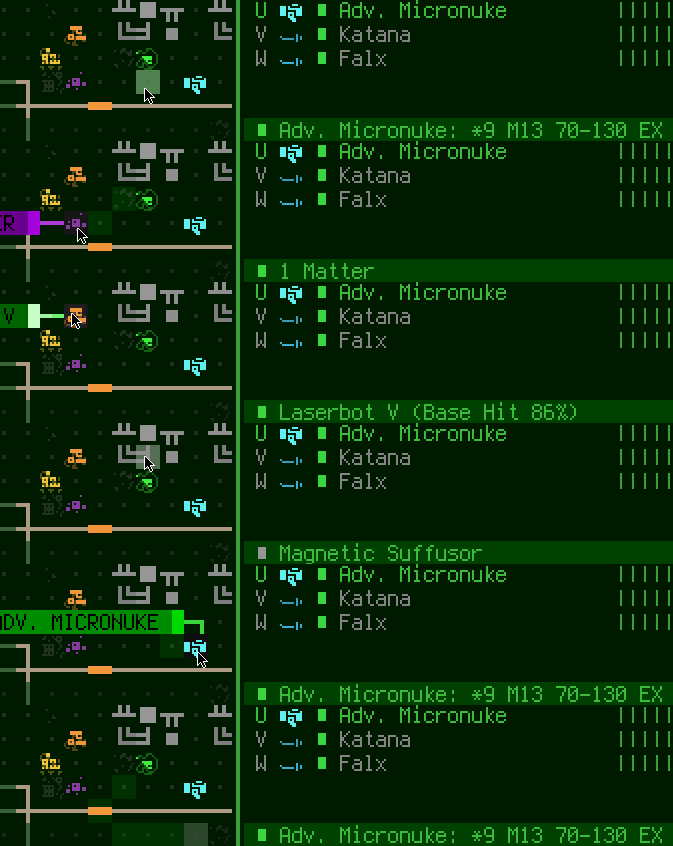
As seen in the earlier layout adjustment diagram, the “Scan” and “Volley” windows (used to get an info summary for the object under the cursor, and attack details, respectively) were both moved out of view, but the info they contain is way too useful to not have it somewhere easily accessible.

While the actual console windows are up above the top of the screen, with all their logic and rendering working normally, I have a one-line strip at the bottom of the parts list that literally reads the display output of those consoles and copies it down below :P

polybot7_info_strip

The “info strip” at the bottom of the parts list, showing summaries for different objects/states.

I didn’t add this particular interface feature right away (notice it wasn’t part of the original mockups), but later on after just a little testing realized that sacrificing a potential item slot was worth it!

polybot7_source_cparts_info_strip

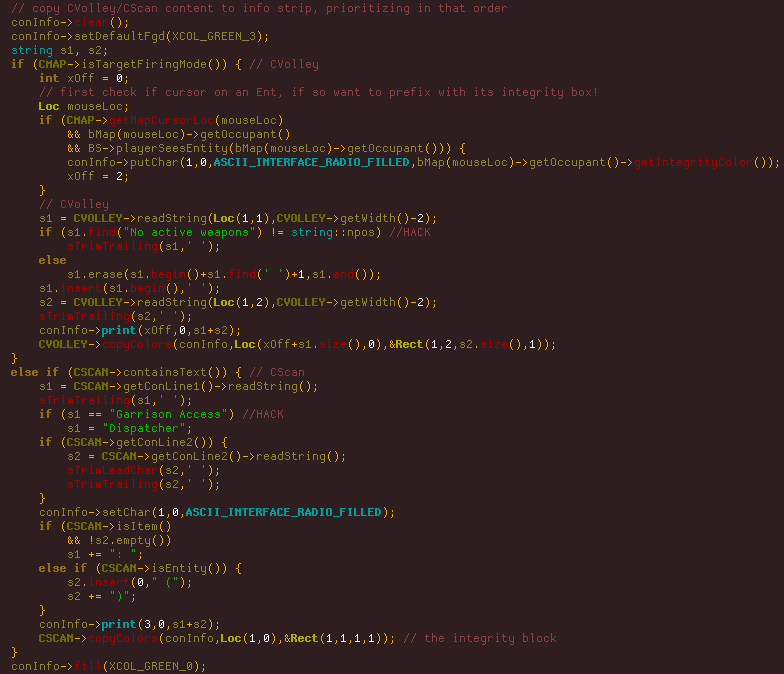
You can see the entirety of the info strip code here, a very messy, quick hack job like everything else done during the week xD. It’s copying text from other consoles and somewhat reformatting it as necessary to show in the new area.

Mechanics

After spending an initial day or two executing the UI plan, the next step was to get all the new mechanics working…

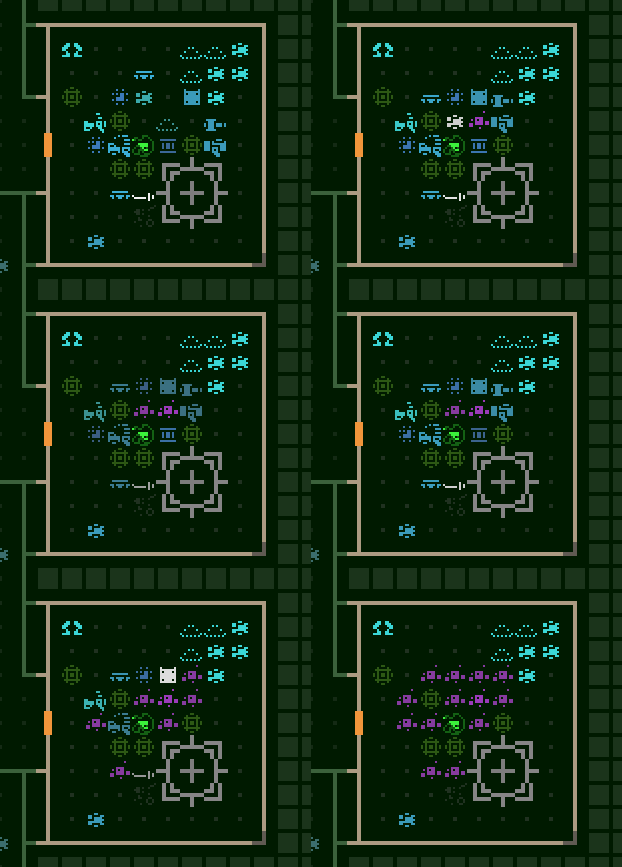
First came one of the main new features: part attraction. This wasn’t too hard to get running because for a long while now there’s been a particular special feature in Cogmind with a similar effect, so I could just adapt that code. A Dijkstra search is performed from the player’s location, finding all parts within range (4), and each uses pathfinding code to attempt to reach the player, one move per turn.

Tactical positioning was always important in Cogmind, but with this it becomes even more vital because optimal play must also take into account relevant item locations, including even potential drops from enemies which if too close might fill empty slots with inferior parts!
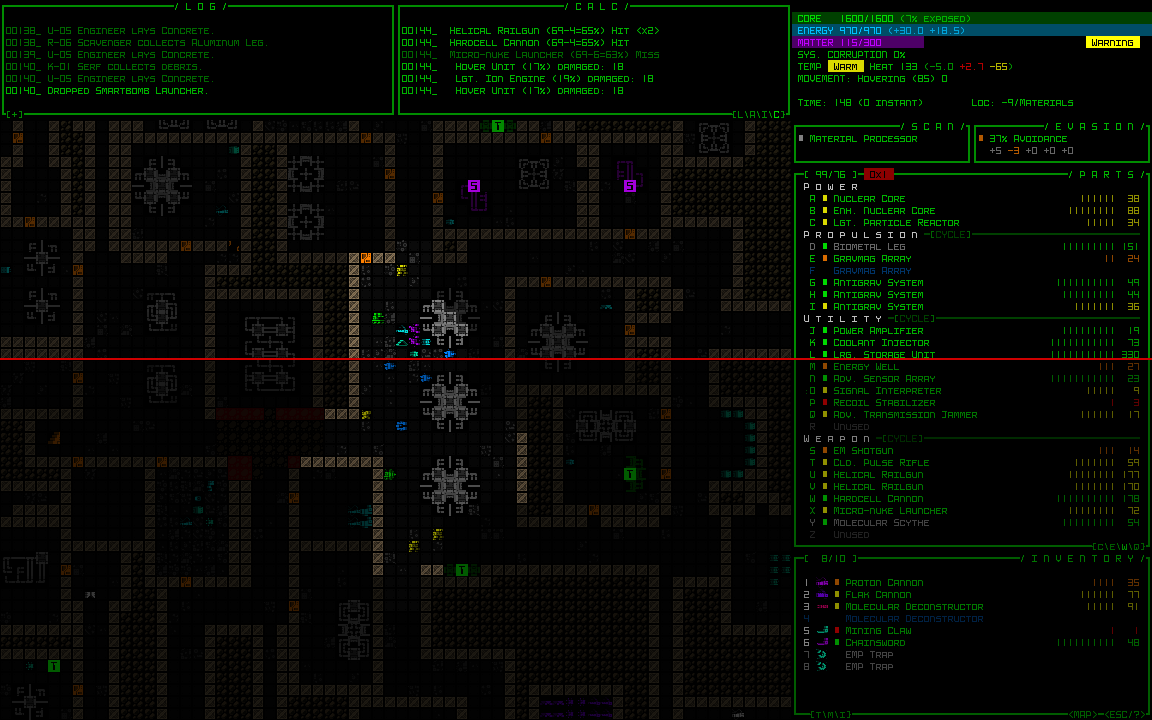
The part that attaches is randomly chosen from among those adjacent to you, making it even harder to construct a specific build if already wading through items. And parts cannot be removed individually, which would otherwise just invite boring tedium.

polybot7_attracting_parts_and_attaching

Attracting nearby parts and letting them attach.

(Note: I developed throughout the week purely in ASCII, but am demonstrating most of these features with tiles now that we have them.)

With all these items lying around (especially in the form of salvage remaining after a fight), and a lot of them going unused, there needed to be a way to get rid of all the clutter because:

  1. having a cluttered map makes finding the right item problematic
  2. given the attraction mechanics, extra clutter would make it very difficult to ever attract specific desired items
  3. there would basically always be a variety of extra parts lying around to use, making it easy to avoid having empty slots (i.e. easier to survive in general)

Cogmind has Recyclers to take care of this job by carrying salvage off to insert into Recycling Units, but there was a clear decision to use only combat-related bots in POLYBOT-7. So I again repurposed an existing Cogmind system to handle this need: item self-destruction. In Cogmind this mechanic is only used in special cases, but here it would need to be universal.

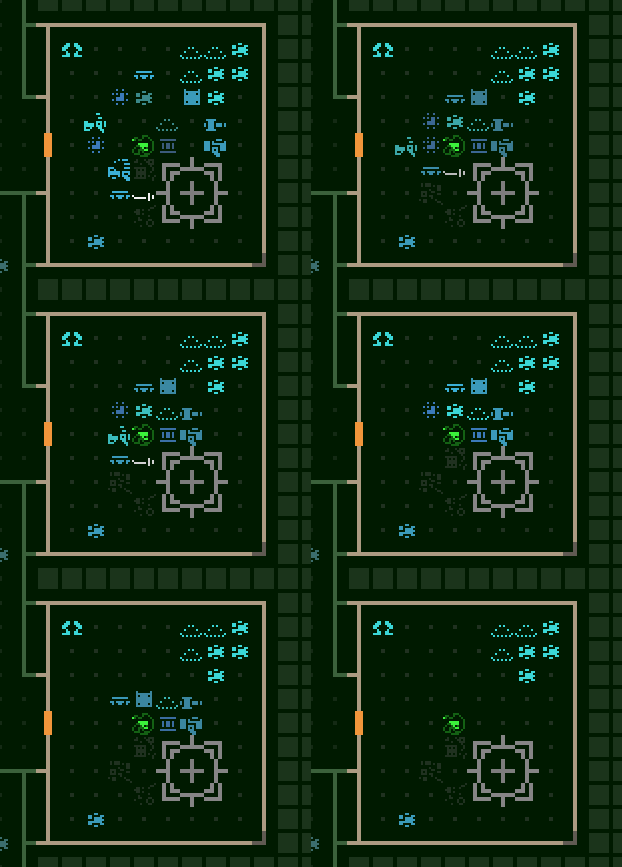
All items dropped as salvage from a robot start their own turn counter, and when their timer is up, the item destroys itself. Each leaves behind a little bit of matter, which is both useful (as ammo) and looks cool (you can still see remnants of a battle or group of parts).

polybot7_part_selfdestruction

Passing turns to demonstrate parts self-destructing because the player’s slots are full.

Obviously there still need to be good parts lying around for the player to find, so those don’t have a timer until the player starts attracting them. And to avoid allowing the player to “drag parts” around a map as backup for too long, any parts that are actively being attracted have their timers count down twice as fast.

As a bit of QoL, items glow a bit once their timer is active, and even faster if their timer is approaching zero. That system can use some improvement but I didn’t have much time and it’s only of secondary importance anyway.

Another huge strategic change to the gameplay was the removal of slot types. This took the design down the unexplored alternate route considered in 2012, which I think turned out to be really appropriate in combination with POLYBOT-7’s other new mechanics, particularly part attraction and mixed propulsion. The resulting highly flexible nature of P7 builds makes runs even more chaotic, and interesting :)

polybot7_part_sorting_ascii_and_tiles

Although there are no type headers anymore, parts are automatically sorted while also showing their ASCII/tile to the left, making it easier to quickly tell how many of a given type are currently available.

Executing this was less painful than I imagined--I mean it’s a fundamental assumption in Cogmind that slots belong to a certain type! Internally speaking, slots must still have a type, it’s just that input and display restrictions were removed or modified to ignore it. Technically every time the player gains a new slot it’s of the “weapon” type, although this is not apparent on the outside because you can fit anything in a weapon slot :P
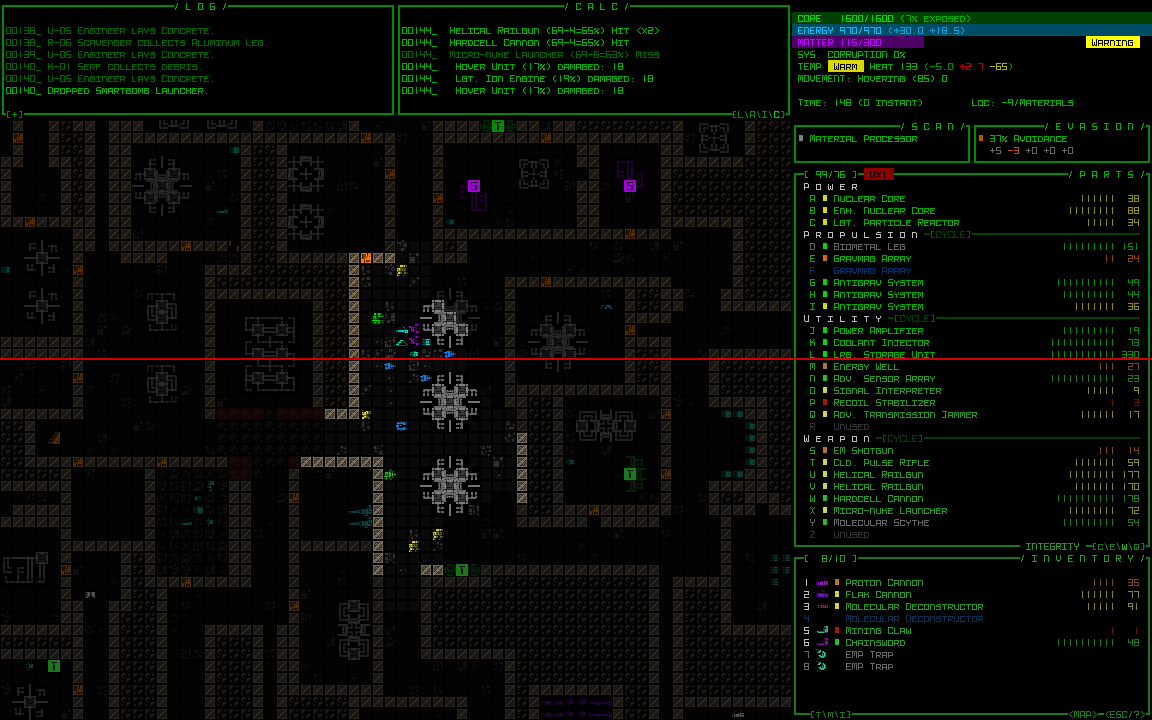
Another key to simplifying item interaction and build management was allowing multiple forms of propulsion to be mixed (unlike Cogmind where only one form can be active at a time). Simply allowing mixing was easy enough, but the whole propulsion system would become really clunky if the old mechanics were kept but multiple types could be used at the same time. There was just no way around it, the entire propulsion mechanics would have to be redesigned from scratch!

In the design doc this was originally on my list of “stuff that would be nice but I won’t have time for,” so finding out partway through the week that I really did need a new propulsion system got me worried! To be good, a system like this would likely need to go through testing and multiple iterations, thus clearly not suitable for 7DRL.

Well, what needed to happen needed to happen, so I just buckled down and rushed through the whole thing in one morning. I won’t go into the details here, other than to say that reducing the options to only three forms of propulsion really helped. (I had already intended to remove flight because it’s no longer appropriate in a combat-focused game, and wheels because they’re extraneous and wouldn’t be able to serve a niche.)

So hover retains speed without being able to provide much support, legs slow the player down a bit but provide a bit more support, and treads slow the player down even more but provide a lot of support. Conceptually it sounds more or less like Cogmind, although the math in Cogmind doesn’t allow for type mixing, and is more complex because it supports other features like overloading (removed for P7) and propulsion that increases base speed (also nonexistent in P7).

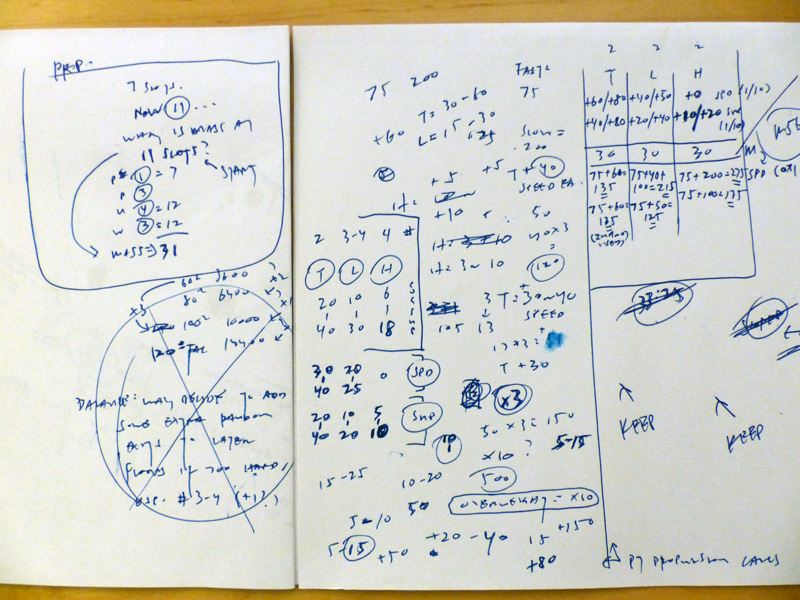
polybot7_notes_propulsion_mechanics

The extent of my propulsion implementation preparations. POLYBOT-7’s propulsion mechanics are based entirely on a bit of quick napkin math, rather than proper spreadsheet analysis and testing.

Fortunately I didn’t have to make any changes to the system at all--it seemed to pretty much balance out in practice! I didn’t even need to change any of the item data templates from which the 54 new propulsion items were derived. Whew!

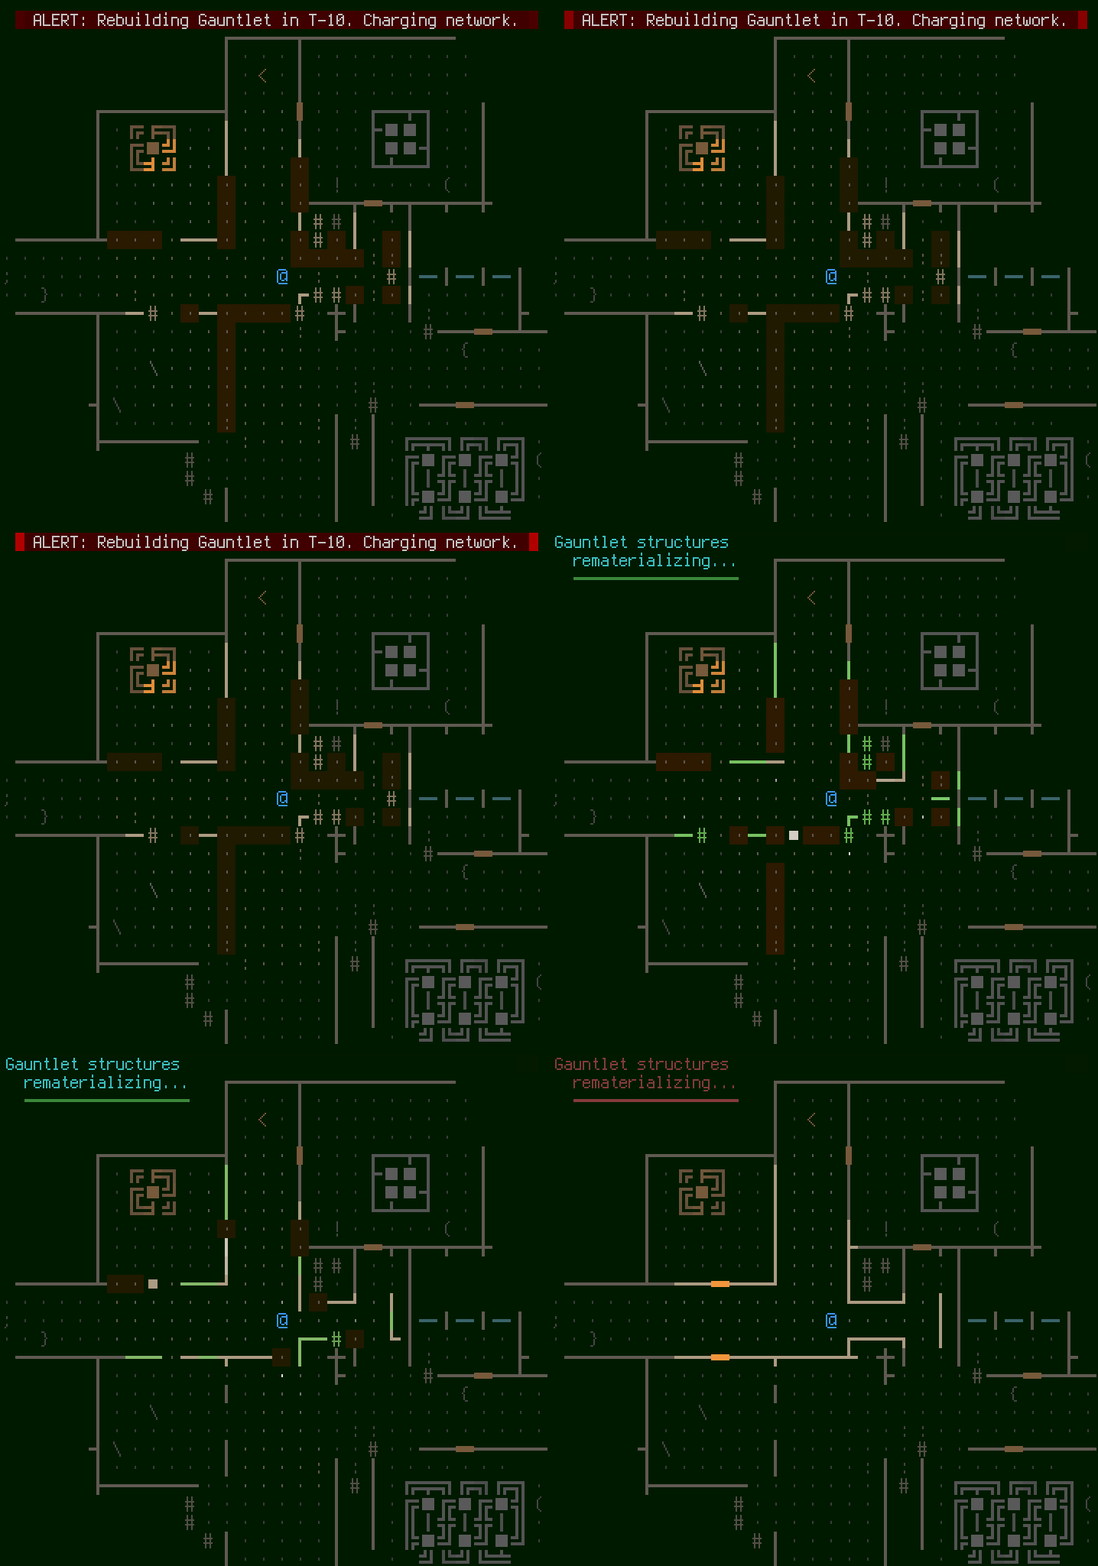
Kinda like the item clutter issue mentioned before, lack of non-combat bots would have another side effect in POLYBOT-7: there would be no Engineers to rebuild walls. Granted, this isn’t as big a problem as clutter, but rampant destruction in a fully destructible world might have some unintended consequences and I wanted to head that off. Plus it’d be cool to see the map being rebuilt, so I did that :P

polybot7_WIP_7DRL_day4_gauntlet_rebuid

“The Gauntlet” rebuilding its structure.

It would be nice if the animation were faster--it’s basically the slowest part of the game (which if you recall I wanted to be fast to play), but I was working quickly and didn’t want it to be without sfx (seeing as everything else is audible…), and the only appropriate sfx I had lying around was that long… so I matched the blocking animation length with that. At least it only actually does this if any terrain has been destroyed since the last cycle.

There’s also an announcement some turns beforehand in case players might want to react to the fact that it’s going to rebuild, for example by repositioning themselves on the other side of a wall to block pursuers/attackers. In hindsight this whole system needs a lot of work :P

Aesthetics

Earlier I mentioned the importance of finding ways to modify POLYBOT-7’s appearance to differentiate it from Cogmind. It plays very differently, so ideally its appearance should be as different as possible, too. We’ve already got the new UI dimensions, larger pixelated fonts, and color changes, but there are also a few other ways this was achieved.

Oriented line-based walls is an easy and obvious one, and it just so happens that Cogmind still includes code to apply that style (originally from the source code’s X@COM days :P). While it was easy to flip that switch, it also hasn’t been flipped on in many years so of course it wasn’t fully functional… After the bugs were fixed, it also had to take into account oriented doors, a new feature which ended up requiring some hackish code to quickly implement, and even then I didn’t quite get to perfect it (the map rebuilding system doesn’t always rebuild doors correctly xD).

polybot7_WIP_bug_doors_fixed_everything_else_broken

Oops, here’s where I finally fixed all the door issues, apparently breaking non-door tiles outside FOV in the process! Typical gamedev… A number of additional complications came from the need to also have the map memory system properly handle orientations. (About the tiles: while I normally work in ASCII I had to check that orientation worked for tiles mode, too, so I still had old Cogmind tiles in at this point.)

As a side-effect of a simple oriented walls implementation, you can get more information than one might expect regarding what’s just behind a wall, though in a robotic world this can be explained away with some logic and I left it that way to allow observant players to make inferences about the layout. I did, however, have to spend a while updating the system to ignore connections with hidden passages/doors, which would otherwise render them pointless. By the end of 7DRL there was still at least one anomaly there which would take much longer to properly address, so I didn’t do anything about it: hidden corridors connecting at the corner of a room would essentially give themselves away. The orientation system had become somewhat complicated already, and accounting for special cases like that would’ve required much more work than the simple rules I set out.

polybot7_wall_orientation_bugs

Wall orientation behaviors, for better or worse…

As you can see in the shot above, floors were also changed, using thick dots instead of full-size floor tiles. This helps the foreground tiles stand out even more, not to mention keeps a bit more of the traditional roguelike look (in 2015 Cogmind ended up going with filled floor tiles because it looked kinda different and it’s something Kacper wanted to try, which I was okay with since either approach could work anyway).

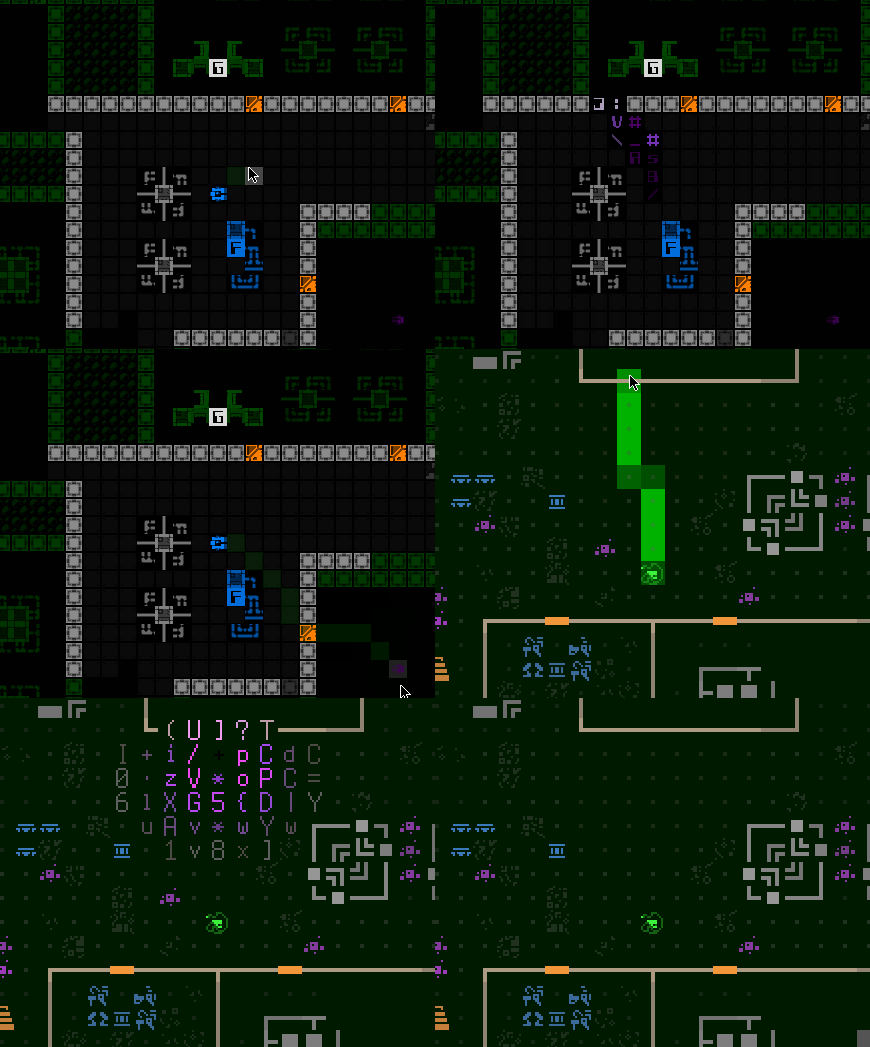
Kacper agreed to join me on the 7DRL by making a tileset, so we needed a new style for that, too. At first the thought was to give him the full 24×24 base cell size, and at the beginning of the week he put together a few concepts based on that size which were then dropped into the game to see what they looked like.

polybot7_WIP_early_tile_concepts_24x24

A shot mixing new 24×24 tileset style concepts (marked) with the new text (the rest are old tiles not converted for testing purposes). Also you can see the solid floor cells here, which were later removed.

The main issue was that I created the text by upscaling a 6×12 Terminus font (for its high readability at all required sizes), so its appearance didn’t jive with the more fine-pixeled tiles, resulting in an inconsistent look. So we thought it’d be better to go back to using 12×12 tiles and just upscale them to match the text and give the whole interface a large chunky look. I also suggested going with a pure side view, and generally as flat as possible (Kacper had already decided he wanted to work with fewer shades anyway).

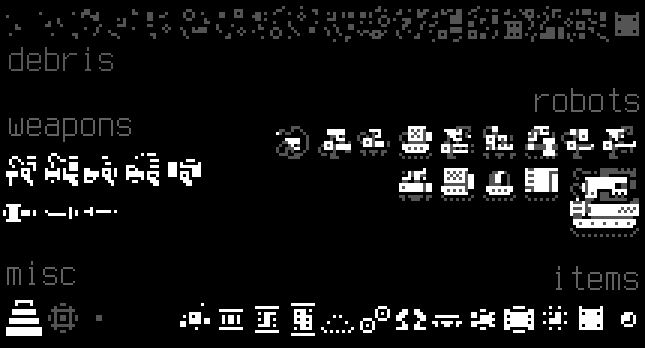
poylbot7_7DRL_tileset

POLYBOT-7 mostly-flat tileset, except for robots which use two shades.

As you can see in the final style demonstrated in the screenshot below, just like ASCII mode the tileset uses oriented doors and walls, and “earth” (filled space behind walls) was converted to a simple square. This both creates a distinctive look as well as kept the tile requirements as low as possible to make sure Kacper could finish (or at least spend more time on what was really important!).

polybot7_2018_7DRL_final_style_screenshot_768p

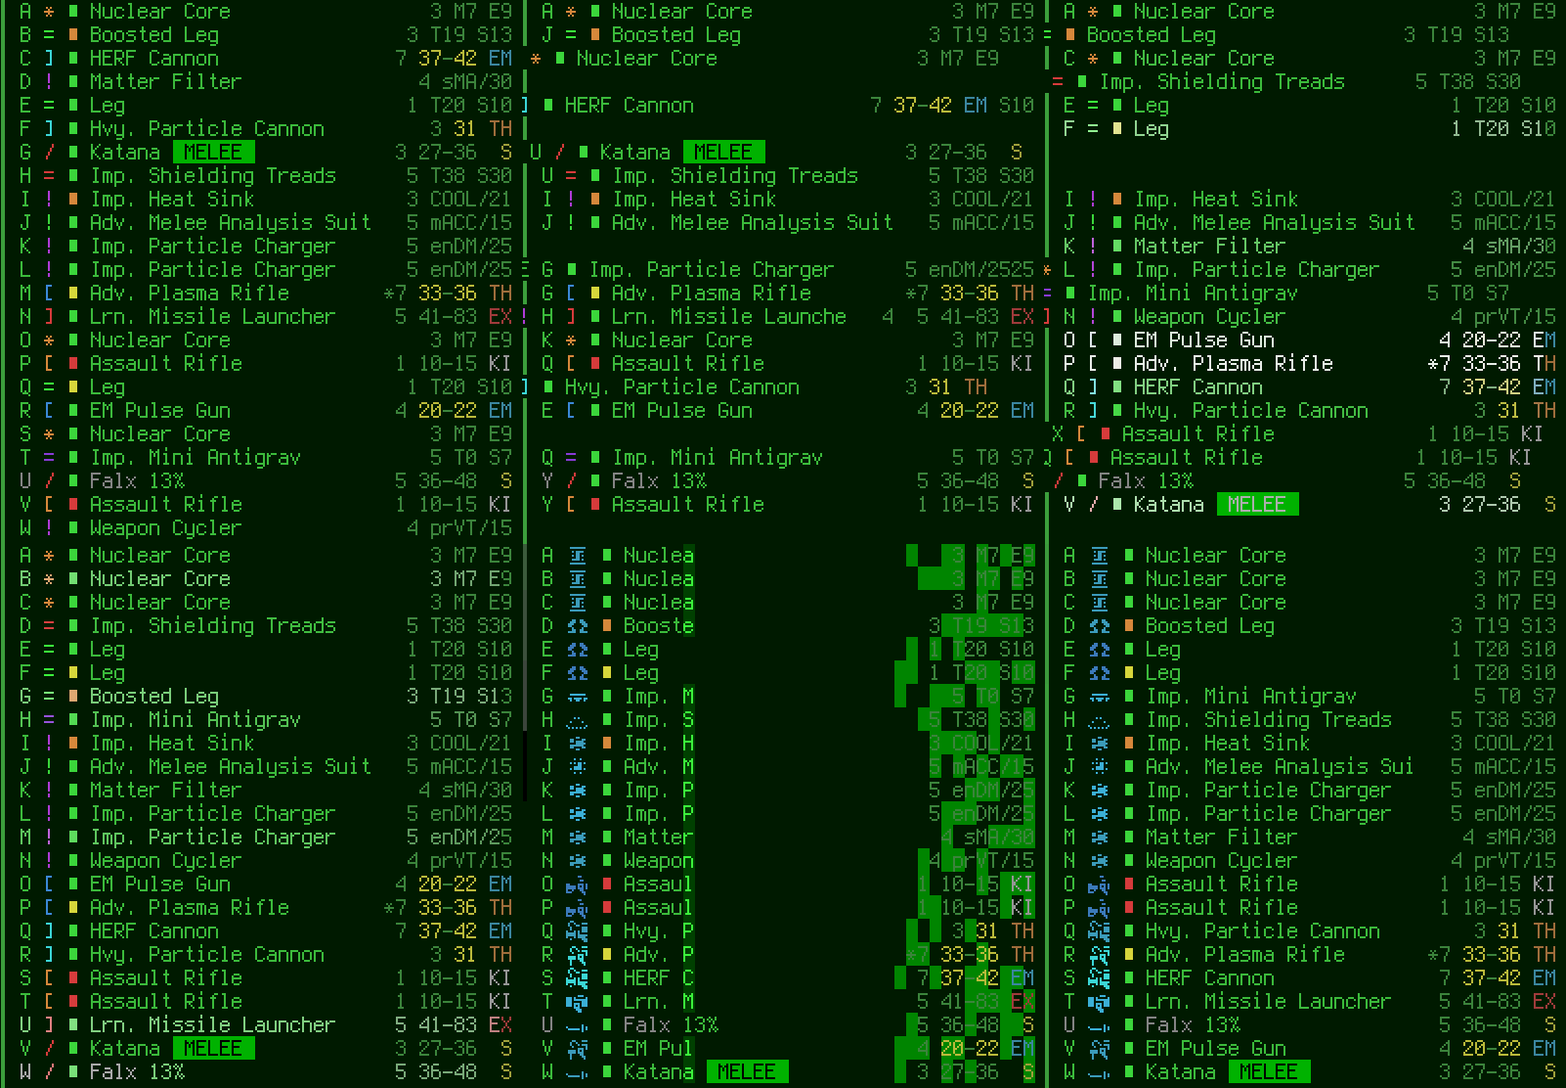
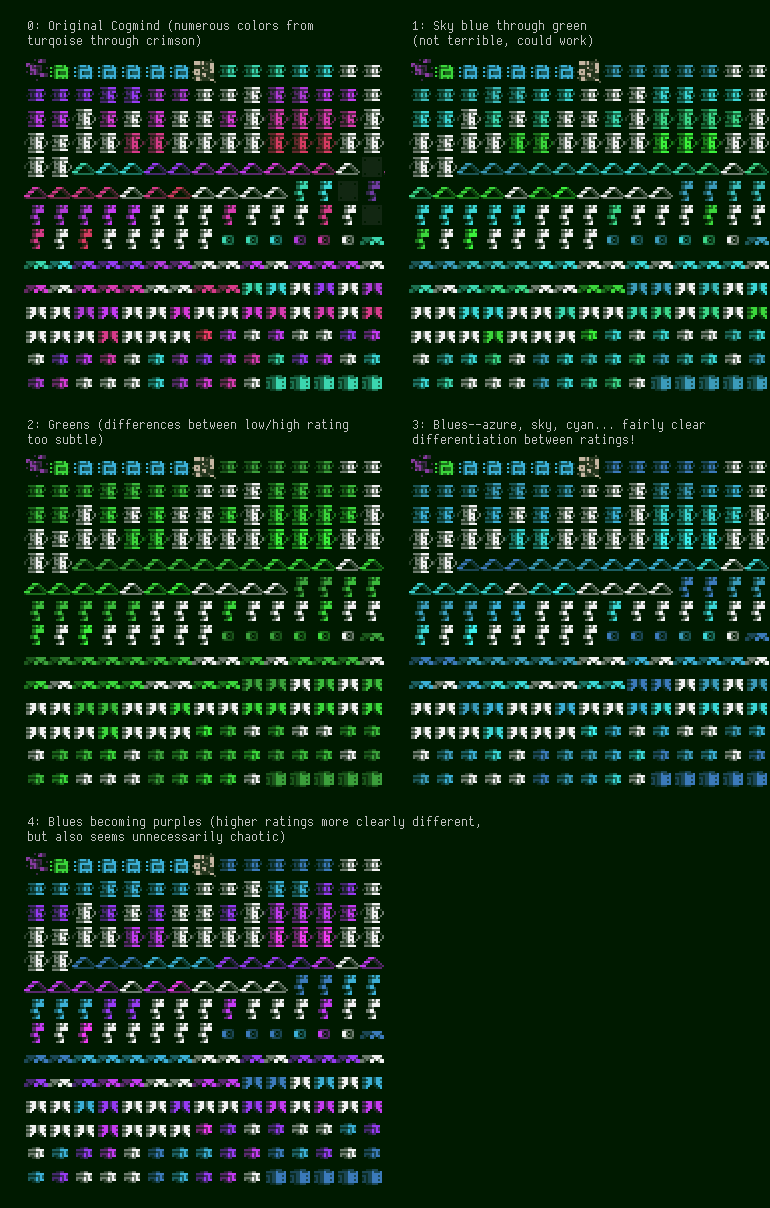
Another pretty big change was the item color scheme. I quickly tested a number of different schemes, anything that seemed like it might work or at least had its own logic to it and was worth investigating. This change in particular wasn’t necessarily aimed at differentiating from Cogmind, but more as an experiment in how to simplify the UI.

polybot7_7DRL_item_color_scheme_sandbox_tests

Quick testing of different item color schemes in the sandbox (white are unidentified objects in all cases). #3 won. (click on this to see everything more clearly).

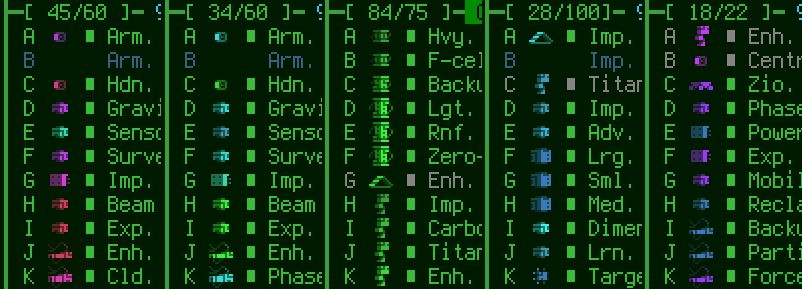
polybot7_7DRL_item_color_scheme_part_list_tests

It was equally important to compare what the schemes looked like in the parts list, where their tile would also appear and be used to get at-a-glance info regarding category, type, and approximate rating. (This is a pretty bad comparison because the contents aren’t all the same, nor is there a good distribution, but I was in a hurry!)

In the end I liked the simplicity of just blues. They aren’t used much in the interface, and go well with “UI green.” Even though it’s more or less a monochrome scheme, brighter shades of blue could still be used to represent higher rated parts so they naturally stick out more. And blues offer a nice range of associated colors, from azure to sky to cyan.

Note however that the player was originally also blue, and this could be somewhat confusing when surrounded by items so at the last minute I switched the player to green, since that color wasn’t used elsewhere on the map either (now that neutral bots were removed from Cogmind). At the same time I also changed upgrade modules to be green as well, since they’re 1) very important compared to everything else on the map and 2) unique to the player character so using the same color for both makes some sense.

Coming next is Part 3: Spending Too Long on Map Generation and Content!

Posted in Dev Series: 7DRL Postmortem | Tagged , , , , , , , | Leave a comment

2018 7DRL Postmortem, Part 1: Preparation

March 4~11… what a crazy, crazy week.

It wasn’t as bad as I thought it might be based on my first experience back in 2012 (this time I actually slept a good 7~8 hours each night!), likely because I’m a lot more knowledgeable than I was back then, and have lots more tools at my disposal. Still, the desire to create something awesome had me putting easily over 80* hours of work into POLYBOT-7, my entry for this year’s Seven-Day Roguelike Challenge. (*This is during the week only--excludes all pre-7DRL preparation!)

The rate of problems and solutions flying through my brain throughout the week was pretty overwhelming. Tiring sometimes, but at the same time exciting to try to find hacks that could manage so many features and content in such a short period. So. many. hacks. The technical debt is real! I was cringing as I wrote much of the code, but had little choice--take the fastest route possible or risk failure. For the first few days I was doing a slightly cleaner job of it, but with the deadline looming I started getting really crazy as the week progressed.

This project was also a little tough at times because my years of “normal” roguelike work have conditioned me to write about absolutely everything I’m doing or planning, and thinking it through to make the best decision possible. I had to get over that tendency and just do stuff--don’t write about it, do it now! Had to keep reminding myself that all week :P

This is my in-depth postmortem covering POLYBOT-7’s development, examining both the process as a whole and the reasoning behind choices made along the way.

The Concept--What and Why?

For 7DRL I originally had slightly lesser ambitions. The goal was simply going to be a “Cogmind demake,” with emphasis on stripping down my main project to create a purely combat-focused roguelike where much of the work involved would be converting the interface to a new condensed layout featuring less information but double-sized fonts and tiles. It would be something I could point people to when they’re interested in Cogmind’s general theme or style but don’t have a large enough display to enjoy it. This version of the concept was dubbed “Bigmind” :)

After thinking on it for a while it started to feel kind of boring, though. This is 7DRL! It should be about experimentation and interesting new roguelikes!

I had to get more radical, and just about the time I was thinking this I was also skimming my notes for upcoming Cogmind features, one of which happened to be a top secret “Katamari Challenge Mode” I wanted to release with a big Challenges update later this year--basically the player would act as a magnet for nearby items.

This suddenly seemed like a great core mechanic to build into the 7DRL, not to mention the ideal design would require a ton of other changes to go along with it, essentially creating a significantly different game within the same world. A 7DRL could do much more justice to this idea than a simple Challenge Mode, so this became the new direction.

Altogether the proposed changes greatly altered the Cogmind experience, and you can read a list of features similar to and different from that game in the original announcement post, though I’ll speak about a few of them in more detail later.

There are of course also a few other reasons why I chose Cogmind as a starting point to begin with, not least of all because doing so would mean I wouldn’t have to do quite as much planning and preparation, and could instead have more time to focus purely on developing any gameplay or content rather than fundamentals. Without a doubt POLYBOT-7 is a better game for it.

One of the best ways to tackle 7DRL is by reigning in scope, but another of the best ways is to base your idea on an existing game or at least a well-developed engine or framework. I’m deeply familiar with the source for my games and engine after working with them for many years, and not having to reinvent the wheel here is good because I’m actually not that great with technical stuff--in fact I’m quite slow so that’s not something I’d want to deal with under a strict time limit.

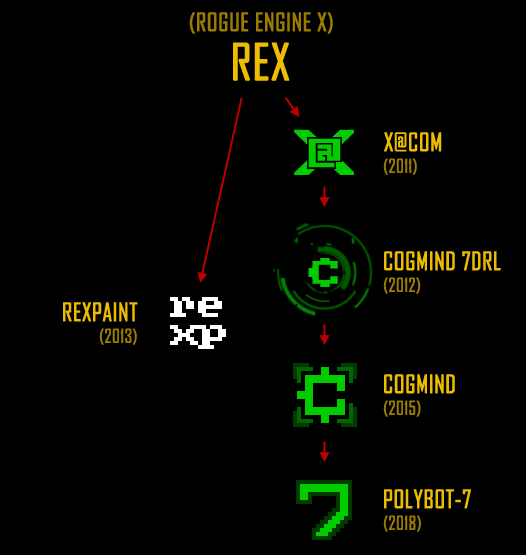
project_source_evolution_REX_through_polybot_2011-2018

The source code from my earlier projects has been spawning newer projects over the years. I rarely start projects from scratch, just modify things :P

(That said, remember that 7DRL can be used for whatever you want, so maybe the goal isn’t to finish an awesome game but simply build an engine, or start that new framework you’ve always wanted to.)

Things weren’t all that rosy, however! Part of why I did worse this year than I could have is that I didn’t have nearly as concrete a design ready for me at the beginning of the week. Back in 2012, prior to starting my 7DRL I’d already figured out everything--all the math, formulas, and data ranges checked out, it was just a case of putting it to code and ASCII. For POLYBOT-7 I had basic plans laid out, but many details were lacking, and that’s a problem because emerging details can pretty easily cause a domino effect throughout a design. And they did :P. I ended up having to make some big changes and additions to accommodate adjustments to systems I hadn’t fully thought through before.

The biggest drawback though was spending more of the week than I’d like to thinking rather than doing. For maximum efficiency, 7DRL week should be about doing, not thinking (coming up with a good design can take a lot longer than a week, most importantly because ideas generally need an incubation period to see if they stand the test of time or maybe there’s a better approach to something). Anyway, I just barely made up for it by relying on a lot of adrenaline-fueled hacks on the coding part :)

Pre-7DRL

7DRL prep really starts a fair bit before the week itself. I went through several design docs starting back in January, occasionally opening up the latest one to make additions, then when it got a bit messy or I wanted to make a significant change in direction I’d reorganize everything in a fresh doc to get a good overview of the design state. Back in 2012 I had a lot of free time for this sort of thing, though, whereas this year I was pretty busy with Cogmind dev and other stuff, so didn’t have as much design time as I would’ve liked. I went into 7DRL with a technically complete high-level design doc, though given more time I would’ve refined it much further.

Before the 7DRL I also wrote the release announcements for both this blog and itch.io :P. I’m actually a fairly slow writer and knew there wouldn’t be time to prepare good release announcements during/at the end of the week. I did end up having to make a few modifications later based on changes to the design, but for the most part it stayed intact, all I had to do later was put together some quick screenshots. Plus this was also a good opportunity to familiarize myself with itch.io, which I’d never used before and it would be funny to somehow screw up releasing the 7DRL when it was already done!

I even designed a probable cover image before the week started, using an old unused Cogmind tileset style as a placeholder:

polybot7_box_art_style_test

Pre-release placeholder box art.

This made it easier to quickly create box art for POLYBOT-7 at the end of the week once Kacper completed the tileset. You can see the similarities :)

polybot_box_cover

Final box art!

UI

In addition to design docs, I also spent a little time in REXPaint doing UI mockups. The initial focus was making sure I could fit everything I needed into a 106×30 grid, and I tested this early because I knew the restrictions would probably impact the mechanics.

This first mockup got thrown out really fast :P

polybot7_ui_mockup_1_hud

UI mockup #1 (HUD only)

The vertical bars are way too cryptic and not all that readable, while also leaving no space for any extra related numbers. Then I realized I could give myself room above the parts list by removing the four headers/lines used purely for separating the types. I could add the ASCII/tile for each part right next to each row anyway, and they’re automatically sorted, so there’s no strong need for those headers. So next came the first serious mockup (with notes), although as you can see below it’s a pretty bad idea to have the item ASCII covering the left UI divider! (I tried that as an experiment to save as much horizontal UI space as possible)

polybot7_ui_mockup_2

UI mockup #2

It was also important to consider ways to adjust the overall appearance to create something as distinct from Cogmind as possible. One of the easiest ways to do that is with color, so of course my first thought (and Kacper’s, separately :P) was to move away from green and try out a different main UI color, specifically orange. Gold on black is a cool theme, as you can see in this inspiring DynaHack screenshot.

dynahack_composite_screenshot_sample

Sample screenshot of DynaHack with a modified color scheme.

I explored the idea in REXPaint, but unfortunately from an overall UX perspective orange really isn’t all that suitable given POLYBOT-7’s mechanics. Like Cogmind of course item destruction is a major feature, and the whole color scheme is geared towards green being “good” while other effects and states use their own logical colors. In most cases anything not green probably deserves closer attention. This also preserves the standard “green -> yellow -> orange -> red” progression for damage indicators and labels, a theme applied consistently across many parts of the interface. Changing the main color would mess with that intuition and make the UI at least somewhat harder to parse.

So with four extra lines at the top, a decent final HUD mockup was born:

polybot7_ui_mockup_3_hud_final

UI mockup #3 (HUD only, final)

I made some other adjustments later, but we’ll get to that. In any case, once a REXPaint mockup lays everything out as clearly as it does, implementation is fairly straightforward so having this ready beforehand was very useful.

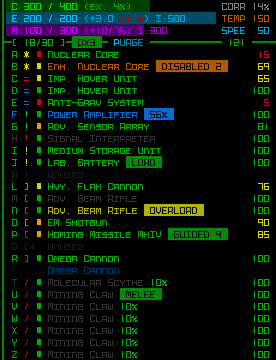
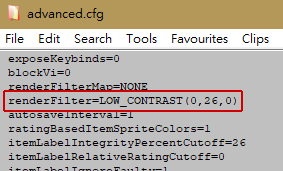
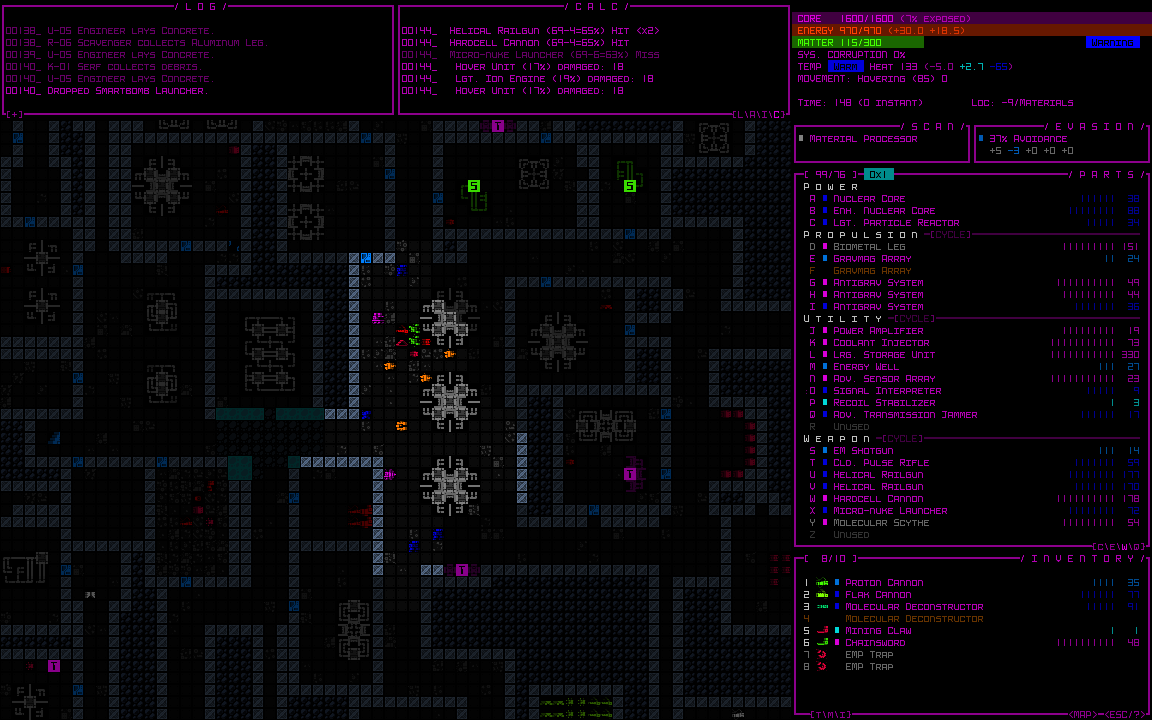
Also with regard to color, I decided that rather than once again going for the same old high-contrast black background style, I’d switch over to a low-contrast theme that relies on a slightly darker foreground on top of a slightly brighter background. Late last year I added “render filters” to my engine (described earlier on the blog), which make enabling a low-contrast look as simple as changing a config setting. At the time I didn’t know I’d end up using it here--the system was just meant to provide Cogmind players with a way to tweak their interface, but it sure came in handy!

polybot7_advanced_config_low_contrast

That line in the config file is what keeps the foreground from being too bright, while also adding a green tint to the entire background.

However, the low-contrast filter itself is a pretty big hack, and as one might expect, Cogmind having been designed all these years with the assumption that the background is black meant that the mode doesn’t always look perfect in combination with the animations. While there certainly wouldn’t be time to update the huge number of particles used for weapons, I could at least get the UI looking better. These changes were all made to Cogmind (which benefited in several ways from this 7DRL :D), something I wanted to do eventually but in this case moved up to before the 7DRL.

There were basically two types of issues to resolve: either forcing a background meant to be black even in low-contrast mode, or modifying animations to lerp from a given color to the desired background color rather than assuming black.

cogmind_low_contrast_UI_animation_fix_optical_array

An example of the latter case, notice how before the fix the animation lerps to black rather than the proper color (effectively going to black before snapping back to the right color), and looks much better (as intended) after it knows the proper target color in the first place.

Fonts were also something I thought about a lot before starting. I wanted something simple--both in terms of appearance and implementation, so I went with Terminus for both the text and map, because it’s a nice and readable pixel-perfect monospace font available at pretty much all sizes. But because I didn’t want to have to provide a massive range of sizes like I do with Cogmind (it takes forever :P), instead of allowing the map view (and HUD) to expand vertically it is locked at 30 rows. The width is still variable, resulting in letterboxing on some displays. This is a much prettier option than scaling, in any case, allowing both text and tiles to retain their pixel-perfect look, straight from the bitmap.

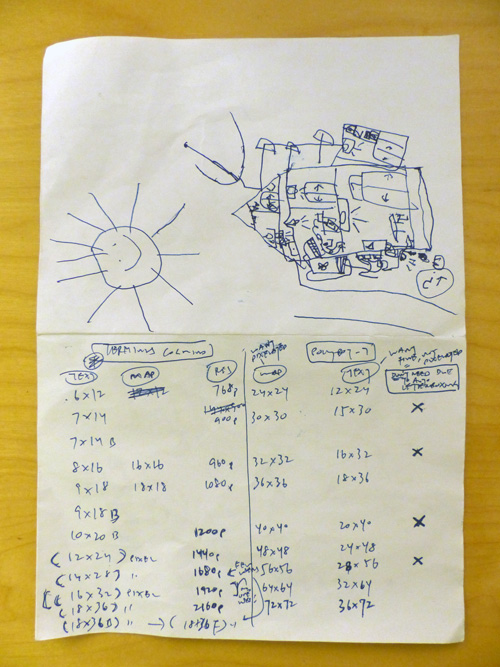
It also means the entire range of resolutions can be pretty well supported with only four different sizes, all created from a single base size. With a base square map tile size of 12×12, a 768p resolution uses a 24×24 font (simply created via 12*2), by far the most common 1080p resolution uses a 36×36 font (12*3), and beyond that there are also size 48 (12*4, 1440p) and 72 (12*6, 2160p). Text uses half-width cells that also need four sizes, based on base dimensions of 6×12.

polybot7_notes_resolution_and_fonts

Some of my pre-7DRL notes. I carry folded pieces of paper in my pocket while out and about to jot down ideas, and my son decided he wanted to borrow this one and draw on the back while bored :)

Gameplay Design

The main goal of the design was to create a quick, very coffeebreak-length Cogmind-ish experience, so everything revolved around that. There should be fewer decisions involved in a normal playthrough, and thus many systems or interactions would need to be removed. And not just systems but even weapons’ visual effects, which are blocking and therefore can slow down the player. With that in mind, during the week I wanted to tweak any slower animations, or outright remove most weapons that relied on them.

polybot7_accelerated_EMP_effect

Comparing Cogmind’s EMP animation with the faster one in POLYBOT-7. (EMPs in particular I wanted to keep for mechanical reasons, so those had to be sped up.)

Another huge decision-saving move was to completely remove the inventory, though it took some time to come to this conclusion. Notice the inventory in mockup #2 above, which was at first envisioned as a modal window that would allow collection of parts to then attach at will. Time-consuming! Even with all the supporting automation features it provides, one of the more time-consuming aspects of Cogmind is inventory management, and I thought it’d be great to limit that. So the next thought was perhaps an ordered “queue” of parts that would be attached next after you lose some, but even that seemed too complex for what I wanted to be a simple, focused game.

It dawned on me that there really wasn’t a strong need for an inventory at all--basically the world was going to be the player’s “inventory,” facilitated by the already established ability to quickly attract surrounding parts. This would be both simple and have lots of interesting implications for play.

Once attached, parts cannot be individually removed because that would make it essentially pointless to automatically attach parts, with players just removing those they don’t want while others are nearby (more tedium!). So aside from losing one to destruction (a slow and unreliable method), there needed to be a different way. Enter another key part of the plan: the “Purge” mechanic.

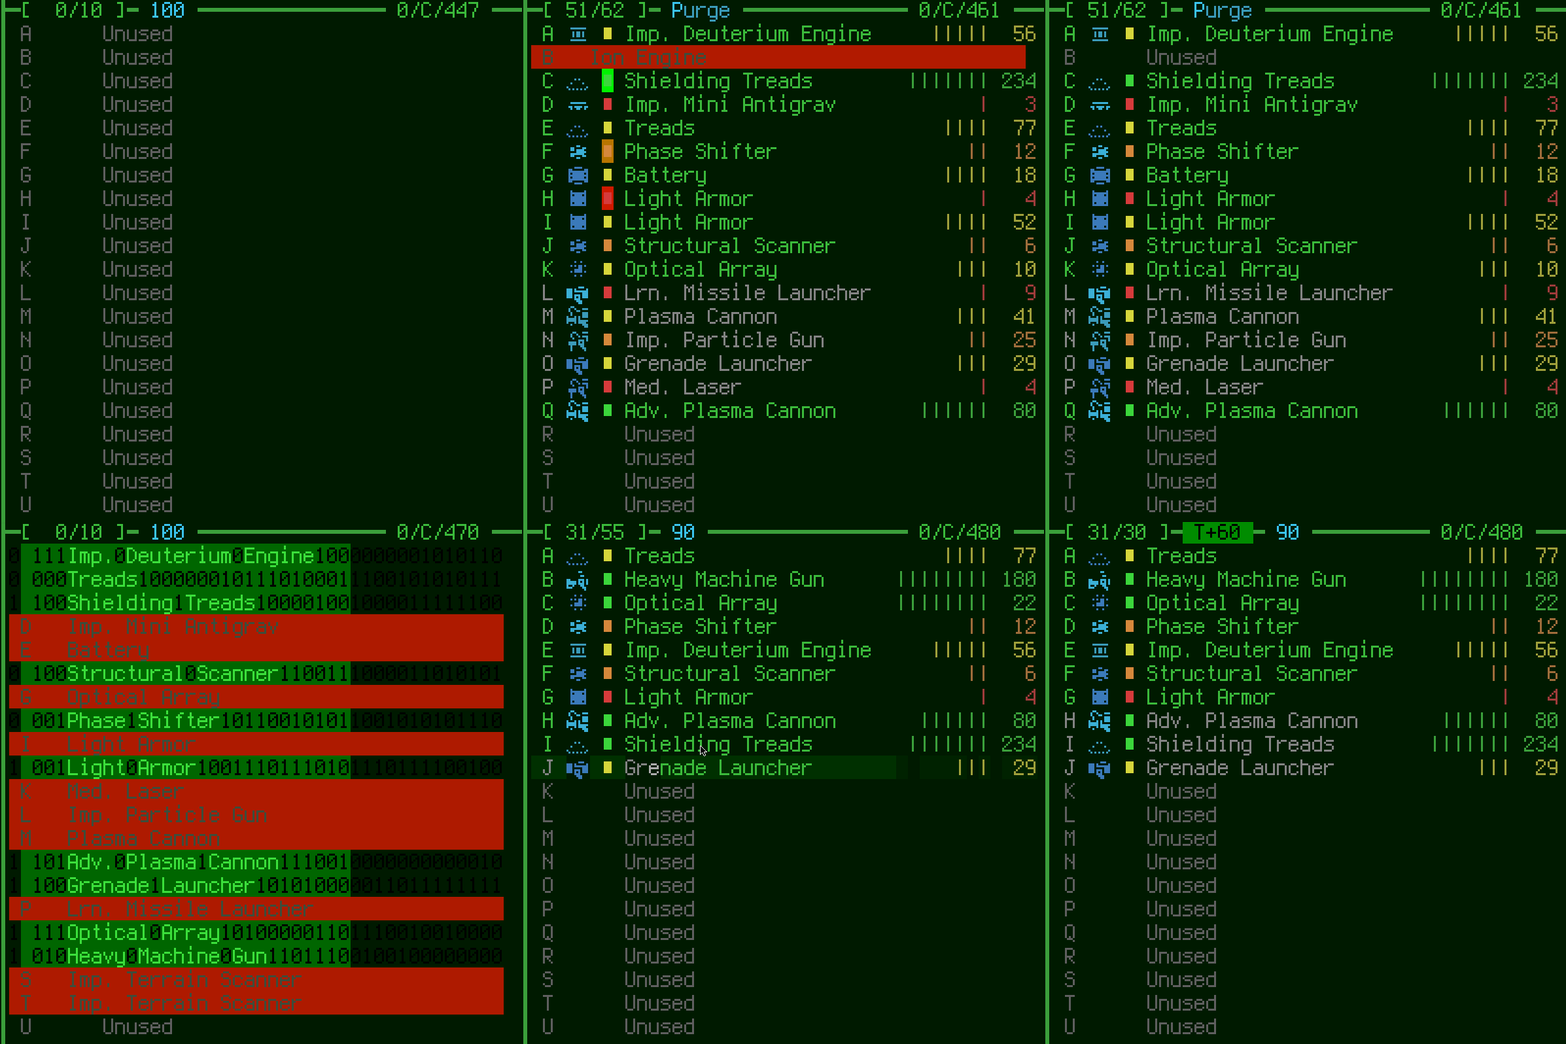
Cogmind already has a “go naked” command that destroys all attached parts to allow for a quick getaway in certain emergencies, and it seemed like repurposing this for POLYBOT-7 would make it a much better game. Instead of destroying all parts, it could destroy a random half of them and drop the other half, allowing the possibility of keeping some potentially good parts while also not requiring that there be a massive number of parts nearby to return to full slot usage. This mechanic would allow players to “shuffle” their build if 1) it became totally imbalanced and unusable or 2) they found some really good/better items that they want to take advantage of right away.

From talking with Cogmind players (I introduced the general plan to them the week before), it became obvious that allowing unlimited Purging wasn’t going to work and could easily be gamed, so I decided to have it charge up before each use, achieved by draining some of the player’s energy in the meantime. This could be interesting because it would be ready faster if you had more power, but also make the player weaker for a while after a Purge, forcing you to seriously consider your situation before taking this action. I’ll talk more about this later, because there were issues and that’s not how it works now :P

I’ll also talk about other unique mechanics when we cover what actually happened during the week, starting with the next section :)

This post is the first in a four-part series. Subsequent parts will dive into the following topics:

Posted in Dev Series: 7DRL Postmortem | Tagged , , , , , | Leave a comment

POLYBOT-7, a 2018 7DRL

Back in 2012 I made a 7DRL by stripping down X@COM to create the original Cogmind prototype. Now, six years later, I’ve ripped Cogmind apart and put it back together as something else for yet another 7DRL :)

I’ve always wanted to build more roguelikes, and the annual 7DRL challenge is a great opportunity to do just that, but in the years after 2012 the torturous hours I put myself through that week to make Cogmind a reality were still too fresh in mind. While that feeling faded as the years went by and I became eager to participate again, then I got way too busy with work and had to repeatedly pass, despite several false starts that died in the design doc phase. This year the stars aligned and it was about time to finally revisit the event that drove me to create a game which has since become my full-time job and taken over my life :P

Today, following a week of blood, sweat, and ASCII, I present POLYBOT-7!

polybot_box_cover

POLYBOT-7 is purely about scrapping together a robot on the fly to take on other robots. And while that sounds sorta like Cogmind, this 7DRL is instead hyperfocused on tactical combat in a coffee break package. To create it, Cogmind’s hacking, intel, allies, factions, ecosystems, NPCs, events, lore, expansive world and much more, are all gone, as are the many UI elements required to support them. There is only

Destroy. Rebuild. Adapt. The world is your inventory.

All the core combat mechanics are inherited from Cogmind (as of the latest version, Beta 5+), but the surrounding systems, and therefore much of the gameplay, have changed significantly…

  • You now automatically attract nearby parts and attach them when you have empty slots
  • Builds are even more free-form, since there are no type restrictions on slots!
  • Redesigned movement mechanics mean you can now combine multiple forms of propulsion, though flight was removed as part of the purge of non-combat options
  • Part management is greatly simplified, since there is no inventory at all and you not only don’t have to but can’t remove individual parts
  • All salvage (and other free items once you’ve neared them) destroy themselves after a period of time
  • You start more powerful, with 11 slots
  • The world is smaller, only 5 floors (although maps are still quite large, and if you win there is New Game+!)
  • There is no slot evolution between floors--you can skip to the next floor whenever you find an exit, but you can only gain extra slots by finding items on the current floor, so skipping ahead will leave you weaker later!
  • You also find permanent upgrades by destroying Dispatchers, machines that are activated and spit out robots as you near them
  • All robots are hostile--if it moves, you probably want to either shoot it, reposition, or run
  • There are fewer robot and item types than found in Cogmind (though also many new ones)
  • Weapon ranges, sight ranges, speeds, etc. were all reduced to fit the new UI dimensions, making it possible to still see everything that’s going on, though maps might feel a bit more “cramped” as a result

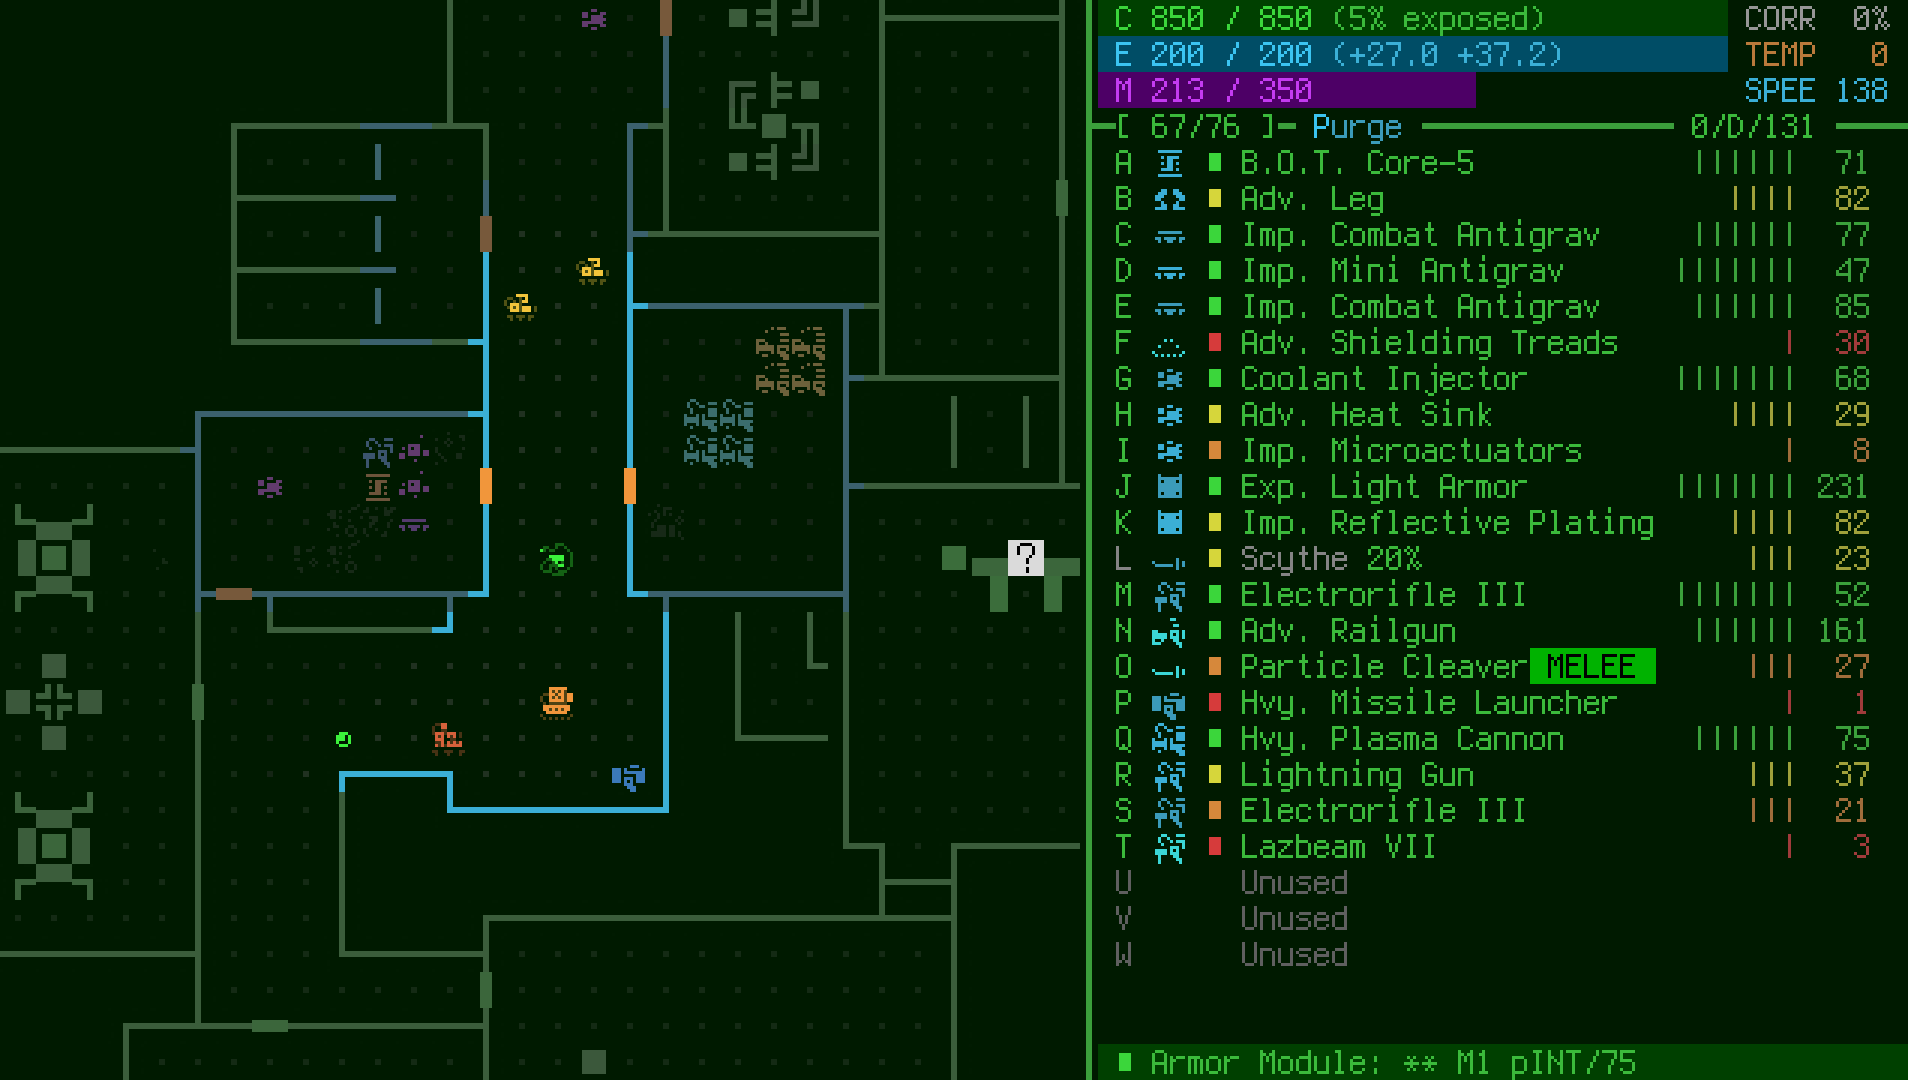
polybot7_7DRL_screenshot_tiles

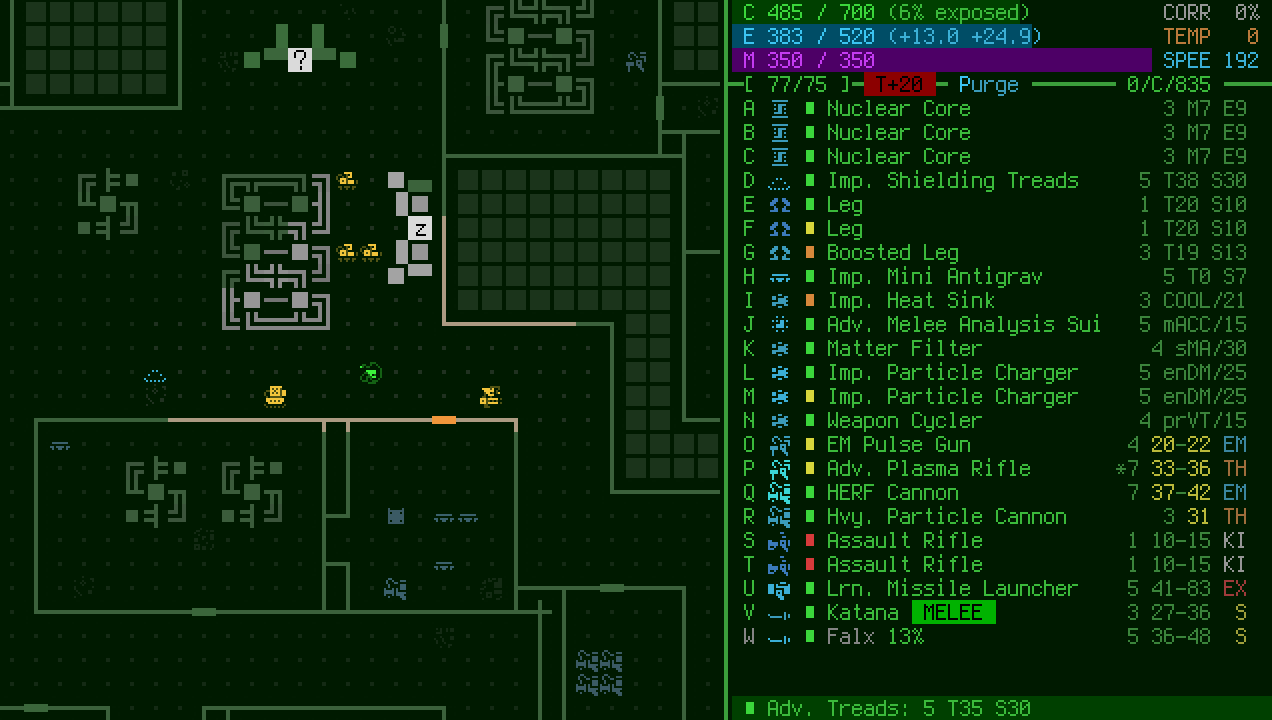
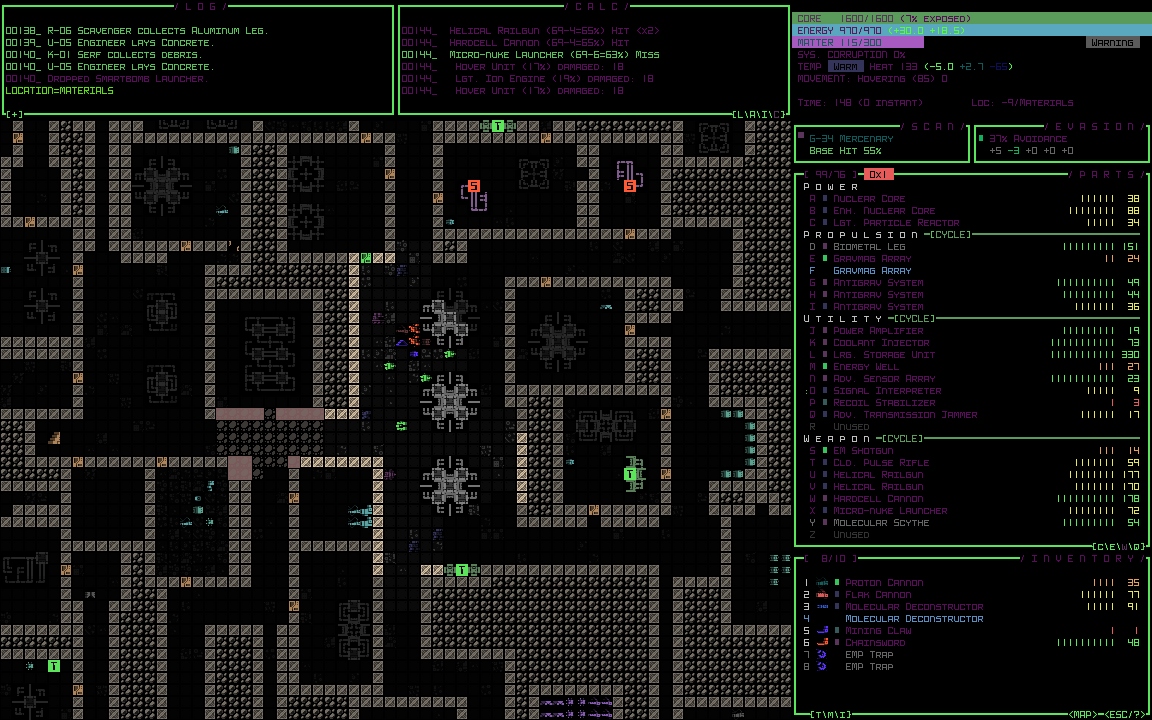
As you can tell in screenshots, the UI is also fairly different, condensed into a much smaller grid to allow for double-sized fonts. The visual style is also different overall, because it’s nice to make clear that POLYBOT-7 is a distinct game and to experiment with other looks! Walls are now line-based (even in the tiles version), and I used Cogmind’s new and improved render filter system to create the low-contrast aesthetic.

Design

Although probably not entirely necessary after a rundown like that, I want to emphasize that POLYBOT-7 is definitely not a true Cogmind demo. It does, however, showcase a lot of the same particle effects and SFX, as well as UI features and general style.

Features that were inherited from Cogmind:

  • Combat mechanics
  • Numerous items and their effects
  • Soundscape/SFX
  • Map generation (same algorithms with different parameters)
  • Some convenient UI features, wherever I could keep or redesign them since they add significant QoL
  • Many of the same customization options are still available, but because I removed the options menu (no time for that!) you have to make changes direct to the config files. Certainly not all of them are applicable anymore, but a lot are.

polybot7_7DRL_parts_manipulation

Still, for a long while Cogmind has been on rails with such a long semi-predetermined TODO list that just executing it is only half the fun of development, whereas hacking away at a 7DRL was a really refreshing opportunity to work with new concepts and a much cleaner slate. Naturally I got really excited at this chance to experiment with mechanics and create a new experience in an otherwise seemingly familiar world--in that way it’s kinda like one of the Cogmind Challenge Modes on steroids. In fact, the idea that ultimately won out as The Core Mechanic for POLYBOT-7 came precisely from a planned Challenge Mode, the idea of attracting parts which automatically attach to you and cannot be removed as normal.

Everything else was designed around that.

Early on it became apparent that simply shooting stuff and attaching nearby parts automatically, maybe while toggling them to optimize the build as necessary, wasn’t quite enough of a fun challenge. There were too few player choices involved, so to keep it interesting I added a heavy emphasis on a redesigned version of Cogmind’s “go naked” command, the one that strips you of all your parts in a single action. (It became so important that its hotkey went from Shift-Alt-p to just ‘p’ :)) But in the case of POLYBOT-7, a so-called “Purge” destroys only half your parts, scattering the other half on the ground around you. This means it’s kind of like a randomized “shuffle” for your build, allowing you to regain some parts while making room for others you’ve come across, or simply trying to rid yourself of too many broken parts or a highly imbalanced build to start fresh.

The Purge system requires 100 turns to charge before it can be used again, however, making it vital to do this at only the best opportunities, while also preventing players from gaming the system to repeatedly purge and quickly destroy specific parts.

In terms of balance, while the player will have easy access to spare parts by strolling through the remains of any given battle, these parts are often garbage and not that suited to fighting hordes of enemy robots. On the other hand, there are caches of nice parts to be found… When and where to Purge will be key to survival!

Of course there are plenty of other features that didn’t survive the chopping block, but such are 7DRLs! Maybe one day? :)

Interlude

Earlier I said blood, sweat, and ASCII, but while there is definitely a full-ASCII mode, POLYBOT-7 defaults to tiles created by the wonderful Kacper Woźniak. He really knows how to maximize the potential of those few pixels I give him :P. So while I was coding up a storm, Kacper was pixeling our new robots and items (when not at work fretting for lack of time :P). Thanks for the help, man!

polybot7_tile_sample

Impetus

I would’ve preferred doing something completely different for what is only my second 7DRL (POLYBOT-7 is pretty radical, though not as radical as say something built from scratch :P), but there are a lot of reasons I ended up choosing this particular game:

  • First and foremost, this is something I can point people to when they like the theme or basic idea of Cogmind but don’t have a large enough display to enjoy it on. For them I wanted to test how much of the main UI I could cram into only half the space, while also adjusting the content to suit a smaller map area. In fact, the original code name I used in my first design docs was “Bigmind” :P. In the earliest design iterations it was going to be just a stripped-down version of Cogmind, but I felt that wasn’t worthy of a 7DRL--it really needed to be something even more unique, so as those changes made their way into the design I later decided the name shouldn’t be that close to its progenitor, either.
  • That first reason also made it easier to justify taking the required time out of my work on Cogmind (technically my job now!) to join 7DRL. I know POLYBOT-7 is something that existing Cogmind fans can enjoy as well, win-win!
  • POLYBOT-7 allowed me to explore a bit of what Cogmind would be like if I had gone the other route back in 2012: no slot types. Design-wise I’ve been very glad I did go the type-restricted route, but it’ll be interesting to see what comes of completely free-form builds, even if there isn’t as much control over them.
  • I really like the idea of using 7DRL to force completion of quick and focused prototypes, exploring game ideas that might be extendable or polishable into something better later on. I’ve been thinking about that especially often as we get into late Cogmind dev, since I may need a quicker commerical project or two to be able to reliably fund future development.

Download

This year’s 7DRL is the first to be hosted at itch.io, so rather than providing the download myself, you’ll find it over there, along with additional information. If I end up providing future updates, they’ll also be made available there. Here on the blog I’ll also be writing a portmortem covering at least some of the design and technical processes that went into creating POLYBOT-7. I certainly didn’t have enough time to share much of anything during the week!

polybot7_7DRL_various_combat

Oh, and it probably goes without saying there is an ASCII version ;) (F3!)

polybot7_7DRL_screenshot_ascii

Have fun :D

Update 180329: I’ve published a four-part postmortem about this 7DRL’s development process and many of the design decisions made along the way, starting here.

Posted in Release | Tagged , , , , | 17 Responses

Color Customization

I’ve always enjoyed adding accessibility features, hence Cogmind’s sizeable options menu and even more extensive config files. Not everyone will have the same habits or abilities, or play a game in the same way, so where possible it’s nice to be able to accommodate different needs. Although I’ve talked a fair bit about fonts before (still more to come on that front!) and four years back also wrote about some of my ideas on potential adjustments related to color blindness, it’s about time for a generalized set of color customization features.

As the player base has grown a fair bit over the past few months, I’ve received a few requests for ways to tweak the brightness and/or saturation, so that was the trigger for finally implementing a display filtering system.

Essentials

Many games come with a simple “gamma” adjustment option, so that’s where I started. Easy enough:

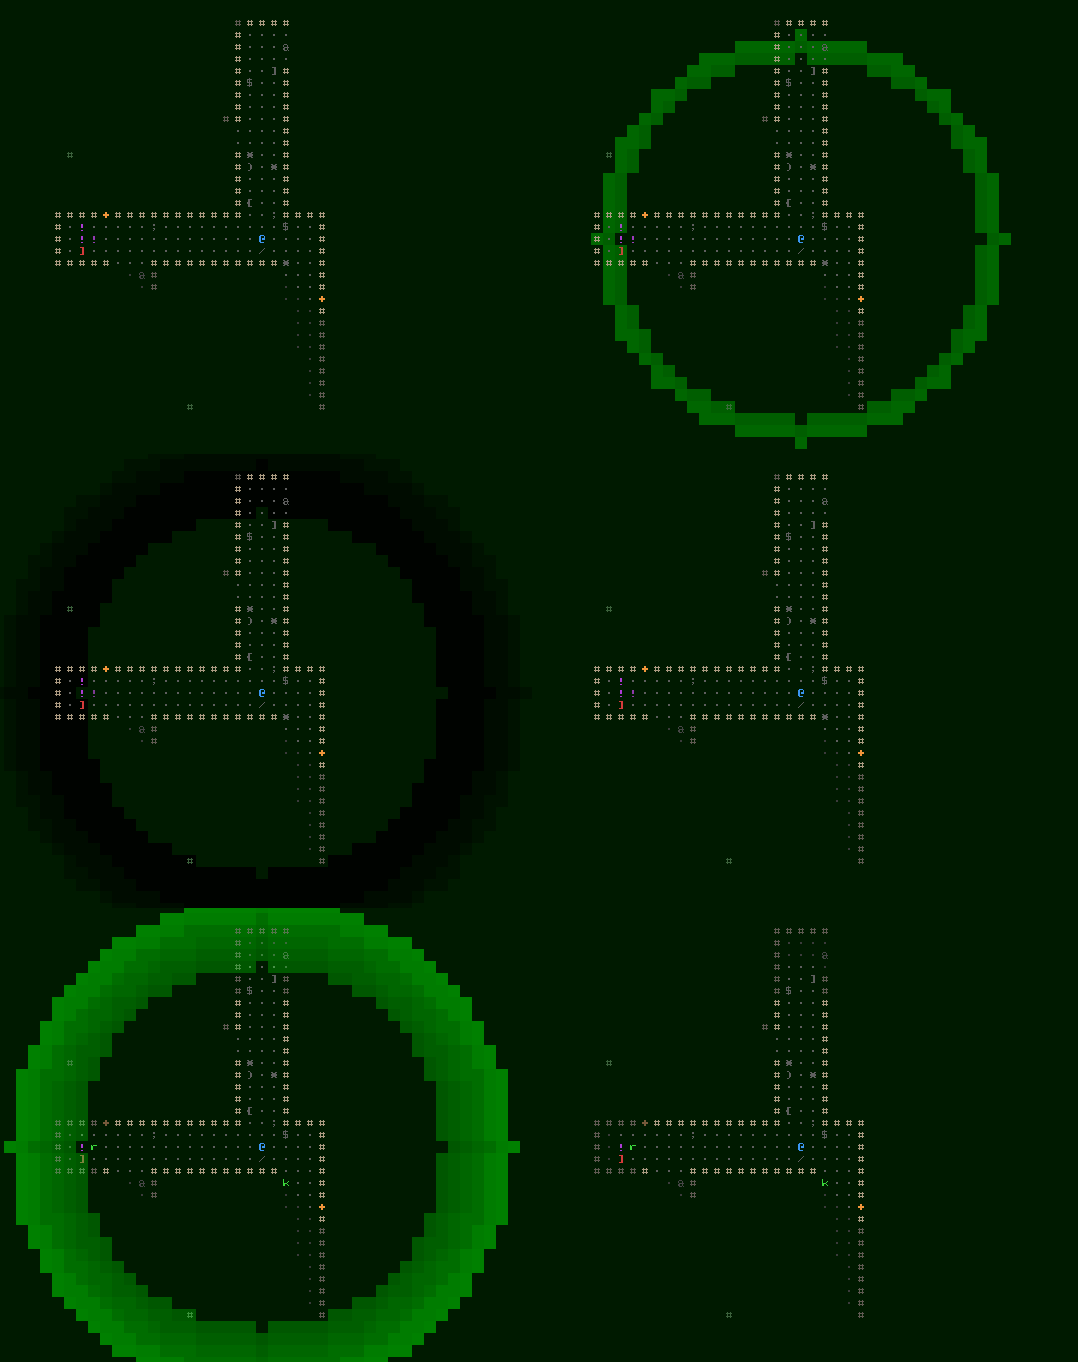
cogmind_color_filter_brightness_66_tiles_comparison

Comparing the default appearance to a 66% brightness setting.

While it’s true perceived color brightness is non-linear, adding in more complex calculations to compensate would slow the filter down so I implemented it as a direct percentage modifier, just [RGB * (0.0~1.0)].

Note that for comparison purposes the majority of screenshots in this article use the same scene, and all can be clicked to open at full size.

Some players may also want to drop the saturation to take the edge off the eye-burning terminal contrast :P

cogmind_color_filter_saturation_66_tiles_comparison

Comparing the default fully saturated appearance to 66% saturation.

Since I store colors using RGB and it’d be slow to convert everything to HSV simply to adjust the saturation then convert back again, I found an alternative formula for direct RGB saturation adjustment that seems to work nicely.

Filter Settings

So how are these options made available, and how to create a system that will support additional filters? For now I opted to make it a string in the advanced.cfg file. For example the line “renderFilter=BRIGHTNESS(90)|SATURATION(90)” adds two filters, a first which drops the brightness by 10%, followed by a second that then desaturates all colors by 10%.

There are currently eight different filter types, and the code converts this string into a set of filters that the engine renderer applies in separate passes over the terminal grid colors, both foreground and background. They’re applied to every cell individually, so this isn’t some GPU-optimized image modification, just an operation repeated for each cell, meaning each filter pass on the standard-dimension UI costs an additional 12,720 operations xD. Yeah there are better ways used by more competent programmers to achieve effects like this, but it works well with my current engine setup :)

At most the minority of players who will use filters seriously will probably only need one or two anyway.

Getting Wild

Having taken care of basic needs, there are of course even more frequently requested adjustments like the ability to outright change terminal colors.

Traditional terminal players are used to being able to fairly easily customize the appearance of a roguelike, including the color palette, but they also only have worry about maybe just 16 colors. Unfortunately there is a huge range of colors in Cogmind so it would be a lot more work to implement a way to customize individual details, but for now I’ve at least added a very simple method with a broad effect: hue shifting. It can lead to some crazy schemes, but there are reportedly a number of people out there interested in something like this.

cogmind_color_filter_hue_shift_180_pink

Cogmind appearance with all hue values rotated by 180 to become… Pinkmind! (example #2: 90-shift Bluemind)

Colors have been carefully chosen in Cogmind, designed to make the meanings and implications of certain pieces of information that much easier to intuit, and obviously shifting the hue will ruin a lot of that. Some things which were obvious may not be so obvious anymore, and on the flip side unimportant elements may be overemphasized. In any case, doesn’t hurt to have this as an extra option for whatever reason!

With a system in place it’s also not hard to add new filters.

I mean we can even get crazier than hue shifting and go as far as RGB shifting! Check out the color chaos that results from a +90 shift:

cogmind_color_filter_rgb_shift_90_purple_green

Shifting all RGB values by 90. No.

Are your eyes ready yet? Let’s continue with more serious filter efforts…

Low-Contrast and More

One of my goals with this system was to enable low-contrast settings that don’t overly impact the general color design, and rather than darkening and/or desturating everything, a better approach is to start by not using a pitch black background. This required some actual changes to the source code beyond a basic filter, since for the past five years of development I’ve assumed the background is black, but the necessary adjustments weren’t too difficult and for the most part now work via a global switch.

The idea is to choose some other dark-yet-not-black color. To avoid wasting too much time here, I used Photoshop layers to tweak a game screenshot until it was low-contrast but highly readable, then made sure the system I had was capable of replicating that process step-for-step. As usual, it’s good to have a target to work towards when designing something like this. (For the same reason I always do UI layout mockups in REXPaint first.)

cogmind_photoshop_low_contrast_curves

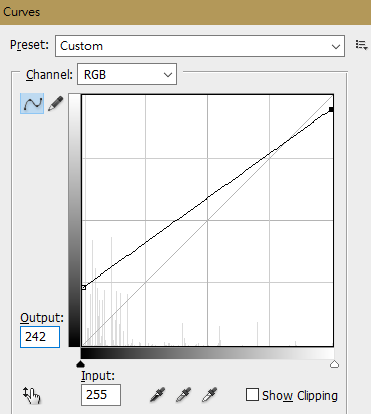
Step 2 for creating Cogmind’s low-contrast mode: Raising the overall brightness, especially for darker colors.

In all there were more steps but I compressed it down to just two:

  1. Swap out the black background with the chosen new color.
  2. Adjust the brightness of all foreground colors using a formula derived from the PS testing above: y = 0.7176x + 59. This raises the brightness of most darker colors so they stand out just enough against the new background, but takes the edge off any really bright ones.

For reasons specific to Cogmind’s color design I did make a couple exceptions--the second step is skipped for any instances where the foreground color is itself black (this is rare but I use it for occasional reverse cell coloring--black characters imprinted over a solid color), or was intentionally set to match the background color (I sometimes do this to temporarily hide the foreground).

So what background colors did I pick as defaults? I started of course with my dark maroon background from the IDE color scheme I designed from scratch and have been using for the past 10 years or so :P

cogmind_source_chack_text_sample

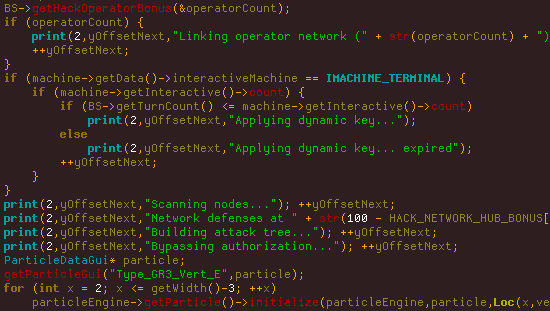
Some Cogmind source as seen in my IDE, the inspiration for the first low-contrast mode.

Like my IDE scheme, this particular filter is called “Autumn.”

cogmind_color_filter_autumn_low_contrast

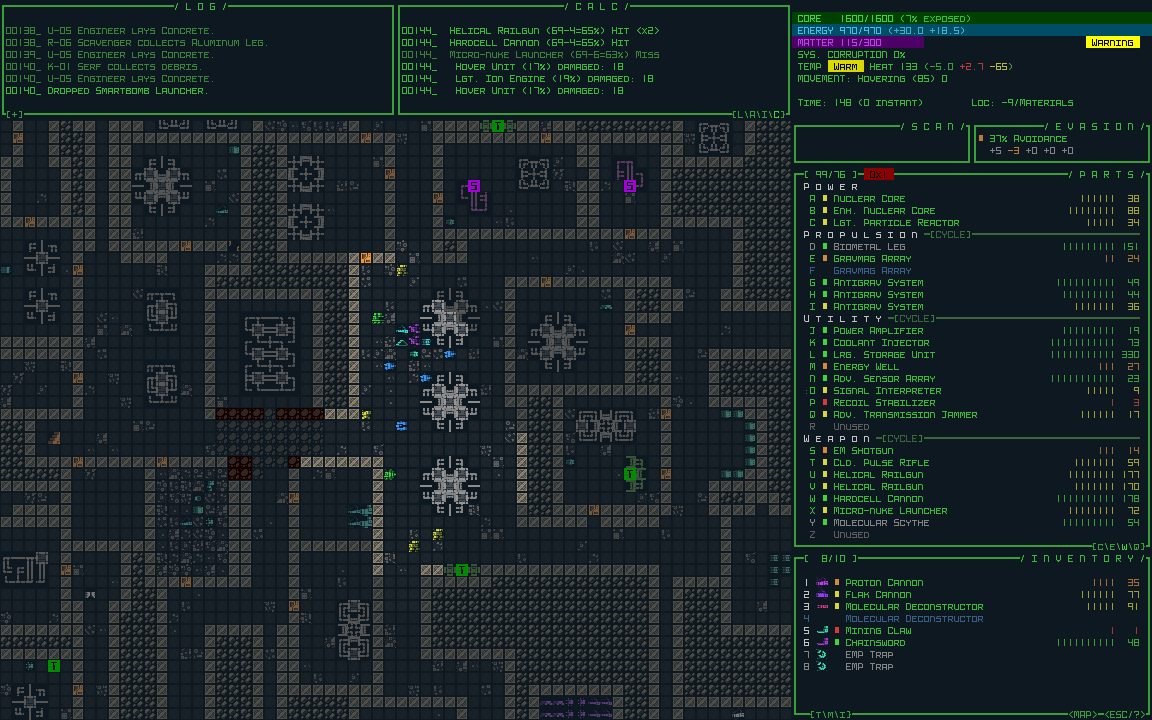
Interacting with various Cogmind UI features in Autumn low-contrast mode.

In fact, aside from being my IDE scheme Autumn is also a REXPaint skin, and Cogmind’s other new low-contrast mode borrows REXPaint’s default skin as well: “Sleepy.”

cogmind_color_filter_sleepy_low_contrast

Cogmind low-contrast mode “Sleepy.”

These modes still aren’t quite perfect due to the aforementioned universal assumption of black, though I did specifically update some of the particle scripts to be compatible with this new filter. The few features which might not always look great under this mode are some of the ASCII item art and intro/ending animations, but this only affects the small minority of areas that use their own dark background colors.

If more people start using low-contrast settings I might go back and invest more time in overcoming some of the remaining aesthetic challenges.

Although I implemented two named low-contrast filters, these are merely for convenience--under the hood they’re implemented through a more general filter: LOW_CONTRAST(R,G,B). This means you can create your own low-contrast scheme using your favorite color, or whatever you think works, I just thought I’d provide defaults for some tried and true colors :)

Map-only Adjustments

Earlier I mentioned this setting is called “renderFilter,” but there is a second one as well: “renderFilterMap.” All filters set there apply only to the map, rather than the entire application including HUD and other UI elements. It’s compatible with the same filters except low-contrast, as the latter must be applied across the entire application and cannot be limited to the map area since it’s handled on the engine side (as opposed to the game side).

One of the interesting filters more suitable for the map area rather than the UI: SWAP. This filter swaps the foreground and background color of every cell to create an even more colorful “dark on light” style rather than the usual “light on dark” terminal look.

cogmind_color_filter_swap_map_only

The results of a renderFilterMap=SWAP, with no other changes to the appearance.

I don’t think this is as good from a parseability standpoint since it somewhat separates color from the character it’s associated with, but maybe it could fun to play around with, plus some players can get used to or even enjoy anything :)

cogmind_color_filter_swap_map_action

Destructive ASCII action in Swap mode

Notice that these are ASCII examples, because although it’s monochrome the default tileset uses multiple shades, and the whole look is not very compatible with this kind of swapping.

cogmind_color_filter_swap_map_only_tiles

Yeah I don’t think so.

So if you’re interested in trying out this mode I hope you like ASCII, otherwise we’ll have to wait for someone to draw a non-shade monochrome tileset that focuses mostly on solid shapes and symbols. I’m sure we’ll see something like that eventually. It could look pretty cool (and of course also work in the default/non-swapped mode as well, so the idea is that we’ll get that one first then it can be simply swapped over).

Good news is the Swap filter is both compatible with and looks even better when combined with low-contrast mode!

cogmind_color_filter_swap_map_only_plus_low_contrast

Cogmind ASCII map with both a Swap filter and Low-contrast Autumn filter enabled.

All these customization features are explained a bit more in a new “Color Customization” section of the manual included with the next release (Beta 5).

Specifically with regard to color blindness, I haven’t gotten any real feedback from players who need more options in this regard, though from the start I’ve tried to design the UI such that as much info as possible is conveyed through multiple channels, color only being one of them, so maybe there isn’t much demand for additional features there. I could add new filters if necessary, and although individual color swapping would be problematic (primarily because any dynamic colors are scripted and therefore calculated via formulas), perhaps there are some formulas that could be made available as filters to adjust the final color palette that way.

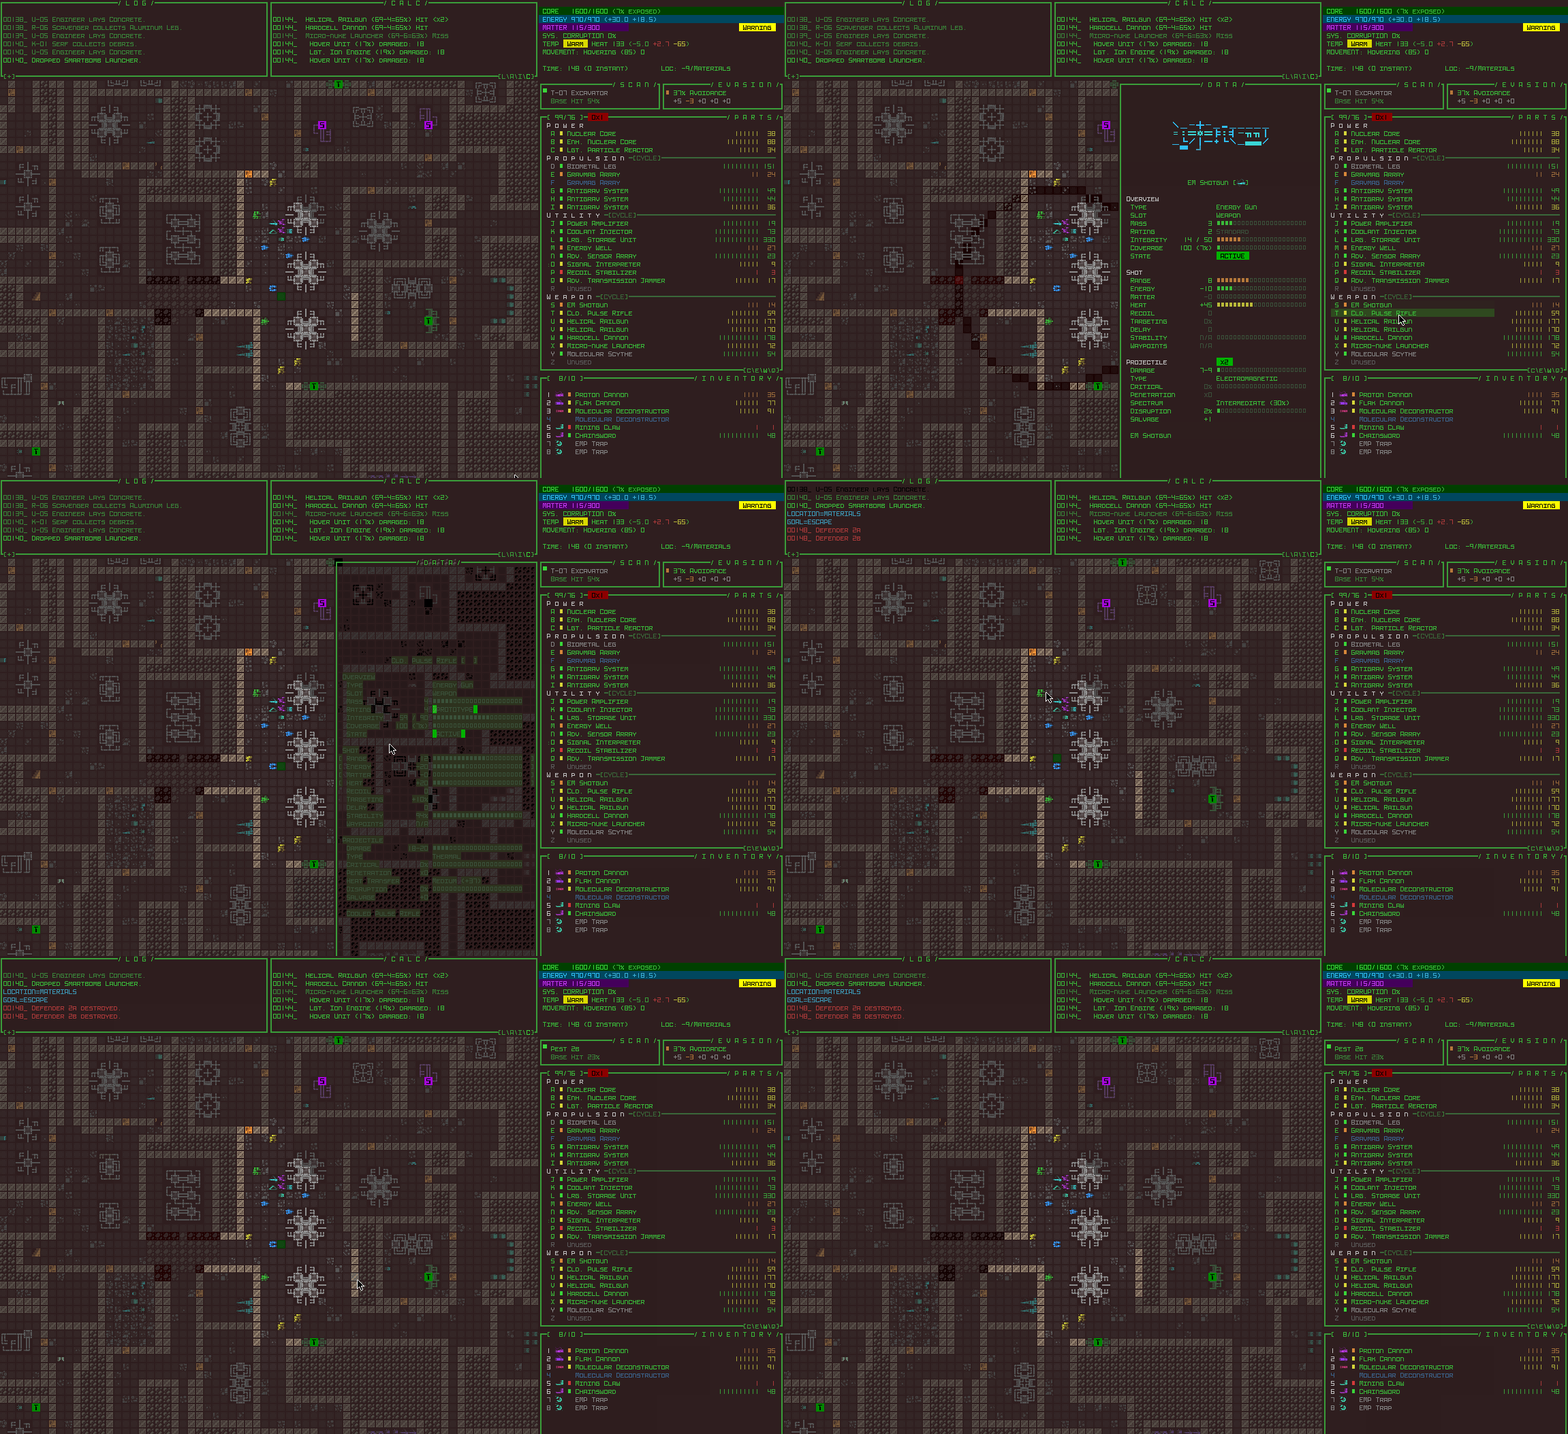
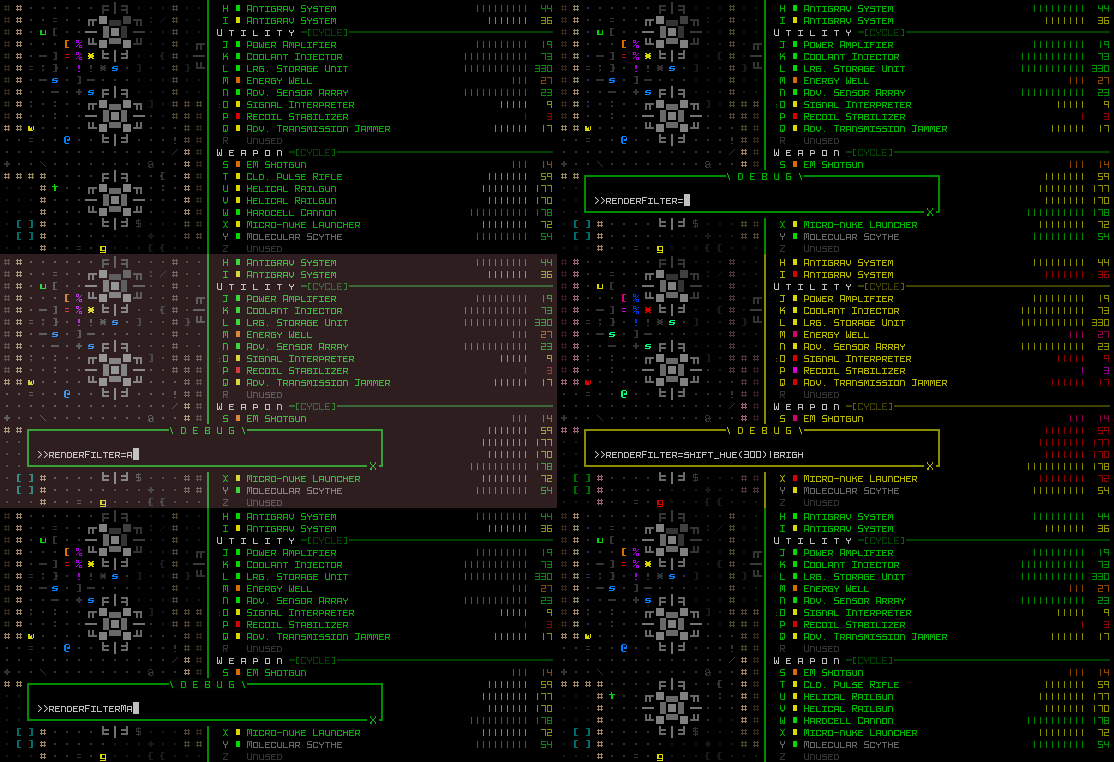
cogmind_color_filter_parser_debug_testing

Bonus GIF: Cycling through various display adjustments in real-time after hooking up the color filter parser to the debug system :D

Update: Based on feedback from players, Cogmind has also since added a colorblind mode accessible directly from the Options menu!

Posted in Design | Tagged , , , , , | 2 Responses