Balance is one of the most important determining factors behind the “fun” of a game. Games that are balanced just right tend to create situations that keep you on your toes and allow you to barely scrape by, while also ensuring that you don’t feel outnumbered and helpless (or completely unstoppable) every step of the way.
Imbalanced games on the other hand are rarely fun, except maybe for those players who enjoy frustration (and in the case of those few games which are designed with the intention to create imbalances, but they’re beyond the scope of this post).
Being so important, balance should naturally be considered in every part of a game’s design from mechanics (ex: are ranged and melee combat equally viable?) to data (are these tools effective enough to overcome the challenges that appear in this part of the game) to even overall experience (is the game an endless string of tiring encounters without giving the player time to rest their mind/fingers?). Most of the mechanics in Cogmind are known to work well, having survived plenty of playtesting at the 7DRL stage. Now we’re moving on to content.
As mentioned before, items (parts) are at the heart of Cogmind’s gameplay, so that’s where balance deserves the most initial attention. It’s also therefore the first part of the game content which is being shaped.
Balancing any game (though even more so deep games) is very much an iterative process. There are so many moving parts that even a “final” data set will be tweaked based on how later developments affect gameplay and according to unforeseen emergent results discovered only through extensive playtesting.
Here I’ll lay out the general steps taken to get Cogmind where it is today.
From End to Beginning, and Back Again
I like to begin by defining ranges of data that will shape the final player experience. So first we have to determine what that experience should be. How many encounters should a player have in a given area? How long should a single battle last? How many average opponents should the player be able to confront without too much trouble? How many should be necessary to challenge the player? Defining, and then answering, these questions is the crux of what I like to call “teleological game design.”
With specific answers in mind we can start to play with numbers that will achieve our goals. The use of data “ranges” is important since it allows us to examine what happens at both extremes: Initially we only care what happens in the low-level early game and high-level late game--once those are working we can easily extrapolate the progression in between. Working with min/max values enables us to more easily understand and contain the experience within those confines, to be sure it will meet the goals we set earlier.
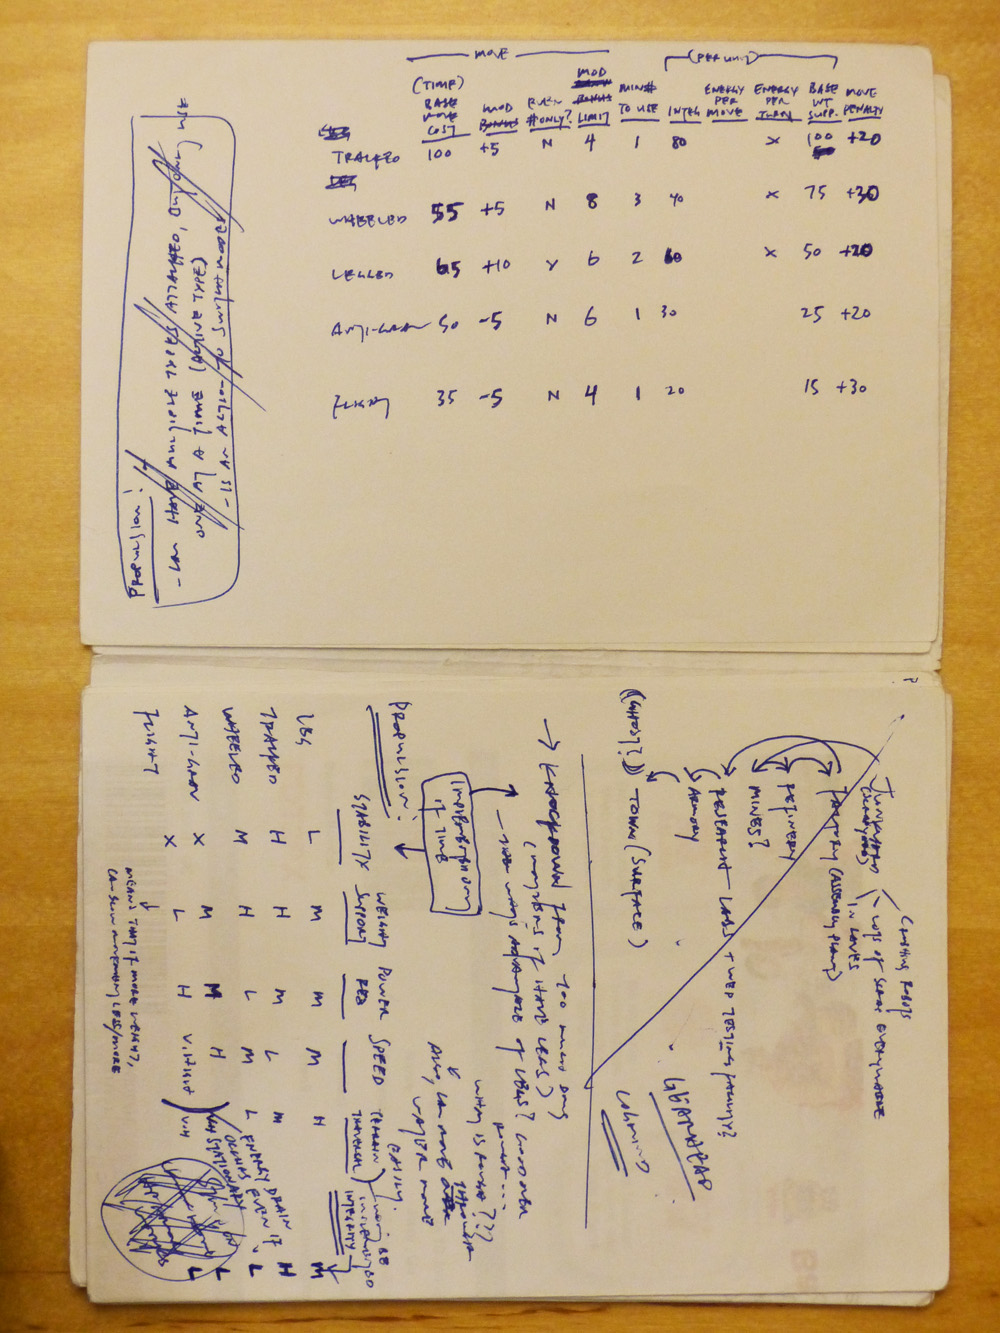
To illustrate I’ve unearthed a relic of the 7DRL2012 era:
Okay, that’s not the best illustration of my point here, but I only have a few pages of those notes left and thought it’d be fun to share them ;)
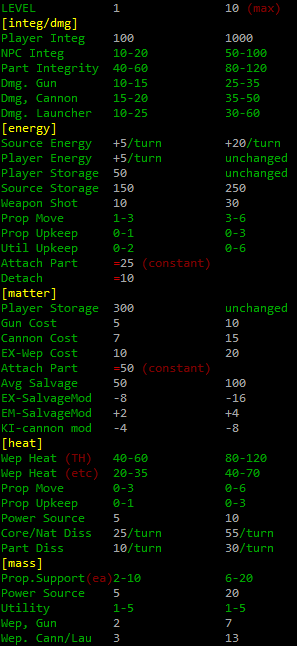
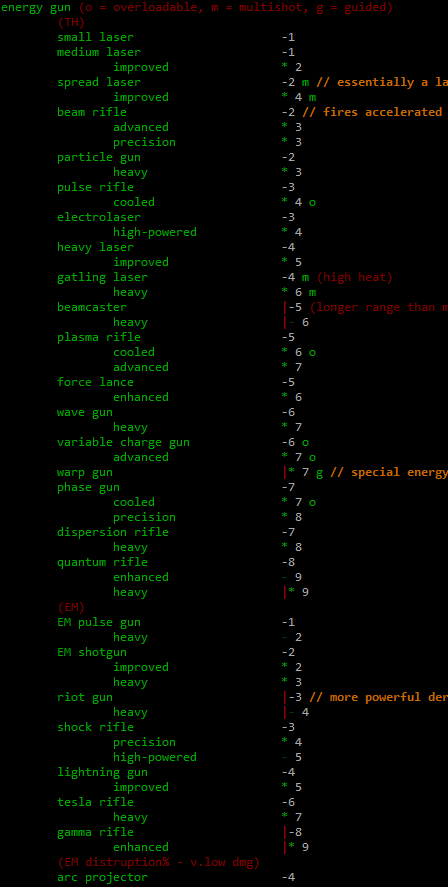
Those notes are actually making horizontal comparisons of propulsion types to ensure each is viable in some way, further informing the next step: The real data ranges used to create the original 7DRL data can be seen below in digital form.
A slightly modified form of this list exists for the new Cogmind, but most of what you see there still holds true. So where did the numbers come from? Me answering the original questions, then trying out a few key reference numbers and extrapolating the rest to reach the goals.
Professional game designers use spreadsheets for this kind of thing, but I wasn’t going to spend my precious 7DRL time fooling with anything but source code, so I relied on simple brain-powered calculations.
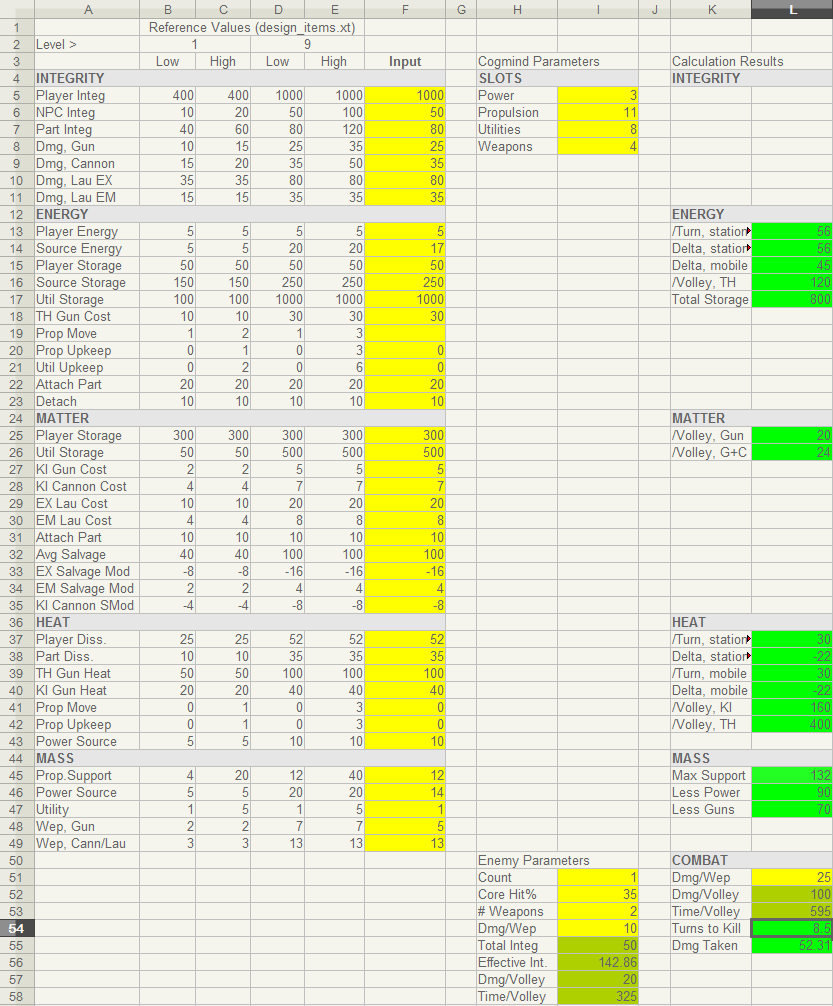
That said, with more time I have since gone back and created a spreadsheet tool that enables me to quickly see how certain data changes affect the answers to my questions.
Yellow fields are input, dirty yellow fields contain “stepwise” calculations, and green fields show the output. I played around with it for a bit, but haven’t yet had a strong need for it since the new data set is heavily based on the old one, which as stated went through lots of playtesting already. The spreadsheet is very much incomplete at the moment, since at the time I was only really looking to get “no. turns to kill” calculations for enemies given certain Cogmind loadouts. I will probably revisit it later when working on enemy robot builds, but at that point the game itself will also be outputting calculations based on actual designs.
Balance is, in most cases, “measurable” if you can figure out the right equations, abstracting out as many non-essential variables as possible in the process. But as much as I seem to be preaching number crunching and spreadsheets here, I still prefer to go on gut feeling when I think I can get away with it ;)
The Real Thing
Armed with our data ranges, it’s time to move towards creating actual game data.
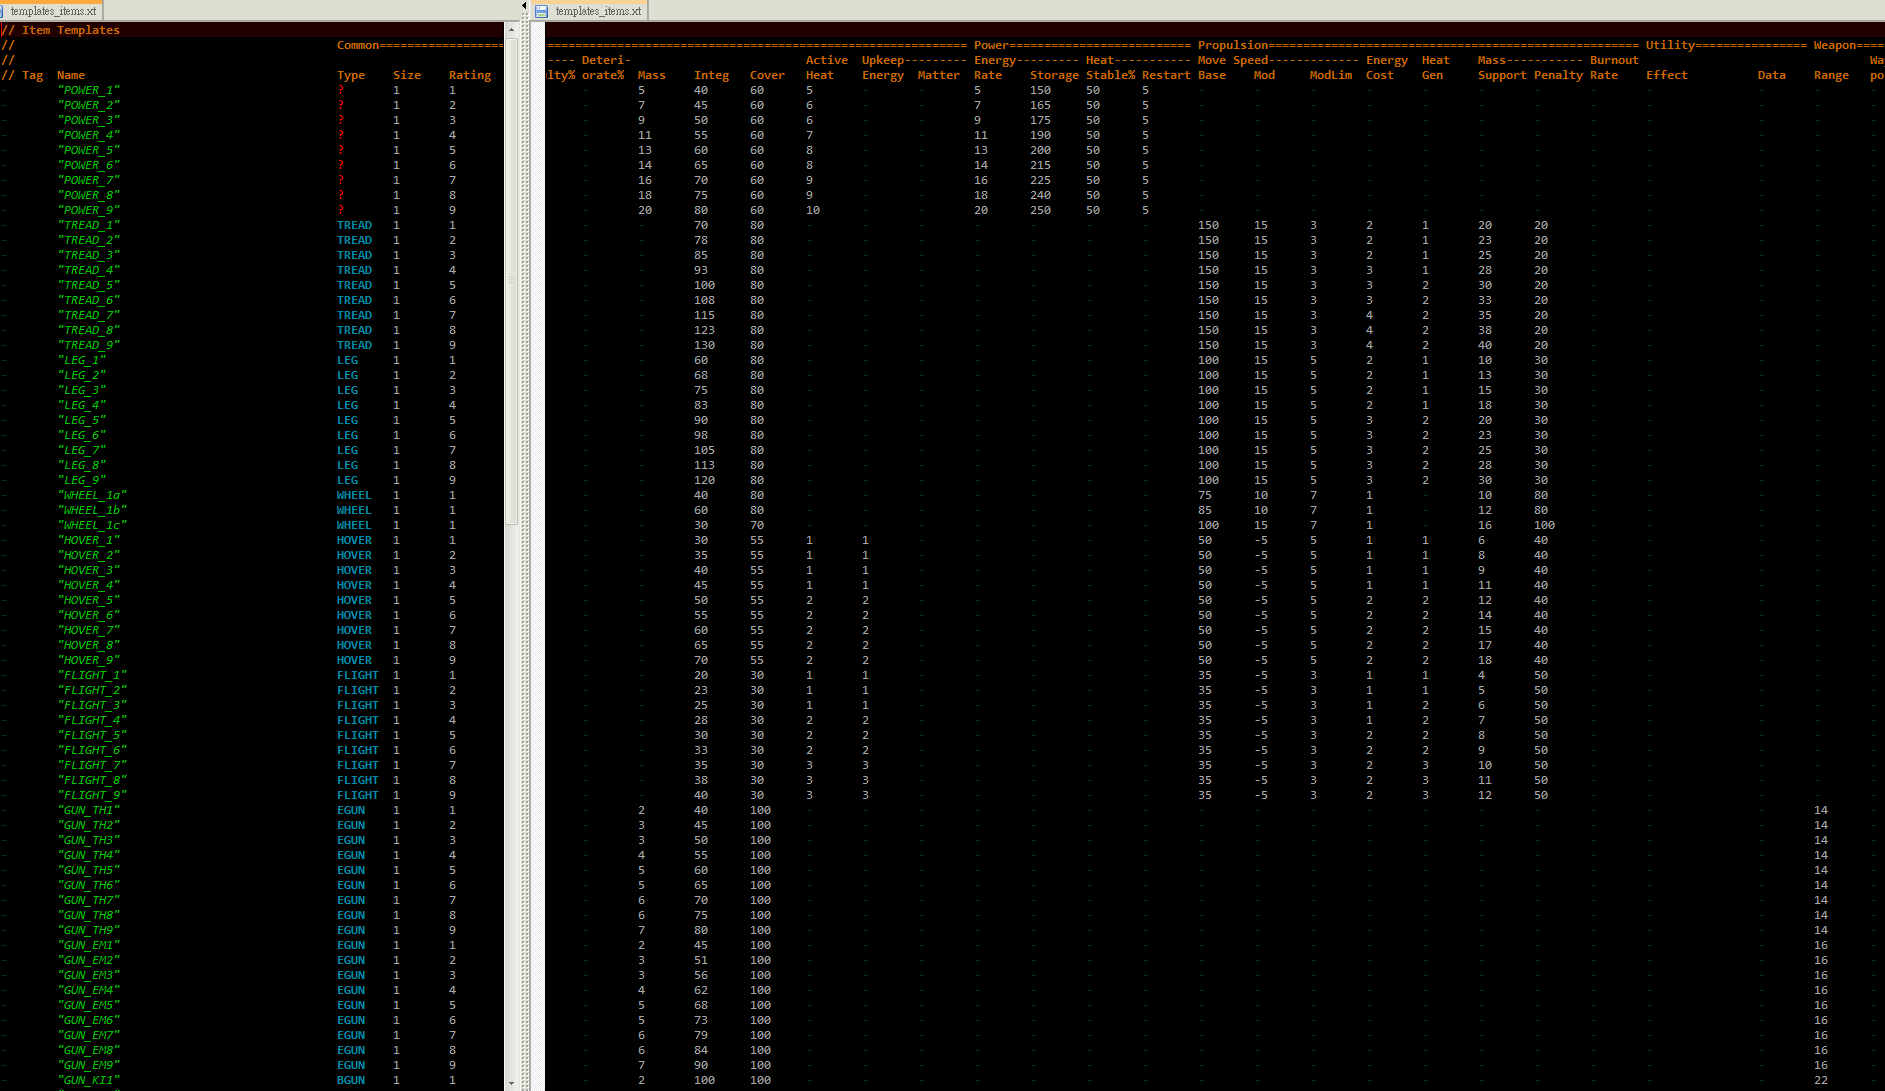
For this step I always rely on templates. The value ranges can be used to define a template for the lowest- and highest-level item of each type, and a table is formed extrapolating templates for all items in between. Cogmind uses a simple linear progression (over a rather short range, too, to ensure that older parts are often still viable later on).
These template values do not necessarily match any given item, but serve as reference points for the items-to-be, keeping us aware of where each item fits into the original goal scheme. Essentially we’re remaining as loyal to the data ranges as possible, since we know those should be balanced. The danger here is if the ranges were wrong in the first place, everything’s going to be wrong now, but if they were right, then there isn’t a whole lot of tweaking to do! Assuming our templates are correct, many individual template values can still be adjusted to make each item unique without undoing the overall balance.
Now we have a huge table of boring nameless templates. Time for some of those cool items we know we want.
I don’t just dive in and start applying templates here. In the case of Cogmind, it’s more important to first look at the overall distribution of item technology and make sure the progression fits each level thematically. All items originate from the simple but effective Master List.
The list indicates what level each item will be (i.e. what template to start with) and whether it’s considered a prototype (‘*’), among other things. It’s nice to have a separate list for this purpose since distribution is very important, and this is a way to clearly normalize that distribution without being distracted by all kinds of other data that defines items.
Finally we take that list and start creating items using the templates as reference points.
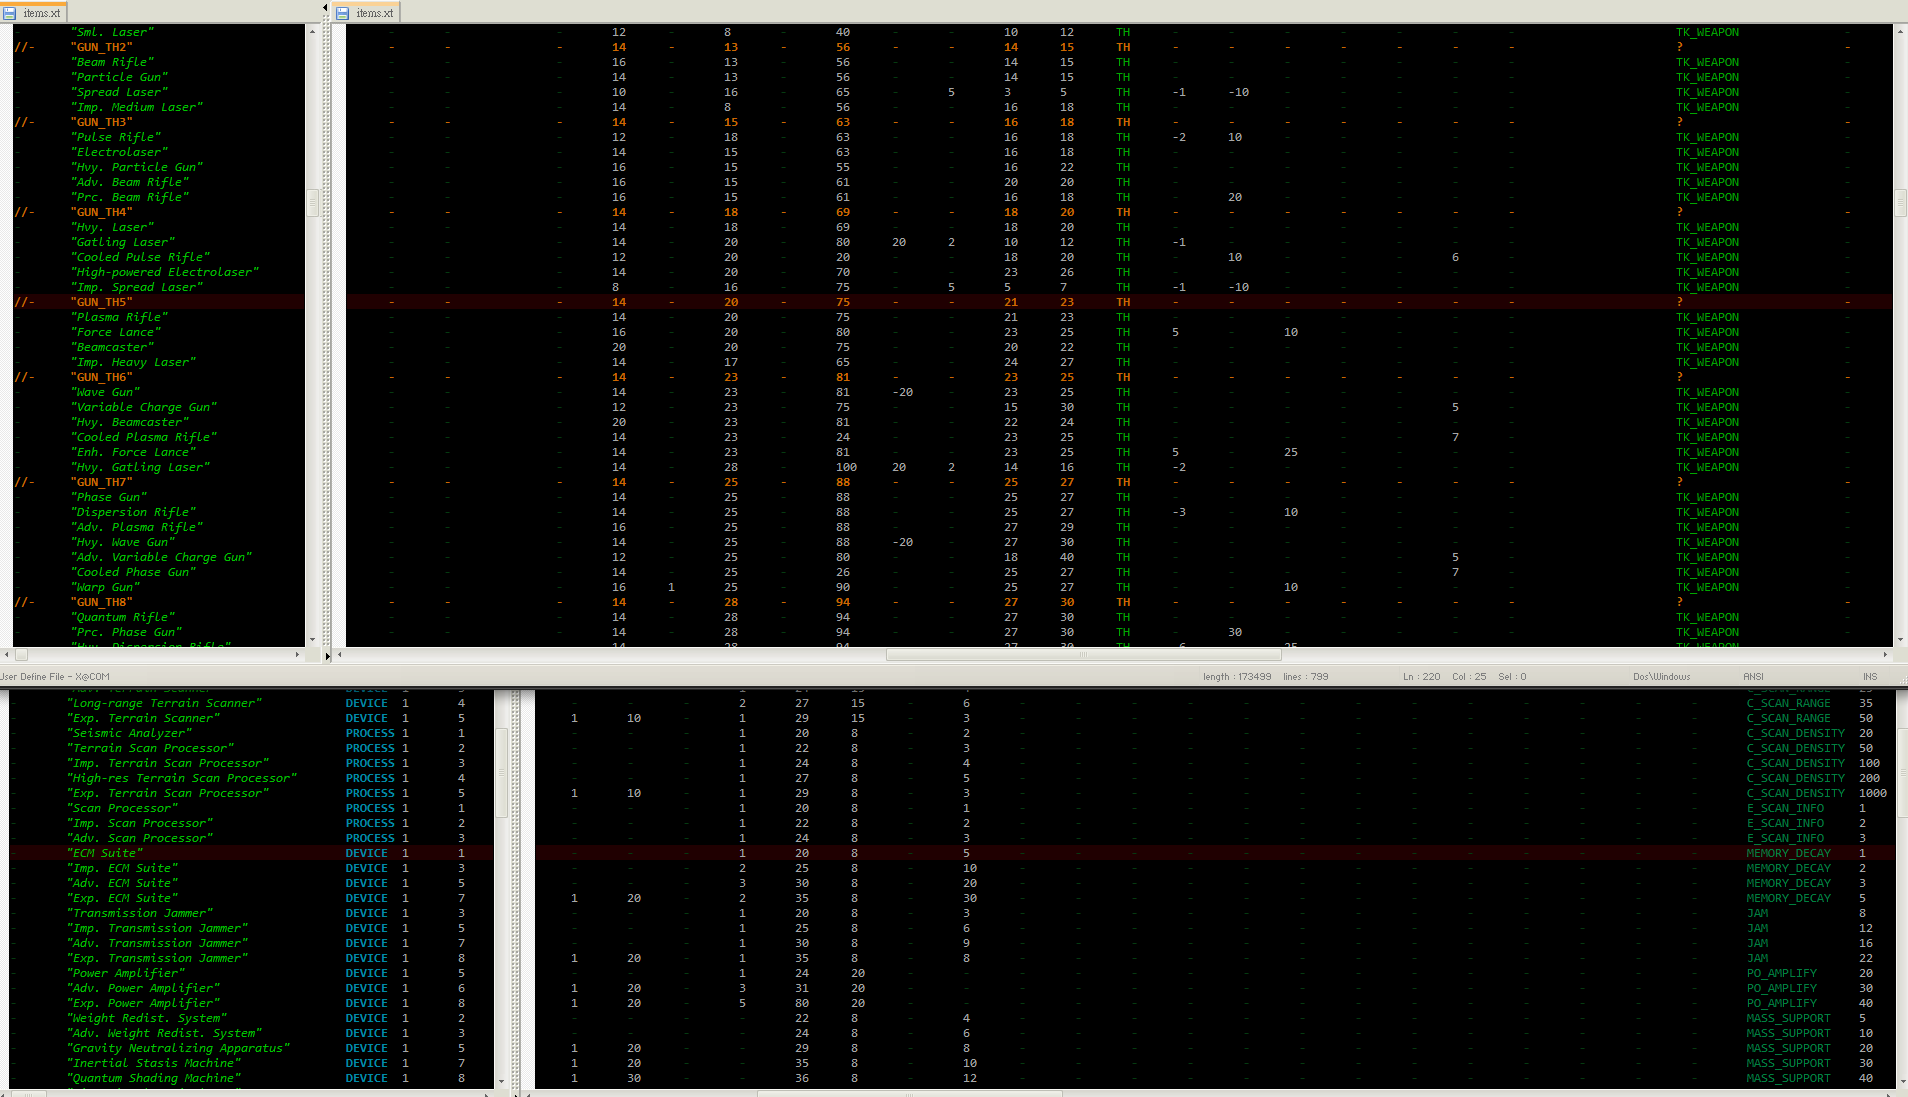
Item Data. At the top you can see some of the weapons from the Master List. Utilities, at bottom, don’t make use of regular templates since they are too unique.
I like to leave the original templates in the final list for reference, and they also do a good job of visually separating each level to make parsing much easier.
Now I’ve touted the advantages of a tab-delimited table format for game data before, but here’s an example of where it really shines. During the initial item creation process there are a lot of vertical comparisons going on. The ability to glance up and down a column to make sure the new item’s values are properly relative to those of same-type items, different-type items, items with the same special feature, etc. is invaluable. The cross-comparisons wouldn’t be as necessary if we stuck closely to the templates in every case, but that would also result in a pretty boring set of items.
So I just completed the data for about 600 base items that will appear in Cogmind. It was much easier following several days of extended play sessions, since with the game context fresh in mind I could always ask myself “Would I want to use this? Why or why not?” and tweak accordingly. (I should mention here for anyone who doesn’t know that I was able to play the game before doing this data set because 400 of the items already existed for the 7DRL--i.e. I’ve been through this process for Cogmind once before, but I’m doing it all over again to make sure it’s what I want.)
When it comes down to it, if while playing there are frequent difficult choices between multiple items as to which should be used immediately, which should be carried along for later, and which should be left behind for the recyclers, then I’ve succeeded. Of course the information to make that choice should ideally be available to the player--said “difficultly” comes from trade-offs. In Cogmind there are a lot of trade-offs. This is doubly so because you aren’t limited by “class” or “race.” You can literally equip and use every single item in the game, including anything your enemies use!
Now that item balance is done*, next up is all their particle effects, sfx, and art. Oh my.
*Haha, we all know that balance is never quite done.
Update 220311: If you’re interested in learning more about balance work, including plenty of charts and even videos, I have more recent coverage of my reviewing and updating of Cogmind’s balance after ten years of development.
